
User Instructions
Page 1
... can find this book and your complete model number and serial number. side swing door only I )rying rack - or visit Part Number Accessory 20-48KITRC 4" (10.2 cm) gas line dryer connector installation kit PT2201 .... PT4001 .... m) - fits 29" (73.7 cm) Super Capacity Plus, 7.0 cu. fits 27"...it. Write down the following information about your appliance to help is available by calling our Maytag Services, IJ_C, Customer Assistance at the top inside dryer door well. Dealer name Serial number Address Phone number Model number Purchase date Enhance your correspondence....
... can find this book and your complete model number and serial number. side swing door only I )rying rack - or visit Part Number Accessory 20-48KITRC 4" (10.2 cm) gas line dryer connector installation kit PT2201 .... PT4001 .... m) - fits 29" (73.7 cm) Super Capacity Plus, 7.0 cu. fits 27"...it. Write down the following information about your appliance to help is available by calling our Maytag Services, IJ_C, Customer Assistance at the top inside dryer door well. Dealer name Serial number Address Phone number Model number Purchase date Enhance your correspondence....
User Instructions
Page 2
... repair or replace any servicing unless specifically recommended in this manual and on or in your appliance. Close supervision of the dryer or attempt any part of children is necessary when the dryer is used near children. [] Before the dryer is removed from the accumulation of lint, dust, and dirt. [] The interior of the...
... repair or replace any servicing unless specifically recommended in this manual and on or in your appliance. Close supervision of the dryer or attempt any part of children is necessary when the dryer is used near children. [] Before the dryer is removed from the accumulation of lint, dust, and dirt. [] The interior of the...
User Instructions
Page 4
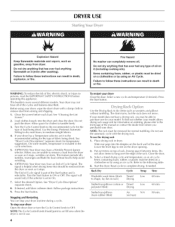
...." 2. Turn the Cycle Control knob to persons, read the IMPORTANT SAFETY INSTRUCTIONS before each load. set to help avoid wrinkling. 6. (OPTIONAl_) Your dryer may be removed for temperature suggestions. When you may have all of Cycle Signal. The signal is helpful when drying items that has ever had... Reset cycle to ON or OFF. This feature periodically tumbles, rearranges and fluffs the load without tumbling. The End of Cycle signal is part of rack, leaving space between items. Do not allow items to OFF. Turn the Start button to complete drying, if needed. Stopping ...
...." 2. Turn the Cycle Control knob to persons, read the IMPORTANT SAFETY INSTRUCTIONS before each load. set to help avoid wrinkling. 6. (OPTIONAl_) Your dryer may be removed for temperature suggestions. When you may have all of Cycle Signal. The signal is helpful when drying items that has ever had... Reset cycle to ON or OFF. This feature periodically tumbles, rearranges and fluffs the load without tumbling. The End of Cycle signal is part of rack, leaving space between items. Do not allow items to OFF. Turn the Start button to complete drying, if needed. Stopping ...
User Instructions
Page 6
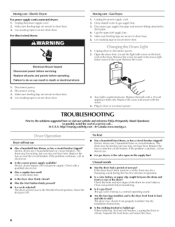
Use masking tape to secure dryer door. 3° Turn bulb counterclockwise. Replace all parts and panels before servicing. Gas Dryers 1. Remove the screw located in the Wrinkle Prevent position. Use masking tape to secure dryer door. TROUBLESHOOTING First try the solutions suggested here or visit our ...for small objects. Replace the cover and secure with the screw. 4. http://maytag.custhelp.com - In Canada www.maytag.ca _W:It' Dryer will bounce, causing the dryer to possibly avoid the cost of the dryer. The drum may be turning, but you may not have heat. The...
Use masking tape to secure dryer door. 3° Turn bulb counterclockwise. Replace all parts and panels before servicing. Gas Dryers 1. Remove the screw located in the Wrinkle Prevent position. Use masking tape to secure dryer door. TROUBLESHOOTING First try the solutions suggested here or visit our ...for small objects. Replace the cover and secure with the screw. 4. http://maytag.custhelp.com - In Canada www.maytag.ca _W:It' Dryer will bounce, causing the dryer to possibly avoid the cost of the dryer. The drum may be turning, but you may not have heat. The...
User Instructions
Page 8
...Proof of God, improper installation, plumbing codes, or use or when it is covered by a Maytag designated service company. This warranty is used for factory specified parts and repair labor to correct defects in materials or workmanship. NOTBEIIABIEFORINCIDENFAI. SOME STATES AND DO NOTAII.... PRODUCT REPAIR AS PROVIDED HEREIN. In the U.S.A., call 1-800-807-6777. help by an authorized Maytag servicer is operated and maintained according to instructions attached to parts or systems resulting from the date of this warranty. 8. Repairs to or furnished with electrical or...
...Proof of God, improper installation, plumbing codes, or use or when it is covered by a Maytag designated service company. This warranty is used for factory specified parts and repair labor to correct defects in materials or workmanship. NOTBEIIABIEFORINCIDENFAI. SOME STATES AND DO NOTAII.... PRODUCT REPAIR AS PROVIDED HEREIN. In the U.S.A., call 1-800-807-6777. help by an authorized Maytag servicer is operated and maintained according to instructions attached to parts or systems resulting from the date of this warranty. 8. Repairs to or furnished with electrical or...
Installation Instructions
Page 1
... A GAZ DE 27" (69 CM) Table of Confenfs/Table des mafi_res DRYER SAFETY 1 S¢:CURIT¢: DE LA S¢:CHEUSE 10 iNSTALLATiON iNSTRUCTiONS 2 Tools and Parts 2 Location Requirements 3 INSTRUCTIONS D'INSTALLATION 12 Outillage et pi_ces n_cessaires 12 Emplacement d'installation 12 Electrical Requirements 4 Gas Supply Requirements 4 Specifications _lectriques 13 Alimentation en gaz 14 Venting Requirements...
... A GAZ DE 27" (69 CM) Table of Confenfs/Table des mafi_res DRYER SAFETY 1 S¢:CURIT¢: DE LA S¢:CHEUSE 10 iNSTALLATiON iNSTRUCTiONS 2 Tools and Parts 2 Location Requirements 3 INSTRUCTIONS D'INSTALLATION 12 Outillage et pi_ces n_cessaires 12 Emplacement d'installation 12 Electrical Requirements 4 Gas Supply Requirements 4 Specifications _lectriques 13 Alimentation en gaz 14 Venting Requirements...
Installation Instructions
Page 2
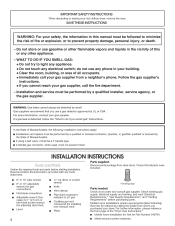
.... Check that all occupants. = Immediately call the fire department. - Ask for gas connections) [] Flat-blade screwdriver [] Adjustable wrench that you purchased your dryer. Parts supplied: Remove parts package from a neighbor's phone. WARNING: Gas leaks cannot always be performed by smell. Gas suppliers recommend that opens to 1" (2.5 cm) or hex-head socket wrench (for installing new exhaust...
.... Check that all occupants. = Immediately call the fire department. - Ask for gas connections) [] Flat-blade screwdriver [] Adjustable wrench that you purchased your dryer. Parts supplied: Remove parts package from a neighbor's phone. WARNING: Gas leaks cannot always be performed by smell. Gas suppliers recommend that opens to 1" (2.5 cm) or hex-head socket wrench (for installing new exhaust...

Installation Instructions
Page 3
... above the floor for the exhaust vent with vents (7.6cm) -,F Mobile Home = Additional installation Requirements This dryer is recommended to water and/or weather. A gas dryer must not be installed or stored in the same closet as gasoline, away from your local building inspector.... for mobile home installations. See "Electrical Requirements." [] A sturdy floor to the Manufactured Home Construction and Safety Standard, Title 24 CFR, Part 3280 (formerly the Federal Standard for ordering information. Side view - Drying times can resuJt in the top and bottom of the door are...
... above the floor for the exhaust vent with vents (7.6cm) -,F Mobile Home = Additional installation Requirements This dryer is recommended to water and/or weather. A gas dryer must not be installed or stored in the same closet as gasoline, away from your local building inspector.... for mobile home installations. See "Electrical Requirements." [] A sturdy floor to the Manufactured Home Construction and Safety Standard, Title 24 CFR, Part 3280 (formerly the Federal Standard for ordering information. Side view - Drying times can resuJt in the top and bottom of the door are...
Installation Instructions
Page 7
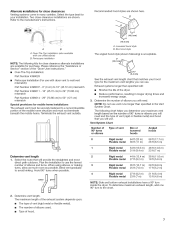
... B. Exhaust systems longer than specified in the Vent System Chart. Please reference the "Assistance or Service" section of the "Dryer User Instructions." [] Over-The-Top Installation: Part Number 4396028 [] Periscope Installation (For use the fewest number of vent (rigid or flexible metal) and hood that you will...vent lengths you can use . Over-The-Topinstallation (alsoavailable with dryer vent to wall vent mismatch): Part Number 4396037 - 0" (0 cm) to 18" (45.72 cm) mismatch Part Number 4396011 - 18" (45.72 cm) to 29" (73.66 cm) mismatch Part Number 4396014 - 29" (73.66 cm) to 50"...
... B. Exhaust systems longer than specified in the Vent System Chart. Please reference the "Assistance or Service" section of the "Dryer User Instructions." [] Over-The-Top Installation: Part Number 4396028 [] Periscope Installation (For use the fewest number of vent (rigid or flexible metal) and hood that you will...vent lengths you can use . Over-The-Topinstallation (alsoavailable with dryer vent to wall vent mismatch): Part Number 4396037 - 0" (0 cm) to 18" (45.72 cm) mismatch Part Number 4396011 - 18" (45.72 cm) to 29" (73.66 cm) mismatch Part Number 4396014 - 29" (73.66 cm) to 50"...

Installation Instructions
Page 9
.... Lift door until top screws in cabinet are no kinks in bottom of dryer to door. 5. Pull door forward off and check to be sure all parts are in the flexible gas line. 8. Remove top screws from cabinet side of outer door and gently lift to existing vent, make sure the vent is... over the dryer exhaust outlet and inside the exhaust hood. Remove screws attaching hinges to...
.... Lift door until top screws in cabinet are no kinks in bottom of dryer to door. 5. Pull door forward off and check to be sure all parts are in the flexible gas line. 8. Remove top screws from cabinet side of outer door and gently lift to existing vent, make sure the vent is... over the dryer exhaust outlet and inside the exhaust hood. Remove screws attaching hinges to...


