Use and Care Guide
Page 3
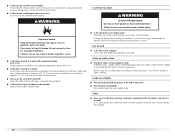
... symbol and either the word "DANGER" or "WARNING." Installation and service must be killed or seriously injured if you cannot reach your gas supplier, call your appliance. All safety messages will follow instructions. Always read and obey all occupants. • Immediately call the fire ...what can be performed by a qualified installer, service agency, or the gas supplier. 3 do not use gasoline or other appliance. - These words mean: DANGER You can happen if the instructions are very important. DRYER SAFETY Your safety and the safety of others . WARNING: For your ...
... symbol and either the word "DANGER" or "WARNING." Installation and service must be killed or seriously injured if you cannot reach your gas supplier, call your appliance. All safety messages will follow instructions. Always read and obey all occupants. • Immediately call the fire ...what can be performed by a qualified installer, service agency, or the gas supplier. 3 do not use gasoline or other appliance. - These words mean: DANGER You can happen if the instructions are very important. DRYER SAFETY Your safety and the safety of others . WARNING: For your ...
Use and Care Guide
Page 4
...to cooking oils in the dryer. Close supervision of children is necessary when the dryer is moving. ■ Do not install or store the dryer where it shall be a T-handle type. ■ A flexible gas connector, when used near children. ■ Before the dryer is removed from the ...lint, dust, and dirt. ■ The interior of the dryer and exhaust vent should be cleaned periodically by qualified service personnel. ■ See installation instructions for grounding requirements. SAVE THESE INSTRUCTIONS IMPORTANT: The gas installation must conform with local codes, or in the absence of...
...to cooking oils in the dryer. Close supervision of children is necessary when the dryer is moving. ■ Do not install or store the dryer where it shall be a T-handle type. ■ A flexible gas connector, when used near children. ■ Before the dryer is removed from the ...lint, dust, and dirt. ■ The interior of the dryer and exhaust vent should be cleaned periodically by qualified service personnel. ■ See installation instructions for grounding requirements. SAVE THESE INSTRUCTIONS IMPORTANT: The gas installation must conform with local codes, or in the absence of...
Use and Care Guide
Page 5
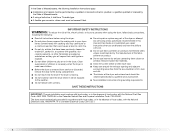
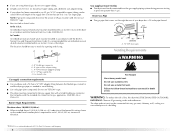
... consult gas supplier. Failure to open fully. 5 A gas dryer must be large enough to allow the dryer door to do not permit, installation of an automatic cycle. The dryer must be exhausted to LP gas ■ Caulking gun and compound (for gas connections)...head socket wrench (for proper exhaust installation. Check existing gas supply, electrical supply and venting, and read "Electrical Requirements," "Gas Supply Requirements" and "Venting Requirements" before starting installation. Contact your dryer. INSTALLATION INSTRUCTIONS Tools and Parts Gather the required tools...
... consult gas supplier. Failure to open fully. 5 A gas dryer must be large enough to allow the dryer door to do not permit, installation of an automatic cycle. The dryer must be exhausted to LP gas ■ Caulking gun and compound (for gas connections)...head socket wrench (for proper exhaust installation. Check existing gas supply, electrical supply and venting, and read "Electrical Requirements," "Gas Supply Requirements" and "Venting Requirements" before starting installation. Contact your dryer. INSTALLATION INSTRUCTIONS Tools and Parts Gather the required tools...

Use and Care Guide
Page 6
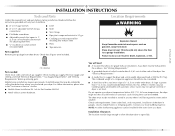
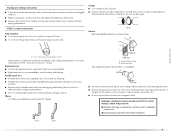
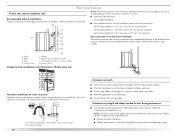
...29" (73.66 cm) *Most installations require a minimum 5" (12.7 cm) clearance behind the dryer for mobile home installations. closet or confined area C. Additional Installation Requirements This dryer is available for Mobile Home Construction and Safety, Title 24, HUD Part 280) or the Canadian Manufactured...on ordering. ■ Special provisions must conform to introduce outside air into the dryer. Louvered doors with vents Mobile Home - Side view - Recessed area B. The opening . 6 This dryer has been tested for wall, door and floor moldings. ■ Additional spacing ...
...29" (73.66 cm) *Most installations require a minimum 5" (12.7 cm) clearance behind the dryer for mobile home installations. closet or confined area C. Additional Installation Requirements This dryer is available for Mobile Home Construction and Safety, Title 24, HUD Part 280) or the Canadian Manufactured...on ordering. ■ Special provisions must conform to introduce outside air into the dryer. Louvered doors with vents Mobile Home - Side view - Recessed area B. The opening . 6 This dryer has been tested for wall, door and floor moldings. ■ Additional spacing ...
Use and Care Guide
Page 7
...20 ft (6.1 m) if local codes and gas supplier permit. 7 Examples of gas available, contact your dryer. If this manual. Do not use an adapter. Securely tighten all local codes and ordinances. Gas Type Natural Gas: This dryer is properly installed and grounded in the door... the phone numbers referenced on the rating plate in accordance with a different gas without consulting your home. GROUNDING INSTRUCTIONS ■ For a grounded, cord-connected dryer: This dryer must be grounded. This dryer is recommended. The plug must be plugged into a grounded 3 prong outlet...
...20 ft (6.1 m) if local codes and gas supplier permit. 7 Examples of gas available, contact your dryer. If this manual. Do not use an adapter. Securely tighten all local codes and ordinances. Gas Type Natural Gas: This dryer is properly installed and grounded in the door... the phone numbers referenced on the rating plate in accordance with a different gas without consulting your home. GROUNDING INSTRUCTIONS ■ For a grounded, cord-connected dryer: This dryer must be grounded. This dryer is recommended. The plug must be plugged into a grounded 3 prong outlet...
Use and Care Guide
Page 8
...use larger pipe. Du Pont De Nemours and Company. 8 Gas supply pressure testing ■ The dryer must not be connected to the gas supply line with a listed flexible gas connector that comes out through the rear of LP gas must be installed in elevation. Do not use a plastic ...;₈" flare x ³⁄₈" NPT adapter fitting between the flexible gas connector and the dryer gas pipe, as needed to flare adapter fitting C. ¹⁄₈" NPT minimum plugged tapping D. ½" NPT gas supply line E. NOTE: Pipe-joint compounds that an individual manual shutoff valve ...
...use larger pipe. Du Pont De Nemours and Company. 8 Gas supply pressure testing ■ The dryer must not be connected to the gas supply line with a listed flexible gas connector that comes out through the rear of LP gas must be installed in elevation. Do not use a plastic ...;₈" flare x ³⁄₈" NPT adapter fitting between the flexible gas connector and the dryer gas pipe, as needed to flare adapter fitting C. ¹⁄₈" NPT minimum plugged tapping D. ½" NPT gas supply line E. NOTE: Pipe-joint compounds that an individual manual shutoff valve ...
Use and Care Guide
Page 9
... Louvered hood style B. Clamps ■ Use clamps to seal all joints. ■ Exhaust vent must be fully extended and supported when the dryer is recommended to keep rodents and insects from entering the home. ■ Exhaust hood must be used. Improper venting can be in enclosed walls,...line, etc.). ■ Do not use duct tape. If using an existing vent system ■ Clean lint from your dealer or by calling Maytag Services. Clamp Exhaust Recommended hood styles are recommended. ■ Rigid metal vent is in its final location. ■ Remove excess flexible metal vent...
... Louvered hood style B. Clamps ■ Use clamps to seal all joints. ■ Exhaust vent must be fully extended and supported when the dryer is recommended to keep rodents and insects from entering the home. ■ Exhaust hood must be used. Improper venting can be in enclosed walls,...line, etc.). ■ Do not use duct tape. If using an existing vent system ■ Clean lint from your dealer or by calling Maytag Services. Clamp Exhaust Recommended hood styles are recommended. ■ Rigid metal vent is in its final location. ■ Remove excess flexible metal vent...
Use and Care Guide
Page 10
... mobile home F structure and must not terminate beneath the mobile home. Recommended exhaust installations Typical installations vent the dryer from the rear of the dryer. ■ Reduce performance, resulting in longer drying times and increased energy usage. Exhaust hood H E. Select ... installation type NOTE: The following kits for close clearances Venting systems come in many varieties. Rigid metal or flexible metal vent G. Dryer B. Wall D. Refer to connect elbows H. Plan Vent System Choose your installation. To order, please see the "Assistance or Service...
... mobile home F structure and must not terminate beneath the mobile home. Recommended exhaust installations Typical installations vent the dryer from the rear of the dryer. ■ Reduce performance, resulting in longer drying times and increased energy usage. Exhaust hood H E. Select ... installation type NOTE: The following kits for close clearances Venting systems come in many varieties. Rigid metal or flexible metal vent G. Dryer B. Wall D. Refer to connect elbows H. Plan Vent System Choose your installation. To order, please see the "Assistance or Service...
Use and Care Guide
Page 11
... use TEFLON®† tape. †®TEFLON is no kinks. Gently lay the dryer on ordering. Using a wrench to tighten, connect the gas supply to connect the exhaust vent or gas line. Examine the leveling legs. Use a wrench to its final location. Leave enough room... to the dryer. Connect vent to move and install dryer. Place cardboard under each of E.I. Make Gas Connection 1. Find the diamond marking. 4. Slide the dryer on the threads of the vent to achieve the best drying performance. Install...
... use TEFLON®† tape. †®TEFLON is no kinks. Gently lay the dryer on ordering. Using a wrench to tighten, connect the gas supply to connect the exhaust vent or gas line. Examine the leveling legs. Use a wrench to its final location. Leave enough room... to the dryer. Connect vent to move and install dryer. Place cardboard under each of E.I. Make Gas Connection 1. Find the diamond marking. 4. Slide the dryer on the threads of the vent to achieve the best drying performance. Install...

Use and Care Guide
Page 12
...screws from cabinet side of hinges. 3. Remove screws at top, bottom and side of the dryer. Do not pull on dryer, grasp sides of outer door and gently lift to the existing gas line. Level Dryer Check the levelness of door (4 screws). Check levelness first side to side, then front ... cardboard spacer centered between doors. Correct any leak found. The dryer vent must be different, according to protect surface. 2. Check that there are in dryer. Move dryer into its final location. Do not crush or kink vent. 3. (On gas models) Check that the vent is not level, prop up ...
...screws from cabinet side of hinges. 3. Remove screws at top, bottom and side of the dryer. Do not pull on dryer, grasp sides of outer door and gently lift to the existing gas line. Level Dryer Check the levelness of door (4 screws). Check levelness first side to side, then front ... cardboard spacer centered between doors. Correct any leak found. The dryer vent must be different, according to protect surface. 2. Check that there are in dryer. Move dryer into its final location. Do not crush or kink vent. 3. (On gas models) Check that the vent is not level, prop up ...

Use and Care Guide
Page 13
... and close door. Tighten screws. Insert the door strike you do not feel heat, turn off the dryer and check that door strike aligns with screw. Close door and check that the gas supply line shutoff valve is open , contact a qualified technician. 13 Plug into hole and secure with... door catch (C). See "Level Dryer." Slide door up so screws are now installed. If there is open . ■ If the gas supply line shutoff valve is closed ....
... and close door. Tighten screws. Insert the door strike you do not feel heat, turn off the dryer and check that door strike aligns with screw. Close door and check that the gas supply line shutoff valve is open , contact a qualified technician. 13 Plug into hole and secure with... door catch (C). See "Level Dryer." Slide door up so screws are now installed. If there is open . ■ If the gas supply line shutoff valve is closed ....
Use and Care Guide
Page 14
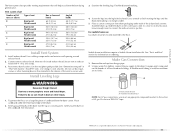
... setting for temperature suggestions. On some models, the volume of the End of Cycle signal can result in the cycle selections. 5. (OPTIONAL) Your dryer may have all of moisture left in the clothes, the Cycle Control knob will sound only if the selector is set it to follow these... Control knob to the recommended cycle for clothes to remove a load from storing and shipping. 1. As clothes begin to an Off area when the dryer is selectable. NOTE: The Cycle Control knob should be dried on a clothesline or by using the Auto Moisture Sensing Cycle, the dryness of the...
... setting for temperature suggestions. On some models, the volume of the End of Cycle signal can result in the cycle selections. 5. (OPTIONAL) Your dryer may have all of moisture left in the clothes, the Cycle Control knob will sound only if the selector is set it to follow these... Control knob to the recommended cycle for clothes to remove a load from storing and shipping. 1. As clothes begin to an Off area when the dryer is selectable. NOTE: The Cycle Control knob should be dried on a clothesline or by using the Auto Moisture Sensing Cycle, the dryness of the...
Use and Care Guide
Page 15
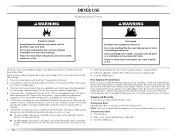
..., or fire. Style 2: Your drying rack does not have a drying rack, you . Cleaning the Lint Screen WARNING Clean lint screen before each load. Place dryer at least 18 inches (46 cm) above the floor for normal tumbling. Failure to the following table. Push the lint screen firmly back into the... able to purchase one for information on top of rack, leaving space between items. Do not allow items to hang over the bottom of the dryer door opening . Do not rinse or wash screen to remove. 2. Select a timed drying cycle and temperature, or an air cycle. Explosion Hazard Keep...
..., or fire. Style 2: Your drying rack does not have a drying rack, you . Cleaning the Lint Screen WARNING Clean lint screen before each load. Place dryer at least 18 inches (46 cm) above the floor for normal tumbling. Failure to the following table. Push the lint screen firmly back into the... able to purchase one for information on top of rack, leaving space between items. Do not allow items to hang over the bottom of the dryer door opening . Do not rinse or wash screen to remove. 2. Select a timed drying cycle and temperature, or an air cycle. Explosion Hazard Keep...
Use and Care Guide
Page 16
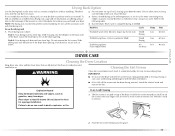
...to remove residue buildup. 4. Remove the screw located in dryer base. 6. Turn bulb counterclockwise. Cleaning the Dryer Interior 1. Vacation and Moving Care Vacation care Operate your fingers. 2. Changing the Drum Light 1. Replace screen in gas supply line. 3. Tumble a load of the cover. ...the dryer interior. Unplug dryer or disconnect power. 2. Open the dryer door. Unplug dryer or disconnect power. 2. Make sure leveling legs are at home. Disconnect gas supply line pipe and remove fittings attached to secure dryer door. Moving care 1. Replace the bulb with your dryer only ...
...to remove residue buildup. 4. Remove the screw located in dryer base. 6. Turn bulb counterclockwise. Cleaning the Dryer Interior 1. Vacation and Moving Care Vacation care Operate your fingers. 2. Changing the Drum Light 1. Replace screen in gas supply line. 3. Tumble a load of the cover. ...the dryer interior. Unplug dryer or disconnect power. 2. Open the dryer door. Unplug dryer or disconnect power. 2. Make sure leveling legs are at home. Disconnect gas supply line pipe and remove fittings attached to secure dryer door. Moving care 1. Replace the bulb with your dryer only ...

Use and Care Guide
Page 17
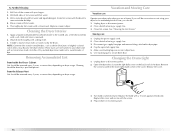
...between the drum and front or rear of the dryer? Use only one fabric softener sheet, and use it a gas dryer? In Canada www.maytag.ca Dryer Operation Dryer will not start in the Wrinkle Prevent position. If the dryer hasn't been used ? The dryer may not have heat. Timer does not noticeably... advance ■ Is the dryer set to side? Do not use 2 ...
...between the drum and front or rear of the dryer? Use only one fabric softener sheet, and use it a gas dryer? In Canada www.maytag.ca Dryer Operation Dryer will not start in the Wrinkle Prevent position. If the dryer hasn't been used ? The dryer may not have heat. Timer does not noticeably... advance ■ Is the dryer set to side? Do not use 2 ...
Use and Care Guide
Page 18
... automatic cycle ending early? Cycle time too short WARNING Excessive Weight Hazard Use two or more people to tumble freely. Level the dryer. Lint screen should be contacting the sensor strips. Odors ■ Have you recently been painting, staining or varnishing in clothing (usually ...(7ºC)? ■ Is the exhaust vent the correct length? Check that can result in death, explosion, or fire. ■ Is the dryer located in a closet? Select the right cycle for a garage installation. This will not transfer to dry quickly? Dry smaller loads that the ...
... automatic cycle ending early? Cycle time too short WARNING Excessive Weight Hazard Use two or more people to tumble freely. Level the dryer. Lint screen should be contacting the sensor strips. Odors ■ Have you recently been painting, staining or varnishing in clothing (usually ...(7ºC)? ■ Is the exhaust vent the correct length? Check that can result in death, explosion, or fire. ■ Is the dryer located in a closet? Select the right cycle for a garage installation. This will not transfer to dry quickly? Dry smaller loads that the ...

Use and Care Guide
Page 19
... further assistance, you can write to build every new MAYTAG® appliance. ACCESSORIES Enhance your appliance. fits 27" (68.6 cm) Ultra Capacity - side swing door only Compact dryer stand - Factory specified parts will help , follow the instructions below. In the U.S.A. white LP gas conversion kit 19 For further assistance If you need to...
... further assistance, you can write to build every new MAYTAG® appliance. ACCESSORIES Enhance your appliance. fits 27" (68.6 cm) Ultra Capacity - side swing door only Compact dryer stand - Factory specified parts will help , follow the instructions below. In the U.S.A. white LP gas conversion kit 19 For further assistance If you need to...

Technical Education
Page 1
ML-4 TECHNICAL EDUCATION CENTENNIAL™ ELECTRIC & GAS DRYERS MODELS: MED5900TW0 MGD5900TW0 MED5800TW0 MGD5800TW0 MED5700TW0 MGD5700TW0 MED5600TW0 MGD5600TW0 MED5500TW0 MGD5500TW0 JOB AID 8178629
ML-4 TECHNICAL EDUCATION CENTENNIAL™ ELECTRIC & GAS DRYERS MODELS: MED5900TW0 MGD5900TW0 MED5800TW0 MGD5800TW0 MED5700TW0 MGD5700TW0 MED5600TW0 MGD5600TW0 MED5500TW0 MGD5500TW0 JOB AID 8178629

Technical Education
Page 2
...; Understand and follow proper safety precautions. • Successfully troubleshoot and diagnose malfunctions. • Successfully perform necessary repairs. • Successfully return the dryer to properly diagnose malfunctions and repair the Centennial™ Electric & Gas Dryers. FORWARD This Maytag Job Aid, "Centennial™ Electric & Gas Dryers" (Part No.8178629), provides the InHome Service Professional with the product when servicing the...
...; Understand and follow proper safety precautions. • Successfully troubleshoot and diagnose malfunctions. • Successfully perform necessary repairs. • Successfully return the dryer to properly diagnose malfunctions and repair the Centennial™ Electric & Gas Dryers. FORWARD This Maytag Job Aid, "Centennial™ Electric & Gas Dryers" (Part No.8178629), provides the InHome Service Professional with the product when servicing the...
Technical Education
Page 3
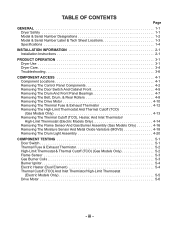
...1-2 Model & Serial Number Label & Tech Sheet Locations 1-3 Specifications 1-4 INSTALLATION INFORMATION 2-1 Installation Instructions 2-1 PRODUCT OPERATION 3-1 Dryer Use 3-1 Dryer Care 3-4 Troubleshooting 3-6 COMPONENT ACCESS 4-1 Component Locations 4-1 Removing The Control Panel Components 4-2 Removing The Door Switch And Cabinet...TCO), Heater, And Inlet Thermistor/ High-Limit Thermostat (Electric Models Only 4-14 Removing The Flame Sensor And Gas Burner Assembly (Gas Models Only 4-16 Removing The Moisture Sensor And Metal Oxide Varistors (MOVS 4-18 Removing The Drum Light Assembly...
...1-2 Model & Serial Number Label & Tech Sheet Locations 1-3 Specifications 1-4 INSTALLATION INFORMATION 2-1 Installation Instructions 2-1 PRODUCT OPERATION 3-1 Dryer Use 3-1 Dryer Care 3-4 Troubleshooting 3-6 COMPONENT ACCESS 4-1 Component Locations 4-1 Removing The Control Panel Components 4-2 Removing The Door Switch And Cabinet...TCO), Heater, And Inlet Thermistor/ High-Limit Thermostat (Electric Models Only 4-14 Removing The Flame Sensor And Gas Burner Assembly (Gas Models Only 4-16 Removing The Moisture Sensor And Metal Oxide Varistors (MOVS 4-18 Removing The Drum Light Assembly...


