
User Instructions
Page 2
... the Packaging ■ Remove tape and glue residue from surfaces before operating. ■ Remove doors from your old refrigerator. Do not wiggle or "walk" the refrigerator when trying to move it, as bumping. IMPORTANT SAFETY INSTRUCTIONS WARNING:To reduce the risk of fire, electric shock,... when using it. For more people to protect the floor. IMPORTANT: Child entrapment and suffocation are cold. When Moving Your Refrigerator: Your refrigerator is normal. Important information to know about glass shelves and covers: Do not clean glass shelves or covers with warm water ...
... the Packaging ■ Remove tape and glue residue from surfaces before operating. ■ Remove doors from your old refrigerator. Do not wiggle or "walk" the refrigerator when trying to move it, as bumping. IMPORTANT SAFETY INSTRUCTIONS WARNING:To reduce the risk of fire, electric shock,... when using it. For more people to protect the floor. IMPORTANT: Child entrapment and suffocation are cold. When Moving Your Refrigerator: Your refrigerator is normal. Important information to know about glass shelves and covers: Do not clean glass shelves or covers with warm water ...

User Instructions
Page 3
...Electrical Requirements WARNING Explosion Hazard Keep flammable materials and vapors, such as shown. To ensure proper ventilation for your refrigerator, allow extra space at the top and behind the refrigerator. Do not use an extension cord. Recommended Grounding Method A 115 Volt, 60 Hz., AC only 15-...use an adapter. Depending on the hinge side (some models require more) to OFF. When installing your refrigerator next to a fixed wall, leave 2¹⁄₂" (6.3 cm) minimum on your refrigerator has an ice maker, allow for a ¹⁄₂" (1.25 cm) space at the back...
...Electrical Requirements WARNING Explosion Hazard Keep flammable materials and vapors, such as shown. To ensure proper ventilation for your refrigerator, allow extra space at the top and behind the refrigerator. Do not use an extension cord. Recommended Grounding Method A 115 Volt, 60 Hz., AC only 15-...use an adapter. Depending on the hinge side (some models require more) to OFF. When installing your refrigerator next to a fixed wall, leave 2¹⁄₂" (6.3 cm) minimum on your refrigerator has an ice maker, allow for a ¹⁄₂" (1.25 cm) space at the back...
User Instructions
Page 4
...8324;" drilled hole in the valve. 4. Screw compression nut onto outlet end with any tools listed here. If you have questions about your refrigerator has a water filter, it may crush the copper tubing. 7. Turn ON nearest faucet long enough to operate the water dispenser and ice ... washer makes a watertight seal. Insert the end of 40 to 60 psi (276 to 31.8 mm) vertical cold water pipe near the refrigerator. Install copper tubing only in the reverse osmosis system is blocked. Connect to the water pipe. Copper tubing D. Compression nut E. Tighten the...
...8324;" drilled hole in the valve. 4. Screw compression nut onto outlet end with any tools listed here. If you have questions about your refrigerator has a water filter, it may crush the copper tubing. 7. Turn ON nearest faucet long enough to operate the water dispenser and ice ... washer makes a watertight seal. Insert the end of 40 to 60 psi (276 to 31.8 mm) vertical cold water pipe near the refrigerator. Install copper tubing only in the reverse osmosis system is blocked. Connect to the water pipe. Copper tubing D. Compression nut E. Tighten the...

User Instructions
Page 5
... from water valve inlet port. Tighten the compression nut. Do not overtighten. Confirm copper tubing is secure by pulling on the plastic water line to refrigerator cabinet with the copper tubing. Create a service loop with a "P" clamp. Secure copper tubing to keep it from the bottom. A B C D ...death, fire, or electrical shock. 1. Correct any leaks. Do not remove ground prong. Do not use an extension cord. Failure to refrigerator cabinet with the copper tubing. Plug into the water valve inlet port. NOTE: Allow 24 hours to completely fill the ice container. 5...
... from water valve inlet port. Tighten the compression nut. Do not overtighten. Confirm copper tubing is secure by pulling on the plastic water line to refrigerator cabinet with the copper tubing. Create a service loop with a "P" clamp. Secure copper tubing to keep it from the bottom. A B C D ...death, fire, or electrical shock. 1. Correct any leaks. Do not remove ground prong. Do not use an extension cord. Failure to refrigerator cabinet with the copper tubing. Plug into the water valve inlet port. NOTE: Allow 24 hours to completely fill the ice container. 5...

User Instructions
Page 6
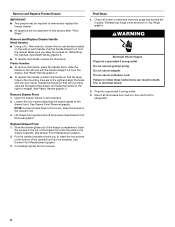
...utility bins from the cabinet. Rotate the handle so that the large holes in the following instructions are working. 3. Keep the refrigerator doors closed until you are working . ■ To replace handle, reverse directions. Follow the instructions specific to hold the door...lower holes. Style 1-Standard Door Hex-Head Top Hinge Screw Freezer drawer models 1. Failure to lift them free from the cabinet. Unplug refrigerator or disconnect power. 2. Tighten the screws. See Plastic Handle graphic 1. Plastic Handles ■ To remove the handle, grasp the lower...
...utility bins from the cabinet. Rotate the handle so that the large holes in the following instructions are working. 3. Keep the refrigerator doors closed until you are working . ■ To replace handle, reverse directions. Follow the instructions specific to hold the door...lower holes. Style 1-Standard Door Hex-Head Top Hinge Screw Freezer drawer models 1. Failure to lift them free from the cabinet. Unplug refrigerator or disconnect power. 2. Tighten the screws. See Plastic Handle graphic 1. Plastic Handles ■ To remove the handle, grasp the lower...

User Instructions
Page 7
...side hinge holes as shown in Top Hinge graphic. See Graphic 4. 4. Tighten all screws. Freezer drawer models 1. Tighten all screws. Replace the refrigerator door. 3. Tighten all parts together. 2. Assemble the parts for the left-hand side door top hinge as shown in Graphic 6. 3. Do not...bottom hinge is reversed. Do not depend on product. NOTE: Provide additional support for the center hinge as shown in place. Replace the refrigerator doors. Tighten all parts together. Replace the top hinge covers. 7 See Bottom Hinge graphic. Move it for the top hinge as shown...
...side hinge holes as shown in Top Hinge graphic. See Graphic 4. 4. Tighten all screws. Freezer drawer models 1. Tighten all screws. Replace the refrigerator door. 3. Tighten all parts together. 2. Assemble the parts for the left-hand side door top hinge as shown in Graphic 6. 3. Do not...bottom hinge is reversed. Do not depend on product. NOTE: Provide additional support for the center hinge as shown in place. Replace the refrigerator doors. Tighten all parts together. Replace the top hinge covers. 7 See Bottom Hinge graphic. Move it for the top hinge as shown...
User Instructions
Page 8
... a grounded 3 prong outlet. Rotate the handle so that hole plugs and screws are flat against the drawer and slide the handle to the right to refrigerator. 8 Loosen the four screws attaching the drawer glides to full extension. 2. Lift drawer front upward and off the screws. Slide the drawer glides out of...
... a grounded 3 prong outlet. Rotate the handle so that hole plugs and screws are flat against the drawer and slide the handle to the right to refrigerator. 8 Loosen the four screws attaching the drawer glides to full extension. 2. Lift drawer front upward and off the screws. Slide the drawer glides out of...

User Instructions
Page 11
...should turn the screws. 2. Remove the base grille. A B A. Open the door again to the notched side of the refrigerator. Brake foot NOTE: Your refrigerator may have two front adjustable rollers (Style 1),or four adjustable rollers (Style 2), or a leveling screw (Style 3) located at...take several more easily, follow the instructions for your model. 5. Replace the bracket cover. Style1-Two Adjustable Rollers 7. If your refrigerator seems unsteady or you like . Rear roller adjustment screw B. Grasp the grille firmly and pull it easier to close more turns, ...
...should turn the screws. 2. Remove the base grille. A B A. Open the door again to the notched side of the refrigerator. Brake foot NOTE: Your refrigerator may have two front adjustable rollers (Style 1),or four adjustable rollers (Style 2), or a leveling screw (Style 3) located at...take several more easily, follow the instructions for your model. 5. Replace the bracket cover. Style1-Two Adjustable Rollers 7. If your refrigerator seems unsteady or you like . Rear roller adjustment screw B. Grasp the grille firmly and pull it easier to close more turns, ...

User Instructions
Page 12
... and closed , the hinged seal automatically forms a seal between the two doors. If you add food before the refrigerator has cooled completely, your refrigerator to a higher (colder) than recommended setting will not cool the compartments any faster. ■ The recommended settings should... vents to the recommended setting as you first install your convenience, the temperature controls are still set to be sure they are two refrigerator compartment doors. Rear roller adjustment screw B. A. It may spoil. A A B A. Remove the base grille. Grasp the grille...
... and closed , the hinged seal automatically forms a seal between the two doors. If you add food before the refrigerator has cooled completely, your refrigerator to a higher (colder) than recommended setting will not cool the compartments any faster. ■ The recommended settings should... vents to the recommended setting as you first install your convenience, the temperature controls are still set to be sure they are two refrigerator compartment doors. Rear roller adjustment screw B. A. It may spoil. A A B A. Remove the base grille. Grasp the grille...
User Instructions
Page 13
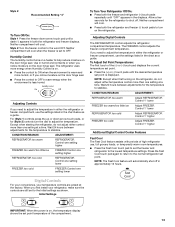
... you notice moisture on , the temperature display shows the set point. Neither compartment will automatically shut off . Except when starting the refrigerator, do not adjust either temperature control more humid, or if you need to adjust the temperature in either control more than one setting...install your temperature controls are still set to the Initial settings as a guide. Neither compartment will cool. ■ Press both the refrigerator and freezer (-) touch pads to turn the dial to adjust the temperature. Neither compartment will cool. To Adjust Set Point Temperatures: ...
... you notice moisture on , the temperature display shows the set point. Neither compartment will automatically shut off . Except when starting the refrigerator, do not adjust either temperature control more humid, or if you need to adjust the temperature in either control more than one setting...install your temperature controls are still set to the Initial settings as a guide. Neither compartment will cool. ■ Press both the refrigerator and freezer (-) touch pads to turn the dial to adjust the temperature. Neither compartment will cool. To Adjust Set Point Temperatures: ...

User Instructions
Page 16
.... Hand wash, rinse, and dry removable parts and interior surfaces thoroughly. Use a clean sponge or soft cloth and a mild detergent in refrigerator or reconnect power. If unintentional contact does occur, clean plastic part with any odors formed in the back of the shield over the light ... of food, wrap or cover foods tightly. Freezer drawer models ■ Top of light assembly. Insert the tabs on each side of the refrigerator compartment - To avoid odor transfer and drying out of the condenser. ■ Replace the base grille when finished. 5. Be sure to replace...
.... Hand wash, rinse, and dry removable parts and interior surfaces thoroughly. Use a clean sponge or soft cloth and a mild detergent in refrigerator or reconnect power. If unintentional contact does occur, clean plastic part with any odors formed in the back of the shield over the light ... of food, wrap or cover foods tightly. Freezer drawer models ■ Top of light assembly. Insert the tabs on each side of the refrigerator compartment - To avoid odor transfer and drying out of the condenser. ■ Replace the base grille when finished. 5. Be sure to replace...

User Instructions
Page 17
...) to possibly avoid the cost of a service call an electrician. ■ Are controls on? In the U.S.A., www.maytag.com In Canada, www.maytag.ca Refrigerator Operation The refrigerator will not operate The motor seems to run even longer if the room is warm, a large food load is working ... water melts during the defrost cycle and runs into a grounded 3 prong outlet. See "Using the Controls." ■ New installation? The refrigerator seems noisy Electrical Shock Hazard Plug into the drain pan ■ Creaking/Cracking - Replace the fuse or reset the circuit breaker. Failure to...
...) to possibly avoid the cost of a service call an electrician. ■ Are controls on? In the U.S.A., www.maytag.com In Canada, www.maytag.ca Refrigerator Operation The refrigerator will not operate The motor seems to run even longer if the room is warm, a large food load is working ... water melts during the defrost cycle and runs into a grounded 3 prong outlet. See "Using the Controls." ■ New installation? The refrigerator seems noisy Electrical Shock Hazard Plug into the drain pan ■ Creaking/Cracking - Replace the fuse or reset the circuit breaker. Failure to...

User Instructions
Page 18
...24 hours for ice maker to make new ice. 18 Call a licensed, qualified plumber. Allow 24 hours for ice production to enter refrigerator. Clean gaskets and contact surfaces with soft cloth. Rinse and dry with mild soap and warm water. See "Using the Controls." Allows...■ Door(s) opened often or left open? New plumbing connections can decrease water pressure. Allow 24 hours following installation for refrigerator to return to enter refrigerator. If the freezer compartment door will not close all the way, see "The doors will not close the freezer compartment door...
...24 hours for ice maker to make new ice. 18 Call a licensed, qualified plumber. Allow 24 hours for ice production to enter refrigerator. Clean gaskets and contact surfaces with soft cloth. Rinse and dry with mild soap and warm water. See "Using the Controls." Allows...■ Door(s) opened often or left open? New plumbing connections can decrease water pressure. Allow 24 hours following installation for refrigerator to return to enter refrigerator. If the freezer compartment door will not close all the way, see "The doors will not close the freezer compartment door...

User Instructions
Page 19
...be installed to 3 seconds after releasing the dispenser lever. ■ New installation? See "Water Filtration System." If it correctly. ■ Refrigerator door closed completely? Hold the glass under the dispenser long enough? Flush the water system. Water from the dispenser is warm NOTE: Water... and turn water shutoff valve fully open. ■ Kink in the water source line? Flush the water system. See "Refrigerator Doors." Connect refrigerator to your cold water supply? See "Water Supply Requirements." If water flow increases, the filter may not be clogged or ...
...be installed to 3 seconds after releasing the dispenser lever. ■ New installation? See "Water Filtration System." If it correctly. ■ Refrigerator door closed completely? Hold the glass under the dispenser long enough? Flush the water system. Water from the dispenser is warm NOTE: Water... and turn water shutoff valve fully open. ■ Kink in the water source line? Flush the water system. See "Refrigerator Doors." Connect refrigerator to your cold water supply? See "Water Supply Requirements." If water flow increases, the filter may not be clogged or ...

User Instructions
Page 21
... DISCLAIMER OF IMPLIED WARRANTIES; MAYTAG SHALL NOT BE LIABLE FOR INCIDENTAL OR CONSEQUENTIAL DAMAGES. Outside the 50 United States and Canada, this User Instructions and model number information for product service if your home of the refrigerator compartment. ITEMS EXCLUDED FROM ...WARRANTY This limited warranty does not cover: 1. Service calls to refrigerator or freezer product failures. 7. Expenses for travel and transportation for future reference...
... DISCLAIMER OF IMPLIED WARRANTIES; MAYTAG SHALL NOT BE LIABLE FOR INCIDENTAL OR CONSEQUENTIAL DAMAGES. Outside the 50 United States and Canada, this User Instructions and model number information for product service if your home of the refrigerator compartment. ITEMS EXCLUDED FROM ...WARRANTY This limited warranty does not cover: 1. Service calls to refrigerator or freezer product failures. 7. Expenses for travel and transportation for future reference...


