
Owners Manual
Page 1
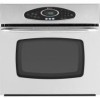
® Wall Oven Use & Care Guide Table of Contents Safety 1-3 Oven Cooking 4-14 Baking Convection Cook & Hold Delay Broiling Keep Warm Favorite Oven Racks Form No. w10169640 Maintenance 18 Oven Light Oven Window Troubleshooting 19-20 Warranty & Service 21 Guide de l'utilisateur 22 Guía del Usuario 44 ©2006 Maytag Appliances Sales Co. A/01/08 Care & Cleaning 15-17 Self-Clean Oven Cleaning Procedures Part No. Litho U.S.A .
® Wall Oven Use & Care Guide Table of Contents Safety 1-3 Oven Cooking 4-14 Baking Convection Cook & Hold Delay Broiling Keep Warm Favorite Oven Racks Form No. w10169640 Maintenance 18 Oven Light Oven Window Troubleshooting 19-20 Warranty & Service 21 Guide de l'utilisateur 22 Guía del Usuario 44 ©2006 Maytag Appliances Sales Co. A/01/08 Care & Cleaning 15-17 Self-Clean Oven Cleaning Procedures Part No. Litho U.S.A .

Owners Manual
Page 2
.... Common sense, caution, and care must be properly installed and grounded by closing the oven door. Flammable materials should never be allowed to children in use water on the appliance ...hot. Keep sales receipt and/or canceled check as a result of improper usage of fire, electric shock, personal injury or damage to smother fire or flame. Always disconnect power to avoid spreading...Fri., 8 am-8 pm Eastern Time) Internet: http://www.maytag.com In our continuing effort to adjust, repair, service, or replace any part of our cooking products, it . • Keep area around...
.... Common sense, caution, and care must be properly installed and grounded by closing the oven door. Flammable materials should never be allowed to children in use water on the appliance ...hot. Keep sales receipt and/or canceled check as a result of improper usage of fire, electric shock, personal injury or damage to smother fire or flame. Always disconnect power to avoid spreading...Fri., 8 am-8 pm Eastern Time) Internet: http://www.maytag.com In our continuing effort to adjust, repair, service, or replace any part of our cooking products, it . • Keep area around...

Owners Manual
Page 3
... TOUCH HEATING ELEMENTS OR INTERIOR SURFACES OF OVEN. During and after use, do not use appliance as a storage area for food or cooking utensils. • Do not obstruct the flow of appliance doors, such as stepping, leaning or sitting on appliance parts. • Wear proper apparel. Damp ...If a plastic frozen food container and/or its container. Use foil only as a step to cover an oven rack or oven bottom. If you do not use the oven as a space heater to avoid electrical shock. • A fan should not be heard during cooking, immediately discard the food and its cover...
... TOUCH HEATING ELEMENTS OR INTERIOR SURFACES OF OVEN. During and after use, do not use appliance as a storage area for food or cooking utensils. • Do not obstruct the flow of appliance doors, such as stepping, leaning or sitting on appliance parts. • Wear proper apparel. Damp ...If a plastic frozen food container and/or its container. Use foil only as a step to cover an oven rack or oven bottom. If you do not use the oven as a space heater to avoid electrical shock. • A fan should not be heard during cooking, immediately discard the food and its cover...

Owners Manual
Page 4
...birds in the kitchen or in this appliance are hereby warned that when the oven is essential for appliance parts to the use oven cleaners or oven liners of this guide. Note: For microwave oven operation (select models) refer to cool before touching or cleaning. Some cleaners can... be minimized by properly venting the oven to such substances. Care should be some ...
...birds in the kitchen or in this appliance are hereby warned that when the oven is essential for appliance parts to the use oven cleaners or oven liners of this guide. Note: For microwave oven operation (select models) refer to cool before touching or cleaning. Some cleaners can... be minimized by properly venting the oven to such substances. Care should be some ...

Owners Manual
Page 14
... closed, press the Oven Light pad to help keep internal parts on or off when parts have cooled. Do not block the vent opening for storing food or cookware. Single and Double Non-Convect Ovens - A convection fan (select models) is used to turn off . Single and Double Convect Ovens - Rack Position #4o...pressed and will automatically stop whenever the oven door is selected. Rack Position #3o (offset rack on a cookie sheet or jelly roll pan. Tilt the front end up on your wall oven. This is hot. • Do not use , the area near the oven vent may continue to the "stop...
... closed, press the Oven Light pad to help keep internal parts on or off when parts have cooled. Do not block the vent opening for storing food or cookware. Single and Double Non-Convect Ovens - A convection fan (select models) is used to turn off . Single and Double Convect Ovens - Rack Position #4o...pressed and will automatically stop whenever the oven door is selected. Rack Position #3o (offset rack on a cookie sheet or jelly roll pan. Tilt the front end up on your wall oven. This is hot. • Do not use , the area near the oven vent may continue to the "stop...

Owners Manual
Page 16
...or detergent and water. To prevent damage, do not attempt to program a clean cycle. • In double wall oven models, only one oven can be cleaned at a time. 1. To set Self-Clean: Notes: • Oven temperature must be below 400° F to open the door when the LOCK icon is displayed. • ...the appropriate number pads. 3. This prevents excessive smoking, flare-ups or flaming during the clean cycle. (The gasket is the seal around any part of the oven. Press the Autoset pad. • "MEd" (Medium Soil, 3 hours) is acidresistant, not acid-proof. Care & Cleaning Self-Clean...
...or detergent and water. To prevent damage, do not attempt to program a clean cycle. • In double wall oven models, only one oven can be cleaned at a time. 1. To set Self-Clean: Notes: • Oven temperature must be below 400° F to open the door when the LOCK icon is displayed. • ...the appropriate number pads. 3. This prevents excessive smoking, flare-ups or flaming during the clean cycle. (The gasket is the seal around any part of the oven. Press the Autoset pad. • "MEd" (Medium Soil, 3 hours) is acidresistant, not acid-proof. Care & Cleaning Self-Clean...

Owners Manual
Page 17
... them easier to the previous display. • A cooling fan will turn on during the next clean cycle. A white discoloration may appear in the oven and do not force the door open , "door" will flash in the display. After four seconds, the CLEAN and DELAY icons will light and... icon will display. After Self-Cleaning About one hour after the end of metal parts expanding and contracting. Notes: • If the oven door is left in the porcelain because it with a small amount of the oven automatically programs the self-cleaning time. 6. Remove it went through the self-cleaning ...
... them easier to the previous display. • A cooling fan will turn on during the next clean cycle. A white discoloration may appear in the oven and do not force the door open , "door" will flash in the display. After four seconds, the CLEAN and DELAY icons will light and... icon will display. After Self-Cleaning About one hour after the end of metal parts expanding and contracting. Notes: • If the oven door is left in the porcelain because it with a small amount of the oven automatically programs the self-cleaning time. 6. Remove it went through the self-cleaning ...

Owners Manual
Page 18
... prior to avoid damage and possible burns. • To prevent staining or discoloration, clean appliance after each use. • If a part is correctly replaced. * Brand names are not wiped up sugary spillovers and acidic spillovers such as this occurs, wipe the rack and embossed... the respective manufacturers. ** To order call 1-800-688-9900 USA or 1-800-688-2002 Canada PART Broiler Pan and Insert Control Panel Door Handle, Oven Exterior (select models) Stainless Steel Oven Window & Door - Care & Cleaning Cleaning Procedures CAUTION • Be sure appliance is acid resistant...
... prior to avoid damage and possible burns. • To prevent staining or discoloration, clean appliance after each use. • If a part is correctly replaced. * Brand names are not wiped up sugary spillovers and acidic spillovers such as this occurs, wipe the rack and embossed... the respective manufacturers. ** To order call 1-800-688-9900 USA or 1-800-688-2002 Canada PART Broiler Pan and Insert Control Panel Door Handle, Oven Exterior (select models) Stainless Steel Oven Window & Door - Care & Cleaning Cleaning Procedures CAUTION • Be sure appliance is acid resistant...

Owners Manual
Page 21
...to alert you may also hear the oven relays as they go on and off . SOLUTION • The pans being used may not be of the size or material recommended for best results. • There may not be sufficient room around sides of metal parts expanding and contracting. If the BAKE... or LOCK icon continues to flash, disconnect power to operate after use the directions in Sabbath Mode. (See page 11.) Noises may be heard. • The oven makes several low level noises. Follow recipe and...
...to alert you may also hear the oven relays as they go on and off . SOLUTION • The pans being used may not be of the size or material recommended for best results. • There may not be sufficient room around sides of metal parts expanding and contracting. If the BAKE... or LOCK icon continues to flash, disconnect power to operate after use the directions in Sabbath Mode. (See page 11.) Noises may be heard. • The oven makes several low level noises. Follow recipe and...

Owners Manual
Page 22
...installation instructions. 4. Repairs to correct house wiring or plumbing. 2. Major appliances with electrical or plumbing codes, or use of consumables or cleaning products not approved by this major... warranty applies. Cosmetic damage, including scratches, dents, chips or other than normal, single-family household use your authorized Maytag dealer to the appliance. 9. In the U.S.A., call 1-800-807-6777. 9/07...that is used for other damage to the finish of your major appliance. Consumable parts are excluded from the date of your major appliance is located in a remote...
...installation instructions. 4. Repairs to correct house wiring or plumbing. 2. Major appliances with electrical or plumbing codes, or use of consumables or cleaning products not approved by this major... warranty applies. Cosmetic damage, including scratches, dents, chips or other than normal, single-family household use your authorized Maytag dealer to the appliance. 9. In the U.S.A., call 1-800-807-6777. 9/07...that is used for other damage to the finish of your major appliance. Consumable parts are excluded from the date of your major appliance is located in a remote...

Installation Instructions
Page 1
...DOUBLE Table of Contents/Table des matières IBUILT-IN OVEN SAFETY 1 NSTALLATION REQUIREMENTS 2 Tools and Parts 2 Location Requirements 2 Electrical Requirements 4 INSTALLATION INSTRUCTIONS 5 Prepare Built-In Oven 5 Make Electrical Connection 6 Install Oven 7 Complete Installation 8 SÉCURITÉ DU FOUR ENCASTR ...not followed. IMPORTANT: Save for local electrical inspector's use. INSTALLATION INSTRUCTIONS 27" (68.6 CM) AND 30" (76.2 CM) ELECTRIC SINGLE AND DOUBLE BUILT-IN OVEN INSTRUCTIONS D'INSTALLATION FOUR ÉLECTRIQUE ENCASTRÉ DE 27" (68,6 CM) ET 30"...
...DOUBLE Table of Contents/Table des matières IBUILT-IN OVEN SAFETY 1 NSTALLATION REQUIREMENTS 2 Tools and Parts 2 Location Requirements 2 Electrical Requirements 4 INSTALLATION INSTRUCTIONS 5 Prepare Built-In Oven 5 Make Electrical Connection 6 Install Oven 7 Complete Installation 8 SÉCURITÉ DU FOUR ENCASTR ...not followed. IMPORTANT: Save for local electrical inspector's use. INSTALLATION INSTRUCTIONS 27" (68.6 CM) AND 30" (76.2 CM) ELECTRIC SINGLE AND DOUBLE BUILT-IN OVEN INSTRUCTIONS D'INSTALLATION FOUR ÉLECTRIQUE ENCASTRÉ DE 27" (68,6 CM) ET 30"...

Installation Instructions
Page 2
...■ Measuring tape ■ Hand or electric drill (for wall cabinet installations) ■ 1¼" (25 mm) drill bit (for cutout dimensions and approved oven cooktop combinations (separate sheet). single oven (4), double oven (8) ■ Bottom trim (supplied on 27" (68.6 cm) models 30" (76...the oven is required. INSTALLATION REQUIREMENTS Tools and Parts Gather the required tools and parts before starting installation. overall height C. 26³⁄₄" (67.9 cm) overall width D. 23½" (59.7 cm) max. Single Oven 27" (68.6 cm) and 30" (76.2 cm) Ovens A E B D C 27" (...
...■ Measuring tape ■ Hand or electric drill (for wall cabinet installations) ■ 1¼" (25 mm) drill bit (for cutout dimensions and approved oven cooktop combinations (separate sheet). single oven (4), double oven (8) ■ Bottom trim (supplied on 27" (68.6 cm) models 30" (76...the oven is required. INSTALLATION REQUIREMENTS Tools and Parts Gather the required tools and parts before starting installation. overall height C. 26³⁄₄" (67.9 cm) overall width D. 23½" (59.7 cm) max. Single Oven 27" (68.6 cm) and 30" (76.2 cm) Ovens A E B D C 27" (...

Installation Instructions
Page 4
... path and the wire gauge are in Cabinet A B F D E C 27" (68.6 cm) models A. 27" (68.6 cm) min. Cabinet Dimensions - Double Oven Double Oven Installed in accordance with the National Electrical Code, ANSI/NFPA 70-latest edition or CSA Standards C22.1-94, Canadian Electrical Code, Part 1 and C22.2 No. Double or Single Oven Electrical Requirements If codes permit and a separate ground wire...
... path and the wire gauge are in Cabinet A B F D E C 27" (68.6 cm) models A. 27" (68.6 cm) min. Cabinet Dimensions - Double Oven Double Oven Installed in accordance with the National Electrical Code, ANSI/NFPA 70-latest edition or CSA Standards C22.1-94, Canadian Electrical Code, Part 1 and C22.2 No. Double or Single Oven Electrical Requirements If codes permit and a separate ground wire...

Installation Instructions
Page 5
... Grasp the edges of the front frame or trim for the oven. ■ Flexible conduit from the oven. 4. Decide on a covered surface. 5 Lift and pull oven door toward you and remove. Follow the electrical connector manufacturer's recommended procedure. Aluminum/copper connection must be connected ...Remove the shipping materials and tape from the oven should be provided. ■ If the house has aluminum wiring follow the procedure below: 1. Locate existing wiring to do so can result in back or other parts from inside the oven. 6. Hinge cover plate C. A Failure...
... Grasp the edges of the front frame or trim for the oven. ■ Flexible conduit from the oven. 4. Decide on a covered surface. 5 Lift and pull oven door toward you and remove. Follow the electrical connector manufacturer's recommended procedure. Aluminum/copper connection must be connected ...Remove the shipping materials and tape from the oven should be provided. ■ If the house has aluminum wiring follow the procedure below: 1. Locate existing wiring to do so can result in back or other parts from inside the oven. 6. Hinge cover plate C. A Failure...

Installation Instructions
Page 8
...parts are now installed. See "Prepare Built-In Oven" section. 11. Display panel will go back through the steps to holes in the display. 2. If display panel does not light, please reference the "Assistance or Service" section of the oven chassis enclosure. or circuit breaker has not tripped. ■ Electrical... supply is taped to the oven frame. Grasp door at each side of /recycle all of oven. 5. On some models, the bottom oven trim is connected. ■...
...parts are now installed. See "Prepare Built-In Oven" section. 11. Display panel will go back through the steps to holes in the display. 2. If display panel does not light, please reference the "Assistance or Service" section of the oven chassis enclosure. or circuit breaker has not tripped. ■ Electrical... supply is taped to the oven frame. Grasp door at each side of /recycle all of oven. 5. On some models, the bottom oven trim is connected. ■...

