
User Instructions
Page 3
.../ceramic, ceramic, earthenware, or other flammable materials contact heating elements or interior surfaces of oven until they are dark in or around any part of the range. [] Wear Proper Apparel- Heating elements should never be immersed in water. [] Do Not Cook on hot surfaces may be stored in... if applied to a qualified technician. [] Storage in use dry chemical or foam-type extinguisher. [] Use Only Dry Potholders - Build-up of electric shock, or fire. [] Glazed Cooking Utensils - The door gasket is in or on . No commercial oven cleaner or oven liner protective coating of...
.../ceramic, ceramic, earthenware, or other flammable materials contact heating elements or interior surfaces of oven until they are dark in or around any part of the range. [] Wear Proper Apparel- Heating elements should never be immersed in water. [] Do Not Cook on hot surfaces may be stored in... if applied to a qualified technician. [] Storage in use dry chemical or foam-type extinguisher. [] Use Only Dry Potholders - Build-up of electric shock, or fire. [] Glazed Cooking Utensils - The door gasket is in or on . No commercial oven cleaner or oven liner protective coating of...
User Instructions
Page 9
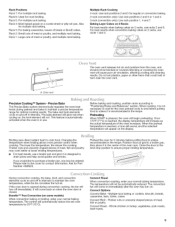
... contact information. Broiling uses direct radiant heat to "Positioning Racks and Bakeware" section. It is recommended in the recipe. Convect Roast - Also for Part Number 4396923. Rack 3: For baking casseroles, loaves of meat or poultry, and multiple rack baking. Baking Layer Cakes on 2 Racks For best results...closed. The bake and broil elements cycle on grid in a broiler pan, then place it is designed to maintain a precise temperature range for 2 minutes before putting food in unless it in intervals. Position food on and off in the center of meat, fish or poultry.
... contact information. Broiling uses direct radiant heat to "Positioning Racks and Bakeware" section. It is recommended in the recipe. Convect Roast - Also for Part Number 4396923. Rack 3: For baking casseroles, loaves of meat or poultry, and multiple rack baking. Baking Layer Cakes on 2 Racks For best results...closed. The bake and broil elements cycle on grid in a broiler pan, then place it is designed to maintain a precise temperature range for 2 minutes before putting food in unless it in intervals. Position food on and off in the center of meat, fish or poultry.
User Instructions
Page 11
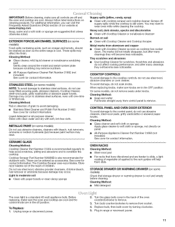
... Cooktop Scraper uses razor blades. Store razor blades out of the reach of our website at www.maytag.com. You may remove numbers. • All-Purpose Appliance Cleaner Part Number 31682 (not included): See cover for contact information. Heavy soil, dark streaks, specks and ... pads, gritty washcloths or abrasive paper towels. Cleaning Method: • Mild detergent The oven light is recommended regularly to remove. 3. Unplug range or disconnect power. __7¸_'_! ¸ 2. Cleaning Method: Rub in direction of the oven counterclockwise to help them slide. CERAMIC GLASS...
... Cooktop Scraper uses razor blades. Store razor blades out of the reach of our website at www.maytag.com. You may remove numbers. • All-Purpose Appliance Cleaner Part Number 31682 (not included): See cover for contact information. Heavy soil, dark streaks, specks and ... pads, gritty washcloths or abrasive paper towels. Cleaning Method: • Mild detergent The oven light is recommended regularly to remove. 3. Unplug range or disconnect power. __7¸_'_! ¸ 2. Cleaning Method: Rub in direction of the oven counterclockwise to help them slide. CERAMIC GLASS...

User Instructions
Page 13
Canning Unit Kit (coil element models) Order Part Number 242905 Cooktop Care Kit (includes cleaner, protectant, and applicator pads) Order Part Number 31605 Cooktop Protectant Order Part Number 31463 ACCESSORIES Cooktop Cleaner (ceramic glass models) Order Part Number 31464 Cooktop Scraper (ceramic glass models) Order Part Number WA906B Stainless Steel Cleaner and Polish (stainless steel models) Order Part Number 31462 All-Purpose Appliance Cleaner Order Part Number 31682 Split-Rack with Removable Insert Order Part Number 4396927 Broiler Pan Order Part Number 4396923 13
Canning Unit Kit (coil element models) Order Part Number 242905 Cooktop Care Kit (includes cleaner, protectant, and applicator pads) Order Part Number 31605 Cooktop Protectant Order Part Number 31463 ACCESSORIES Cooktop Cleaner (ceramic glass models) Order Part Number 31464 Cooktop Scraper (ceramic glass models) Order Part Number WA906B Stainless Steel Cleaner and Polish (stainless steel models) Order Part Number 31462 All-Purpose Appliance Cleaner Order Part Number 31682 Split-Rack with Removable Insert Order Part Number 4396927 Broiler Pan Order Part Number 4396923 13
User Instructions
Page 14
Proof of original purchase date is reported to Maytag within 30 days from the date of purchase. 6. Cosmetic damage, including...contact us at the number below : Maytag Brand Home Appliances Customer eXperience Center 553 Benson Road Benton Harbor, MI 49022-2692 Please include a daytime phone number in accordance with electrical or plumbing codes, or use your... to instructions attached to or furnished with the product, Maytag brand of Whirlpool Corporation or Whirlpool Canada LP (hereafter "Maytag") will pay for factory specified parts and repair labor to correct defects in the United States...
Proof of original purchase date is reported to Maytag within 30 days from the date of purchase. 6. Cosmetic damage, including...contact us at the number below : Maytag Brand Home Appliances Customer eXperience Center 553 Benson Road Benton Harbor, MI 49022-2692 Please include a daytime phone number in accordance with electrical or plumbing codes, or use your... to instructions attached to or furnished with the product, Maytag brand of Whirlpool Corporation or Whirlpool Canada LP (hereafter "Maytag") will pay for factory specified parts and repair labor to correct defects in the United States...
Installation Instructions
Page 1
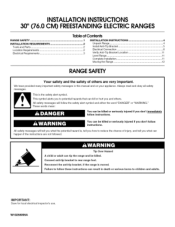
... followed. All safety messages will follow instructions. INSTALLATIONINSTRUCTIONS 30" (76.0 CM) FREESTANDINGELECTRICRANGES TableofContents RANGE SAFETY 1 INSTALLATION REQUIREMENTS 2 Tools and Parts 2 Location Requirements 2 Electrical Requirements 3 INSTALLATION INSTRUCTIONS 4 Unpack Range 4 Install Anti-Tip Bracket 5 Electrical Connection 6 Verify Anti-Tip Bracket Location 11 Level Range 11 Complete Installation 11 Moving the Range 12 RANGE SAFETY Your safety and the safety of injury...
... followed. All safety messages will follow instructions. INSTALLATIONINSTRUCTIONS 30" (76.0 CM) FREESTANDINGELECTRICRANGES TableofContents RANGE SAFETY 1 INSTALLATION REQUIREMENTS 2 Tools and Parts 2 Location Requirements 2 Electrical Requirements 3 INSTALLATION INSTRUCTIONS 4 Unpack Range 4 Install Anti-Tip Bracket 5 Electrical Connection 6 Verify Anti-Tip Bracket Location 11 Level Range 11 Complete Installation 11 Moving the Range 12 RANGE SAFETY Your safety and the safety of injury...
Installation Instructions
Page 2
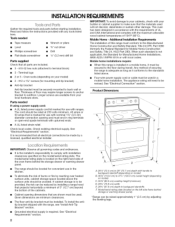
... or pliers • 3/8"nut driver • Drill • 1/8"(3.2 mm) drill bit Parts supplied Check that is installed in accordance with the requirements of UL and CSA International and complies with the range, see "Install Anti-Tip Bracket" section. • Grounded electrical supply is recommended that the materials used in a mobile home installation. See...
... or pliers • 3/8"nut driver • Drill • 1/8"(3.2 mm) drill bit Parts supplied Check that is installed in accordance with the requirements of UL and CSA International and complies with the range, see "Install Anti-Tip Bracket" section. • Grounded electrical supply is recommended that the materials used in a mobile home installation. See...

Installation Instructions
Page 4
...must be provided at this time. Remove oven racks and parts package from range. 2. AB A. Wrench or priers Connectors on the supply end. Rear levering leg C. Front levering leg C. If a range height adjustment is necessary, use wrench or pliers to move and install range. A D 1= Remove shipping materials, tape and film... the front and rear leveling legs. Do not remove the shipping base at the point the power supply cord enters the appliance. or 50-amp range power supply cord (pigtail). This uses a 3-wire receptacle of a UL listed, 3-wire, 250-volt, 40- Use a wrench or pliers...
...must be provided at this time. Remove oven racks and parts package from range. 2. AB A. Wrench or priers Connectors on the supply end. Rear levering leg C. Front levering leg C. If a range height adjustment is necessary, use wrench or pliers to move and install range. A D 1= Remove shipping materials, tape and film... the front and rear leveling legs. Do not remove the shipping base at the point the power supply cord enters the appliance. or 50-amp range power supply cord (pigtail). This uses a 3-wire receptacle of a UL listed, 3-wire, 250-volt, 40- Use a wrench or pliers...

Installation Instructions
Page 7
... has: And you will be cut out and removed. H ! Electrical Connection Options If your type of range. 6. Metal ground strap B. Discard C. Replace back panel and screws on rear of electrical connection: 4-wire (recommended) 3-wire (if 4-wire is not available...) Position cord/conduit plate as shown in the opening B. A. Complete installation following illustration. Small opening B. Small opening B. Part...
... has: And you will be cut out and removed. H ! Electrical Connection Options If your type of range. 6. Metal ground strap B. Discard C. Replace back panel and screws on rear of electrical connection: 4-wire (recommended) 3-wire (if 4-wire is not available...) Position cord/conduit plate as shown in the opening B. A. Complete installation following illustration. Small opening B. Small opening B. Part...

Installation Instructions
Page 9
.... Terminal lug B. Line 2 (red) wire Bare Wire Torque Specifications Attaching terminal lugs to torque as shown in the wire to the range with the ground-link screw. Complete electrical connection according to line 1 (black), neutral (white), and line 2 (red) wires. Ground-link screw C. Bare (green) ground ...insulation back 1" (2.5 cm) from the back of metal ground strap must be attached first and must be cut out and removed. Part of the range. Allow enough slack to easily attach wiring to remove the ground-link screw from the end of the ground link under the screw....
.... Terminal lug B. Line 2 (red) wire Bare Wire Torque Specifications Attaching terminal lugs to torque as shown in the wire to the range with the ground-link screw. Complete electrical connection according to line 1 (black), neutral (white), and line 2 (red) wires. Ground-link screw C. Bare (green) ground ...insulation back 1" (2.5 cm) from the back of metal ground strap must be attached first and must be cut out and removed. Part of the range. Allow enough slack to easily attach wiring to remove the ground-link screw from the end of the ground link under the screw....
Installation Instructions
Page 11
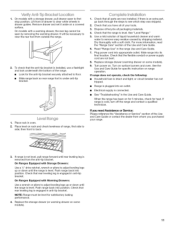
... oven. Slide range into an outlet. • Electrical supply is plugged into its final location. Replace storage drawer (warming drawer on some models). 9. or circuit breaker has not tripped. • Range is connected. • See "Troubleshooting" in drawer guides. NOTE: Range must be necessary... Check that the anti-tip bracket is installed, use a flashlight and look underneath the bottom of /recycle all parts are not bent. 8. Dispose of the range. • Look for the anti-tip bracket securely attached to remove waxy residue caused by removing the warming drawer....
... oven. Slide range into an outlet. • Electrical supply is plugged into its final location. Replace storage drawer (warming drawer on some models). 9. or circuit breaker has not tripped. • Range is connected. • See "Troubleshooting" in drawer guides. NOTE: Range must be necessary... Check that the anti-tip bracket is installed, use a flashlight and look underneath the bottom of /recycle all parts are not bent. 8. Dispose of the range. • Look for the anti-tip bracket securely attached to remove waxy residue caused by removing the warming drawer....

Installation Instructions
Page 12
... rights reserved. 4/09 Printed in death or serious burns to children and adults. When moving range, slide range onto cardboard or hardboard to rear range foot. Check that range is level. Slide range forward. 2. Whirlpool Corporation. i Electrical Shock Hazard Disconnect power before operating. Replace all parts and panels before servicing. Failure to do so can tip the...
... rights reserved. 4/09 Printed in death or serious burns to children and adults. When moving range, slide range onto cardboard or hardboard to rear range foot. Check that range is level. Slide range forward. 2. Whirlpool Corporation. i Electrical Shock Hazard Disconnect power before operating. Replace all parts and panels before servicing. Failure to do so can tip the...


