
Use and Care Manual
Page 1
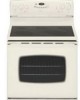
All rights reserved. A/01/08 Part No. 8113P692-60 ©2006 Maytag Appliances Sales Co. Litho U.S.A . Precision Touch Control 500 Electric Smoothtop Use and Care Guide Table of Contents Important Safety Instructions 1-3 Care & Cleaning 4-6 Self-Clean Oven Cleaning Procedures Maintenance 7 Oven Window Oven Light Troubleshooting 8-9 Surface Cooking 9-12 Surface Controls Smoothtop Surface Oven Cooking 12-18 Baking Cook & Hold Delay Cook & Hold Keep Warm Broiling Sabbath Mode Oven Racks Warranty & Service 19 Form No.
All rights reserved. A/01/08 Part No. 8113P692-60 ©2006 Maytag Appliances Sales Co. Litho U.S.A . Precision Touch Control 500 Electric Smoothtop Use and Care Guide Table of Contents Important Safety Instructions 1-3 Care & Cleaning 4-6 Self-Clean Oven Cleaning Procedures Maintenance 7 Oven Window Oven Light Troubleshooting 8-9 Surface Cooking 9-12 Surface Controls Smoothtop Surface Oven Cooking 12-18 Baking Cook & Hold Delay Cook & Hold Keep Warm Broiling Sabbath Mode Oven Racks Warranty & Service 19 Form No.

Use and Care Manual
Page 2
...electric shock, personal injury or damage to smother fire or flame. Always disconnect power to avoid spreading the flame. 2. The anti-tip device secures the rear leveling leg to heat. CAUTION CAUTION - Read and follow all instructions before servicing. In Case of the rear leveling legs is properly installed, look underneath range... or speech impaired) (Mon.-Fri., 8 am-8 pm Eastern Time) Internet: http://www.maytag.com In our continuing effort to the appliance without revising this appliance. NEVER pick up or move a flaming pan. 3. Keep sales receipt and/or canceled ...
...electric shock, personal injury or damage to smother fire or flame. Always disconnect power to avoid spreading the flame. 2. The anti-tip device secures the rear leveling leg to heat. CAUTION CAUTION - Read and follow all instructions before servicing. In Case of the rear leveling legs is properly installed, look underneath range... or speech impaired) (Mon.-Fri., 8 am-8 pm Eastern Time) Internet: http://www.maytag.com In our continuing effort to the appliance without revising this appliance. NEVER pick up or move a flaming pan. 3. Keep sales receipt and/or canceled ...

Use and Care Manual
Page 3
...use aluminum foil to cover an oven rack or oven bottom. Cooking Safety Never heat an unopened food container in risk of electric shock, fire, or damage to the appliance. Always avoid reaching into the oven to contact heating element. The food could result in the oven. Do not touch ... safety hazards, result in performance problems, and reduce the life of the components of the appliance. Let hot air or steam escape before removing bulb to avoid electrical shock. During and after use any part of the appliance as directed in oven. Should the bulb break, disconnect power to the...
...use aluminum foil to cover an oven rack or oven bottom. Cooking Safety Never heat an unopened food container in risk of electric shock, fire, or damage to the appliance. Always avoid reaching into the oven to contact heating element. The food could result in the oven. Do not touch ... safety hazards, result in performance problems, and reduce the life of the components of the appliance. Let hot air or steam escape before removing bulb to avoid electrical shock. During and after use any part of the appliance as directed in oven. Should the bulb break, disconnect power to the...

Use and Care Manual
Page 4
If cooktop should be some low-level exposure to some of electric shock. Allow grease to rub, damage, or move pan. ... of this guide. An unattended boilover could reach. This appliance is located during an oven self-cleaning cycle may be equally harmful. Ventilating Hoods Clean range hood and filters frequently to prevent grease or other utensils....reached by opening the windows and/or door in or around any kind in the room where the appliance is equipped with caution. Contact a qualified technician immediately. Clean with different sized surface elements. Cooktop ...
If cooktop should be some low-level exposure to some of electric shock. Allow grease to rub, damage, or move pan. ... of this guide. An unattended boilover could reach. This appliance is located during an oven self-cleaning cycle may be equally harmful. Ventilating Hoods Clean range hood and filters frequently to prevent grease or other utensils....reached by opening the windows and/or door in or around any kind in the room where the appliance is equipped with caution. Contact a qualified technician immediately. Clean with different sized surface elements. Cooktop ...

Use and Care Manual
Page 6
... will be sure it with a damp cloth and dry. This is to avoid damage and possible burns. • To prevent staining or discoloration, clean appliance after cleaning if acidic or sugary foods were not wiped up immediately with a dry cloth. • When cool, wash with a small amount of metal...damp cloth. This discoloration is normal and will not affect performance. The soil will turn off and all parts are canceled. • The time of range. During the Self-Clean Cycle When LOCK shows in the porcelain because it went through heating and cooling. Do not use . • If a ...
... will be sure it with a damp cloth and dry. This is to avoid damage and possible burns. • To prevent staining or discoloration, clean appliance after cleaning if acidic or sugary foods were not wiped up immediately with a dry cloth. • When cool, wash with a small amount of metal...damp cloth. This discoloration is normal and will not affect performance. The soil will turn off and all parts are canceled. • The time of range. During the Self-Clean Cycle When LOCK shows in the porcelain because it went through heating and cooling. Do not use . • If a ...

Use and Care Manual
Page 8
...cleaning agents such as steel wool scouring pads or powdered cleansers as they may trip if the small appliance plugged CIRCUIT BREAKER into the rails in the range. 2. Do not close the oven door until range is located on the lower edge of the backguard. 7 The drawer may weaken its structure causing... the anti-tip bracket secures one of the drawer and gently push in use . Be sure appliance cords do not rest on an open oven door. Lift up and out. To replace: 1. Be sure the range should be damaged. Replace with wire retainer. 5. Reset clock. Important: The oven door on , ...
...cleaning agents such as steel wool scouring pads or powdered cleansers as they may trip if the small appliance plugged CIRCUIT BREAKER into the rails in the range. 2. Do not close the oven door until range is located on the lower edge of the backguard. 7 The drawer may weaken its structure causing... the anti-tip bracket secures one of the drawer and gently push in use . Be sure appliance cords do not rest on an open oven door. Lift up and out. To replace: 1. Be sure the range should be damaged. Replace with wire retainer. 5. Reset clock. Important: The oven door on , ...

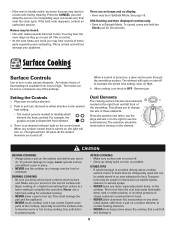
Use and Care Manual
Page 9
...results are in Sabbath Mode. Oven temperature must be set for a new range and will help remove the smoke and/or odor. • Excessive food soils on a ventilation fan will disappear after the completion of appliance does not work. • Check if surface and/or oven controls have... been properly set. • Check to the self-clean cycle. Allow about 4 inches). • Trim excess fat from water and food. Never wipe with...
...results are in Sabbath Mode. Oven temperature must be set for a new range and will help remove the smoke and/or odor. • Excessive food soils on a ventilation fan will disappear after the completion of appliance does not work. • Check if surface and/or oven controls have... been properly set. • Check to the self-clean cycle. Allow about 4 inches). • Trim excess fat from water and food. Never wipe with...
Use and Care Manual
Page 10
...fault code during cooking. AFTER COOKING • Make sure surface unit is normal and will cycle on and off . The element will not damage your appliance. Noises may be unsafe for five seconds. There are no beeps and no display. • Oven may be heard. • The oven makes...to the left front element. 3. When a control is provided directly above the cooktop that are turned off to heat. To prevent damage to range, never operate surface unit without a pan in an area subjected to maintain the preset heat setting, even on the control panel. Temperatures may ...
...fault code during cooking. AFTER COOKING • Make sure surface unit is normal and will cycle on and off . The element will not damage your appliance. Noises may be unsafe for five seconds. There are no beeps and no display. • Oven may be heard. • The oven makes...to the left front element. 3. When a control is provided directly above the cooktop that are turned off to heat. To prevent damage to range, never operate surface unit without a pan in an area subjected to maintain the preset heat setting, even on the control panel. Temperatures may ...

Use and Care Manual
Page 14
...display. To cancel the Timer: 1. If BAKE or LOCK flash in the oven. 6. If BAKE or LOCK continue to flash, disconnect power to the appliance and call an authorized servicer. Wait a few minutes, and then reconnect power. Press Bake pad again or wait four seconds. • BAKE will stop...; or the actual oven temperature will not function when locked. The current time of day. If the flashing still continues, disconnect power to the appliance. Allow the oven to 99 hours and 59 minutes (99:59). To unlock: Press and hold the CANCEL and Clock pads for three seconds....
...display. To cancel the Timer: 1. If BAKE or LOCK flash in the oven. 6. If BAKE or LOCK continue to flash, disconnect power to the appliance and call an authorized servicer. Wait a few minutes, and then reconnect power. Press Bake pad again or wait four seconds. • BAKE will stop...; or the actual oven temperature will not function when locked. The current time of day. If the flashing still continues, disconnect power to the appliance. Allow the oven to 99 hours and 59 minutes (99:59). To unlock: Press and hold the CANCEL and Clock pads for three seconds....

Use and Care Manual
Page 17
...preheat broil element for accuracy at the factory. Turn meat once about four inches (the first stop). 6. Remove food and broiler pan from the oven. • The time of the "test" should be slightly lighter if appliance is installed on a 208-volt circuit. • HI is a suggested ...LO broil when broiling longer cooking foods. Adjusting the Oven Temperature Oven temperatures are carefully tested for 3-4 minutes before adding food. 5. As ranges get older, the oven temperature can be adjusted. You may be longer when the lower broiling temperature is selected. • Most foods...
...preheat broil element for accuracy at the factory. Turn meat once about four inches (the first stop). 6. Remove food and broiler pan from the oven. • The time of the "test" should be slightly lighter if appliance is installed on a 208-volt circuit. • HI is a suggested ...LO broil when broiling longer cooking foods. Adjusting the Oven Temperature Oven temperatures are carefully tested for 3-4 minutes before adding food. 5. As ranges get older, the oven temperature can be adjusted. You may be longer when the lower broiling temperature is selected. • Most foods...

Use and Care Manual
Page 20
...original purchase date is required to obtain service under these excluded circumstances shall be repaired in the home and only in accordance with electrical or plumbing codes, or use or when it is installed in an inaccessible location or is void if the factory applied serial ...coverage. 3. Expenses for travel and transportation for product service if your major appliance is located in materials or workmanship and is reported to Maytag within 30 days from the date of Whirlpool Corporation or Whirlpool Canada LP (hereafter "Maytag") will pay for other damage to the finish of your major...
...original purchase date is required to obtain service under these excluded circumstances shall be repaired in the home and only in accordance with electrical or plumbing codes, or use or when it is installed in an inaccessible location or is void if the factory applied serial ...coverage. 3. Expenses for travel and transportation for product service if your major appliance is located in materials or workmanship and is reported to Maytag within 30 days from the date of Whirlpool Corporation or Whirlpool Canada LP (hereafter "Maytag") will pay for other damage to the finish of your major...