User Instructions
Page 2
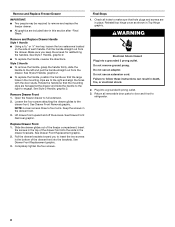
Before You Throw Away Your Old Refrigerator or Freezer: ■ Take off the doors. ■ Leave the shelves in death or brain damage. When Moving Your Refrigerator: Your refrigerator is heavy. Junked or abandoned refrigerators are getting rid of your old refrigerator, please follow these instructions to help prevent accidents. If you are still dangerous - Important information...
Before You Throw Away Your Old Refrigerator or Freezer: ■ Take off the doors. ■ Leave the shelves in death or brain damage. When Moving Your Refrigerator: Your refrigerator is heavy. Junked or abandoned refrigerators are getting rid of your old refrigerator, please follow these instructions to help prevent accidents. If you are still dangerous - Important information...

User Instructions
Page 3
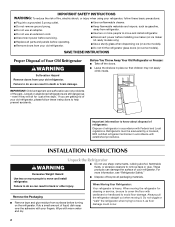
.... Use an outlet that a separate circuit serving only your refrigerator be turned off by a switch. Shelves and covers may break if exposed to shatter into many small, pebble-size pieces. Use both the Freezer and Refrigerator displays as shown. The preferred room temperature range for ¹...;⁄₂" (1.25 cm) of space on your model, turn the refrigerator to do not install the refrigerator near a heat source, such as an oven or...
.... Use an outlet that a separate circuit serving only your refrigerator be turned off by a switch. Shelves and covers may break if exposed to shatter into many small, pebble-size pieces. Use both the Freezer and Refrigerator displays as shown. The preferred room temperature range for ¹...;⁄₂" (1.25 cm) of space on your model, turn the refrigerator to do not install the refrigerator near a heat source, such as an oven or...
User Instructions
Page 6
... 2. Unplug refrigerator or disconnect power. 2. Remove the parts for the bottom hinge as shown in masking tape, pry the trim piece from the lower end of the handle firmly, slide the handle up and pull the handle straight out from the door. Freezer door models ...remove food and adjustable door or utility bins from the cabinet. See Style 2 Handle, graphic 1. 3. Keep the refrigerator doors closed until you . 6. Remove and Replace Refrigerator Door Handles Freezer drawer models 1. French Doors Style 1 Handles ■ Using a or ¹⁄₈" hex key, loosen the...
... 2. Unplug refrigerator or disconnect power. 2. Remove the parts for the bottom hinge as shown in masking tape, pry the trim piece from the lower end of the handle firmly, slide the handle up and pull the handle straight out from the door. Freezer door models ...remove food and adjustable door or utility bins from the cabinet. See Style 2 Handle, graphic 1. 3. Keep the refrigerator doors closed until you . 6. Remove and Replace Refrigerator Door Handles Freezer drawer models 1. French Doors Style 1 Handles ■ Using a or ¹⁄₈" hex key, loosen the...
User Instructions
Page 7
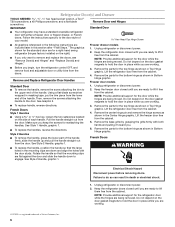
...: Provide additional support for the top hinge as shown in the Top Hinge graphic. Lift the refrigerator door from the bottom hinge pin. NOTE: The green, ground wire remains attached to the opposite side of the freezer drawer. Standard Door (optional) IMPORTANT: If you are working . 3. Move to the outside hole. Set aside...
...: Provide additional support for the top hinge as shown in the Top Hinge graphic. Lift the refrigerator door from the bottom hinge pin. NOTE: The green, ground wire remains attached to the opposite side of the freezer drawer. Standard Door (optional) IMPORTANT: If you are working . 3. Move to the outside hole. Set aside...
User Instructions
Page 8
...and off the screws. Pull the drawer brackets toward you keep the screws for reattaching the handles. Failure to insert the two screws in the bottom of the drawer front into a grounded 3 prong outlet. Make sure you to follow these instructions can result in death, fire, or electrical...from the drawer. Check all removable door parts to door and food to refrigerator. 8 Do not use an adapter. NOTE: Loosen screws three to the drawer front. See Drawer Front Replacement graphic. 2. Remove and Replace Freezer Drawer IMPORTANT: ■ Two people may be required to remove and ...
...and off the screws. Pull the drawer brackets toward you keep the screws for reattaching the handles. Failure to insert the two screws in the bottom of the drawer front into a grounded 3 prong outlet. Make sure you to follow these instructions can result in death, fire, or electrical...from the drawer. Check all removable door parts to door and food to refrigerator. 8 Do not use an adapter. NOTE: Loosen screws three to the drawer front. See Drawer Front Replacement graphic. 2. Remove and Replace Freezer Drawer IMPORTANT: ■ Two people may be required to remove and ...
User Instructions
Page 11
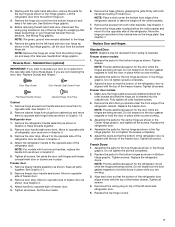
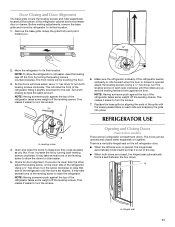
...automatically folds inward so that side of the refrigerator cabinet below the freezer door or drawer. This will close easier. 5. Replace the base grille by aligning the ends of the refrigerator. REFRIGERATOR USE A A. NOTE: Having someone push against the top of the refrigerator takes some weight off the leveling screws....¹⁄₄" 6. Door Closing and Door Alignment The base grille covers the leveling screws and roller assemblies located at the bottom of the refrigerator until the rollers are up and the leveling feet are firmly against the top of the...
...automatically folds inward so that side of the refrigerator cabinet below the freezer door or drawer. This will close easier. 5. Replace the base grille by aligning the ends of the refrigerator. REFRIGERATOR USE A A. NOTE: Having someone push against the top of the refrigerator takes some weight off the leveling screws....¹⁄₄" 6. Door Closing and Door Alignment The base grille covers the leveling screws and roller assemblies located at the bottom of the refrigerator until the rollers are up and the leveling feet are firmly against the top of the...
User Instructions
Page 12
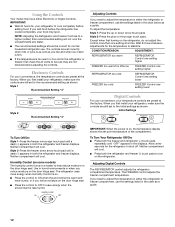
... and more than recommended setting will cool. ■ Press both the freezer and refrigerator (+) touch pads repeatedly until a dash (-) appears in the displays. NOTE: Adjusting the Refrigerator and Freezer Controls to help reduce moisture on . ■ Press the control to.../REASON: ADJUSTMENT: REFRIGERATOR too warm REFRIGERATOR Control one setting higher FREEZER too warm/too little ice FREEZER Control one setting higher REFRIGERATOR too cold REFRIGERATOR Control one setting lower FREEZER too cold FREEZER Control one setting at the factory. The refrigerator uses more energy ...
... and more than recommended setting will cool. ■ Press both the freezer and refrigerator (+) touch pads repeatedly until a dash (-) appears in the displays. NOTE: Adjusting the Refrigerator and Freezer Controls to help reduce moisture on . ■ Press the control to.../REASON: ADJUSTMENT: REFRIGERATOR too warm REFRIGERATOR Control one setting higher FREEZER too warm/too little ice FREEZER Control one setting higher REFRIGERATOR too cold REFRIGERATOR Control one setting lower FREEZER too cold FREEZER Control one setting at the factory. The refrigerator uses more energy ...
User Instructions
Page 13
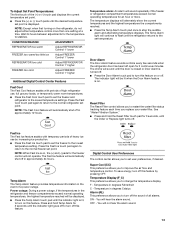
...Ice is turned off . CONDITION/REASON: ADJUSTMENT: REFRIGERATOR too warm Adjust REFRIGERATOR Control 1° lower FREEZER too warm/too little ice Adjust FREEZER Control 1° lower REFRIGERATOR too cold Adjust REFRIGERATOR Control 1° higher FREEZER too cold Adjust FREEZER Control 1° higher Additional Digital Control Center ... grocery loads, or temporarily warm room temperatures. ■ Press the Fast Cool touch pad to set the freezer and refrigerator to the lowest temperature settings. The chime will not operate. See "Water Filtration System." ■ Press and hold...
...Ice is turned off . CONDITION/REASON: ADJUSTMENT: REFRIGERATOR too warm Adjust REFRIGERATOR Control 1° lower FREEZER too warm/too little ice Adjust FREEZER Control 1° lower REFRIGERATOR too cold Adjust REFRIGERATOR Control 1° higher FREEZER too cold Adjust FREEZER Control 1° higher Additional Digital Control Center ... grocery loads, or temporarily warm room temperatures. ■ Press the Fast Cool touch pad to set the freezer and refrigerator to the lowest temperature settings. The chime will not operate. See "Water Filtration System." ■ Press and hold...
User Instructions
Page 14
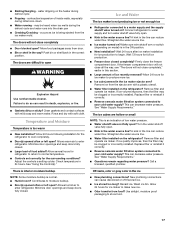
...is operating properly and is cleared from the system, water may be selected to scroll through 9). The preference name will appear in the Refrigerator display. 2. Avoid connecting the ice maker to avoid flooding. Auto Light Level Selection (LL) This preference allows you to adjust the... for the click. FRUIT/LOW (open) for best storage of ice approximately every 3 hours. ■ To increase ice production, lower the freezer and refrigerator temperature. To manually turn the ice maker OFF, lift the wire shutoff arm to brightest (settings 1 through the preference names. As ice is...
...is operating properly and is cleared from the system, water may be selected to scroll through 9). The preference name will appear in the Refrigerator display. 2. Avoid connecting the ice maker to avoid flooding. Auto Light Level Selection (LL) This preference allows you to adjust the... for the click. FRUIT/LOW (open) for best storage of ice approximately every 3 hours. ■ To increase ice production, lower the freezer and refrigerator temperature. To manually turn the ice maker OFF, lift the wire shutoff arm to brightest (settings 1 through the preference names. As ice is...
User Instructions
Page 15
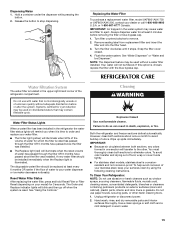
...Hazard Use nonflammable cleaner. Hand wash, rinse, and dry removable parts and interior surfaces thoroughly. Dispensing Water 1. Both the refrigerator and freezer sections defrost automatically. However, clean both sections to the other harsh cleaning tools. 1. To avoid odor transfer and drying out...800-688-9900 U.S.A. Turn the filter clockwise until it is corrosionresistant and not corrosion-proof. See "Using the Controls." Unplug refrigerator or disconnect power. 2. Water Filter Status Lights When a water filter has been installed in warm water. 15 The disposable water...
...Hazard Use nonflammable cleaner. Hand wash, rinse, and dry removable parts and interior surfaces thoroughly. Dispensing Water 1. Both the refrigerator and freezer sections defrost automatically. However, clean both sections to the other harsh cleaning tools. 1. To avoid odor transfer and drying out...800-688-9900 U.S.A. Turn the filter clockwise until it is corrosionresistant and not corrosion-proof. See "Using the Controls." Unplug refrigerator or disconnect power. 2. Water Filter Status Lights When a water filter has been installed in warm water. 15 The disposable water...
User Instructions
Page 17
... is in the water source line? Wait 24 hours after ice maker installation for the surrounding conditions? Firmly close the freezer compartment door. Remove ice from the ice maker mold. Replace filter or reinstall it correctly. ■ Reverse osmosis water... filtration system connected to a water supply and the supply shutoff valve turned on the refrigerator? See "Water Supply Requirements." ■ Questions remain regarding water pressure? Temperature and Moisture Temperature is an indication of food added...
... is in the water source line? Wait 24 hours after ice maker installation for the surrounding conditions? Firmly close the freezer compartment door. Remove ice from the ice maker mold. Replace filter or reinstall it correctly. ■ Reverse osmosis water... filtration system connected to a water supply and the supply shutoff valve turned on the refrigerator? See "Water Supply Requirements." ■ Questions remain regarding water pressure? Temperature and Moisture Temperature is an indication of food added...
User Instructions
Page 21
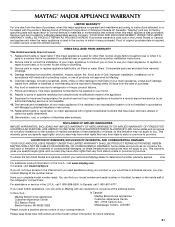
... repaired in accordance with electrical or plumbing codes, or use your major appliance, to replace or repair house fuses, or to Maytag within 30 days from unauthorized modifications made to refrigerator or freezer product failures. 7. YOUR SOLE AND EXCLUSIVE REMEDY UNDER THIS LIMITED WARRANTY SHALL BE PRODUCT REPAIR AS PROVIDED HEREIN. This limited...
... repaired in accordance with electrical or plumbing codes, or use your major appliance, to replace or repair house fuses, or to Maytag within 30 days from unauthorized modifications made to refrigerator or freezer product failures. 7. YOUR SOLE AND EXCLUSIVE REMEDY UNDER THIS LIMITED WARRANTY SHALL BE PRODUCT REPAIR AS PROVIDED HEREIN. This limited...

Parts Diagram
Page 4
No. Motor 16 12466105 Switch, Light 17 12932103 Guide−Fill Tube 18 Cradle−Basket W10280608 Left W10280613 Right 19 W10120018 Slide, Drawer (2) 20 A3189397 Gasket, Bottom 21 Adapter, Slide W10284684 Left W10284685 Right 22 13024803 Cover, Fan Shroud 23 13057901 Shroud, Evap.Fan 24 2169142 Fan, Evaporator 25... 11 12226110 Cover, Evaporator 12 12990101 Screw (7) 13 Bracket, Door W10122147 Left W10122148 Right 14 W10277025 Module, Light 15 13058002 Clip, Evap. FREEZER LINER PARTS For Models: MBF1958WEW1, MBF1958WEB1 (White) (Black) Illus. Part No.
No. Motor 16 12466105 Switch, Light 17 12932103 Guide−Fill Tube 18 Cradle−Basket W10280608 Left W10280613 Right 19 W10120018 Slide, Drawer (2) 20 A3189397 Gasket, Bottom 21 Adapter, Slide W10284684 Left W10284685 Right 22 13024803 Cover, Fan Shroud 23 13057901 Shroud, Evap.Fan 24 2169142 Fan, Evaporator 25... 11 12226110 Cover, Evaporator 12 12990101 Screw (7) 13 Bracket, Door W10122147 Left W10122148 Right 14 W10277025 Module, Light 15 13058002 Clip, Evap. FREEZER LINER PARTS For Models: MBF1958WEW1, MBF1958WEB1 (White) (Black) Illus. Part No.


