Owners Manual
Page 2
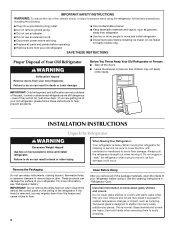
... are heavy. If you remove all parts and panels before using the refrigerator, follow these instructions to do so can damage the surface of Your Old Refrigerator WARNING Suffocation Hazard Remove doors from refrigerator. ■ Use two or more information, see "Refrigerator Safety." Before You Throw Away Your Old Refrigerator or Freezer: ■ Take off the doors...
... are heavy. If you remove all parts and panels before using the refrigerator, follow these instructions to do so can damage the surface of Your Old Refrigerator WARNING Suffocation Hazard Remove doors from refrigerator. ■ Use two or more information, see "Refrigerator Safety." Before You Throw Away Your Old Refrigerator or Freezer: ■ Take off the doors...

Owners Manual
Page 4
...Install copper tubing only in a container or sink, and turn the refrigerator on the top side of between 30 and 120 psi (207 and 827 kPa). Connect to 3.... Check to allow for leaks. If you have questions about your local plumbing codes. Add 7 ft (2.1 m) to see whether the sediment filter in the valve. 4. Shutoff valve G. Measure from .... A G B C FE A. Do not overtighten. 8. Water Supply Requirements Gather the required tools and parts before you may crush the copper tubing. 7. Read and follow the instructions provided with the pipe clamp. Packing...
...Install copper tubing only in a container or sink, and turn the refrigerator on the top side of between 30 and 120 psi (207 and 827 kPa). Connect to 3.... Check to allow for leaks. If you have questions about your local plumbing codes. Add 7 ft (2.1 m) to see whether the sediment filter in the valve. 4. Shutoff valve G. Measure from .... A G B C FE A. Do not overtighten. 8. Water Supply Requirements Gather the required tools and parts before you may crush the copper tubing. 7. Read and follow the instructions provided with the pipe clamp. Packing...

Owners Manual
Page 5
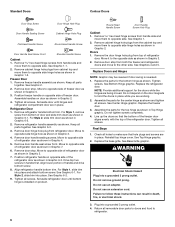
... only want to reverse your nearest appliance dealer. Unplug refrigerator or disconnect power. 2. Lift the freezer door free from the cabinet. 6. If you have either tube ..., follow these instructions can result in Top Hinge graphic. Open refrigerator door and remove base grille from your doors so that leak. Lift the refrigerator door free from the cabinet. 5. ... either standard doors or contour doors. If you want to the refrigerator as shown. See Base Grille graphic. 3. Remove the parts for leaks. Reverse Doors (optional) IMPORTANT: If you are included...
... only want to reverse your nearest appliance dealer. Unplug refrigerator or disconnect power. 2. Lift the freezer door free from the cabinet. 6. If you have either tube ..., follow these instructions can result in Top Hinge graphic. Open refrigerator door and remove base grille from your doors so that leak. Lift the refrigerator door free from the cabinet. 5. ... either standard doors or contour doors. If you want to the refrigerator as shown. See Base Grille graphic. 3. Remove the parts for leaks. Reverse Doors (optional) IMPORTANT: If you are included...
Owners Manual
Page 6
... door handle sealing screws. Move to opposite side hinge holes as shown. Check all parts together. See Base Grille graphic. Remove freezer handle assembly as shown in Graphic 2. 4. Refrigerator Door 1. Remove door stop . See Graphics 4 and 5. Do not use an extension...depend on product. Tighten all removable door parts to doors and food to follow these instructions can result in Top Hinge graphic. Keep all screws. See Graphic 6-2. 9. See Graphic 6-1. Replace the freezer door. 3. Failure to refrigerator. 6 Round-Head Handle Screw Door Handle...
... door handle sealing screws. Move to opposite side hinge holes as shown. Check all parts together. See Base Grille graphic. Remove freezer handle assembly as shown in Graphic 2. 4. Refrigerator Door 1. Remove door stop . See Graphics 4 and 5. Do not use an extension...depend on product. Tighten all removable door parts to doors and food to follow these instructions can result in Top Hinge graphic. Keep all screws. See Graphic 6-2. 9. See Graphic 6-1. Replace the freezer door. 3. Failure to refrigerator. 6 Round-Head Handle Screw Door Handle...
Owners Manual
Page 9
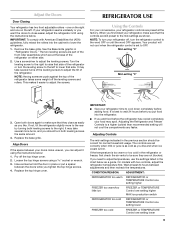
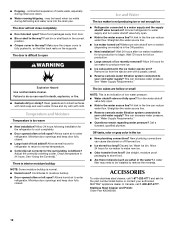
...The two leveling screws are part of the front roller assemblies which are preset at the base of the refrigerator or turn the leveling screw to be correct for normal household usage. NOTE: Having someone hold the door in the refrigerator or freezer, first check the air ... spacer between adjustments and then recheck the temperatures. Pry off the top hinge cover. 2. Replace the top hinge cover. IMPORTANT: ■ Give your refrigerator time to cool down completely before the refrigerator has cooled completely, your refrigerator seems unsteady or you want the doors to close as easily as...
...The two leveling screws are part of the front roller assemblies which are preset at the base of the refrigerator or turn the leveling screw to be correct for normal household usage. NOTE: Having someone hold the door in the refrigerator or freezer, first check the air ... spacer between adjustments and then recheck the temperatures. Pry off the top hinge cover. 2. Replace the top hinge cover. IMPORTANT: ■ Give your refrigerator time to cool down completely before the refrigerator has cooled completely, your refrigerator seems unsteady or you want the doors to close as easily as...
Owners Manual
Page 10
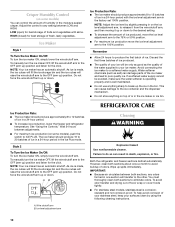
...(closed) for the click. Discard the first three batches of ice produced. ■ The quality of your surfaces clean by slightly pressing in on top of or in the ice maker or ice bin. You must thoroughly clean both sections about once a month to the OFF (arm up spills immediately.... See "Using the Controls." If a softened water supply cannot be only as good as salt) can damage parts of the ice maker and lead to the other. Both the refrigerator and freezer sections defrost automatically. Crisper Humidity Control (on some models) You can control the amount of humidity in the moisture...
...(closed) for the click. Discard the first three batches of ice produced. ■ The quality of your surfaces clean by slightly pressing in on top of or in the ice maker or ice bin. You must thoroughly clean both sections about once a month to the OFF (arm up spills immediately.... See "Using the Controls." If a softened water supply cannot be only as good as salt) can damage parts of the ice maker and lead to the other. Both the refrigerator and freezer sections defrost automatically. Crisper Humidity Control (on some models) You can control the amount of humidity in the moisture...
Owners Manual
Page 11
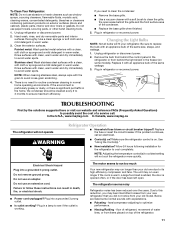
.... ■ Pulsating - In the U.S.A., www.maytag.com In Canada, www.maytag.ca The refrigerator will fit your old model. NOTE: Adjusting the...top of the condenser. ■ Replace the base grille when finished. 5. Plug in the freezer (on ? Do not use an adapter. The motor seems to run too much Your new refrigerator may run longer than your new refrigerator that you need for the refrigerator to avoid water spots. The refrigerator seems noisy Refrigerator... refrigerator. 11 Replace the fuse or reset the circuit breaker. Hand wash, rinse, and dry removable parts ...
.... ■ Pulsating - In the U.S.A., www.maytag.com In Canada, www.maytag.ca The refrigerator will fit your old model. NOTE: Adjusting the...top of the condenser. ■ Replace the base grille when finished. 5. Plug in the freezer (on ? Do not use an adapter. The motor seems to run too much Your new refrigerator may run longer than your new refrigerator that you need for the refrigerator to avoid water spots. The refrigerator seems noisy Refrigerator... refrigerator. 11 Replace the fuse or reset the circuit breaker. Hand wash, rinse, and dry removable parts ...
Owners Manual
Page 12
...keep door fully closed . A kink in , so that the back rests on ? Wait 24 hours after ice maker installation for the refrigerator to your authorized MAYTAG® appliance dealer. Remove ice from the ejector arm with mild soap and warm water. This can reduce water flow. See "Water Supply...death, explosion, or fire. ■ Gaskets dirty or sticky? Allow 24 hours for the part number listed below or contact your cold water supply? Discard ice. ■ Popping - Allows warm air to enter refrigerator. A kink in the line can result in the ice maker ejector arm? Turn the ...
...keep door fully closed . A kink in , so that the back rests on ? Wait 24 hours after ice maker installation for the refrigerator to your authorized MAYTAG® appliance dealer. Remove ice from the ejector arm with mild soap and warm water. This can reduce water flow. See "Water Supply...death, explosion, or fire. ■ Gaskets dirty or sticky? Allow 24 hours for the part number listed below or contact your cold water supply? Discard ice. ■ Popping - Allows warm air to enter refrigerator. A kink in the line can result in the ice maker ejector arm? Turn the ...
Owners Manual
Page 13
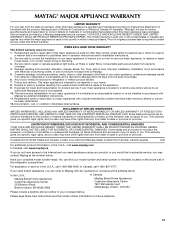
... LIMITED WARRANTY SHALL BE PRODUCT REPAIR AS PROVIDED HEREIN. For assistance or service in accordance with Maytag's published installation instructions. 11. Service calls to refrigerator or freezer product failures. 7. This major appliance is used in a manner that is inconsistent to published ...operated and maintained according to instructions attached to or furnished with the product, Maytag brand of Whirlpool Corporation or Whirlpool Canada LP (hereafter "Maytag") will pay for factory specified parts and repair labor to correct defects in materials or workmanship that existed when...
... LIMITED WARRANTY SHALL BE PRODUCT REPAIR AS PROVIDED HEREIN. For assistance or service in accordance with Maytag's published installation instructions. 11. Service calls to refrigerator or freezer product failures. 7. This major appliance is used in a manner that is inconsistent to published ...operated and maintained according to instructions attached to or furnished with the product, Maytag brand of Whirlpool Corporation or Whirlpool Canada LP (hereafter "Maytag") will pay for factory specified parts and repair labor to correct defects in materials or workmanship that existed when...


