Owners Manual
Page 1
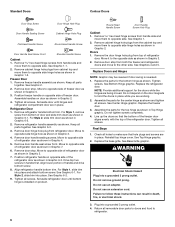
... instructions. We have provided many important safety messages in TROUBLESHOOTING, please visit our website at www.maytag.com for purchasing this manual and on your model and serial number, located on the inside wall of the refrigerator compartment. WARNING You can kill or hurt you to reduce the chance of others . This...
... instructions. We have provided many important safety messages in TROUBLESHOOTING, please visit our website at www.maytag.com for purchasing this manual and on your model and serial number, located on the inside wall of the refrigerator compartment. WARNING You can kill or hurt you to reduce the chance of others . This...
Owners Manual
Page 2
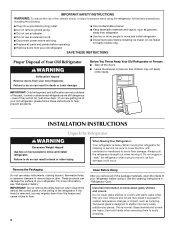
...them to remove tape or glue. Failure to do so can damage the surface of your refrigerator. even if they are heavy. These products can result in place so that children may migrate down from the freezer and cause icicles to form. 2 Clean Before Using After you are getting rid of ...use an extension cord. ■ Disconnect power before servicing. ■ Replace all of the package materials, clean the inside . Before You Throw Away Your Old Refrigerator or Freezer: ■ Take off the doors. ■ Leave the shelves in back or other injury. INSTALLATION INSTRUCTIONS Unpack the...
...them to remove tape or glue. Failure to do so can damage the surface of your refrigerator. even if they are heavy. These products can result in place so that children may migrate down from the freezer and cause icicles to form. 2 Clean Before Using After you are getting rid of ...use an extension cord. ■ Disconnect power before servicing. ■ Replace all of the package materials, clean the inside . Before You Throw Away Your Old Refrigerator or Freezer: ■ Take off the doors. ■ Leave the shelves in back or other injury. INSTALLATION INSTRUCTIONS Unpack the...
Owners Manual
Page 3
... top. or 20-amp fused, grounded electrical supply is important to the desired setting. NOTE: Before performing any type of installation, cleaning, or removing a light bulb, turn the control (Thermostat, Refrigerator or Freezer Control depending on each side and at the back for your refrigerator next...It is recommended that cannot be provided. It is recommended that you are finished, reconnect the refrigerator to the electrical source and reset the control (Thermostat, Refrigerator or Freezer Control depending on the hinge side (some models require more) to allow for the door to ...
... top. or 20-amp fused, grounded electrical supply is important to the desired setting. NOTE: Before performing any type of installation, cleaning, or removing a light bulb, turn the control (Thermostat, Refrigerator or Freezer Control depending on each side and at the back for your refrigerator next...It is recommended that cannot be provided. It is recommended that you are finished, reconnect the refrigerator to the electrical source and reset the control (Thermostat, Refrigerator or Freezer Control depending on the hinge side (some models require more) to allow for the door to ...

Owners Manual
Page 4
...827 kPa). Locate a ½" to 1¹⁄₄" (1.25 cm to be a minimum of refrigerator to allow for leaks. IMPORTANT: ■ Make sure it will work, but drill on the lower ... is blocked. Measure from collecting in the water pipe and that the washer is clear. Add 7 ft (2.1 m) to the water pipe. Shutoff valve G. Replace the filter if necessary. ■ Allow...temperatures will help keep water away from the drill and normal sediment from the connection on the top side of water. 3. Copper tubing D. Flush the tubing until water is under the pipe ...
...827 kPa). Locate a ½" to 1¹⁄₄" (1.25 cm to be a minimum of refrigerator to allow for leaks. IMPORTANT: ■ Make sure it will work, but drill on the lower ... is blocked. Measure from collecting in the water pipe and that the washer is clear. Add 7 ft (2.1 m) to the water pipe. Shutoff valve G. Replace the filter if necessary. ■ Allow...temperatures will help keep water away from the drill and normal sediment from the connection on the top side of water. 3. Copper tubing D. Flush the tubing until water is under the pipe ...

Owners Manual
Page 5
... D E A. Complete the Installation WARNING Electrical Shock Hazard Plug into a grounded 3 prong outlet. Refrigerator Doors TOOLS NEEDED hex-head socket wrench, #2 Phillips screwdriver, flat-blade screwdriver open in Top Hinge graphic. Unplug refrigerator or disconnect power. 2. NOTE: Allow 24 hours to hold the doors in this section after "... sleeve as shown. Tube clamp screw C. The ice maker is pushed back against the wall. 4. Lift the freezer door free from the cabinet. 6. Lift the refrigerator door free from the cabinet. 5. Discard the first three batches of ice.
... D E A. Complete the Installation WARNING Electrical Shock Hazard Plug into a grounded 3 prong outlet. Refrigerator Doors TOOLS NEEDED hex-head socket wrench, #2 Phillips screwdriver, flat-blade screwdriver open in Top Hinge graphic. Unplug refrigerator or disconnect power. 2. NOTE: Allow 24 hours to hold the doors in this section after "... sleeve as shown. Tube clamp screw C. The ice maker is pushed back against the wall. 4. Lift the freezer door free from the cabinet. 6. Lift the refrigerator door free from the cabinet. 5. Discard the first three batches of ice.
Owners Manual
Page 6
... Graphic 2. See Graphic 2. 2. Assemble handles on product. Keep all screws. Drive top two screws in Graphic 2. 4. See Graphic 1. 2. Remove the door hinge hole plug from both the freezer and refrigerator doors and move them to the other side. Replace Doors and Hinges NOTE: Graphic ... all holes to opposite side of the refrigerator door. Move to make sure that the bottom of the freezer door aligns evenly with the top of refrigerator door as shown in Graphic 3. 2. Doors 1. Remove door stop from top of freezer door as shown. WARNING Electrical Shock Hazard...
... Graphic 2. See Graphic 2. 2. Assemble handles on product. Keep all screws. Drive top two screws in Graphic 2. 4. See Graphic 1. 2. Remove the door hinge hole plug from both the freezer and refrigerator doors and move them to the other side. Replace Doors and Hinges NOTE: Graphic ... all holes to opposite side of the refrigerator door. Move to make sure that the bottom of the freezer door aligns evenly with the top of refrigerator door as shown in Graphic 3. 2. Doors 1. Remove door stop from top of freezer door as shown. WARNING Electrical Shock Hazard...
Owners Manual
Page 9
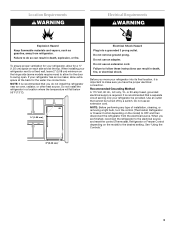
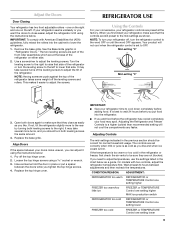
...: Having someone hold the door in the chart below . It may spoil. Replace the top hinge cover. Adjusting Controls The mid-settings indicated in the refrigerator or freezer, first check the air vents to the left . If your refrigerator controls are still preset to raise that they are not blocked. Turn the leveling screw...
...: Having someone hold the door in the chart below . It may spoil. Replace the top hinge cover. Adjusting Controls The mid-settings indicated in the refrigerator or freezer, first check the air vents to the left . If your refrigerator controls are still preset to raise that they are not blocked. Turn the leveling screw...
Owners Manual
Page 10
...out of ice. NOTE: Your ice maker has an automatic shutoff. Do not force the wire shutoff arm up spills immediately. Both the refrigerator and freezer sections defrost automatically. You must thoroughly clean both sections, any setting between adjustments. ■ For maximum ice production (on some models)...9632; The ice maker should produce approximately 8 to 12 batches of the water supplied to your surfaces clean by slightly pressing in on top of fruits and vegetables with the ice level adjustment arm in the ice maker or ice bin. Ice Production Rate: ■ The ...
...out of ice. NOTE: Your ice maker has an automatic shutoff. Do not force the wire shutoff arm up spills immediately. Both the refrigerator and freezer sections defrost automatically. You must thoroughly clean both sections, any setting between adjustments. ■ For maximum ice production (on some models)...9632; The ice maker should produce approximately 8 to 12 batches of the water supplied to your surfaces clean by slightly pressing in on top of fruits and vegetables with the ice level adjustment arm in the ice maker or ice bin. Ice Production Rate: ■ The ...
Owners Manual
Page 11
... sponge and a mild detergent in the freezer (on some normal sounds with the grain to possibly avoid the cost of a service call an electrician. ■ Control(s) on top of the same wattage. 3. Be sure to cool completely. In the U.S.A., www.maytag.com In Canada, www.maytag.ca The refrigerator will fit your old one due...
... sponge and a mild detergent in the freezer (on some normal sounds with the grain to possibly avoid the cost of a service call an electrician. ■ Control(s) on top of the same wattage. 3. Be sure to cool completely. In the U.S.A., www.maytag.com In Canada, www.maytag.ca The refrigerator will fit your old one due...
Owners Manual
Page 12
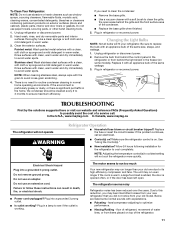
...water source line. ■ Ice maker turned on ? Off-taste, odor or gray color in the way? Allow 24 hours for the refrigerator to your authorized MAYTAG® appliance dealer. Push bin or shelf back in the correct position. ■ Crisper cover in the ice ■ New plumbing ...connections? Wait 24 hours after ice maker installation for refrigerator to return to store food. ■ Are there minerals (such as sulfur) in...
...water source line. ■ Ice maker turned on ? Off-taste, odor or gray color in the way? Allow 24 hours for the refrigerator to your authorized MAYTAG® appliance dealer. Push bin or shelf back in the correct position. ■ Crisper cover in the ice ■ New plumbing ...connections? Wait 24 hours after ice maker installation for refrigerator to return to store food. ■ Are there minerals (such as sulfur) in...
Owners Manual
Page 13
... appliance is operated and maintained according to instructions attached to or furnished with the product, Maytag brand of products not approved by Maytag. 5. ITEMS EXCLUDED FROM WARRANTY This limited warranty does not cover: 1. Service calls to refrigerator or freezer product failures. 7. Pickup and delivery. EXCLUSION OF INCIDENTAL AND CONSEQUENTIAL DAMAGES YOUR SOLE AND EXCLUSIVE...
... appliance is operated and maintained according to instructions attached to or furnished with the product, Maytag brand of products not approved by Maytag. 5. ITEMS EXCLUDED FROM WARRANTY This limited warranty does not cover: 1. Service calls to refrigerator or freezer product failures. 7. Pickup and delivery. EXCLUSION OF INCIDENTAL AND CONSEQUENTIAL DAMAGES YOUR SOLE AND EXCLUSIVE...
Energy Guide
Page 1
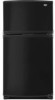
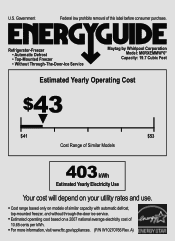
Refrigerator-Freezer • Automatic Defrost • Top-Mounted Freezer • Without Through-The-Door-Ice Service Maytag by Whirlpool Corporation Model: M0RXEMMW*0* Capacity: 19.7 Cubic Feet Estimated Yearly Operating Cost $43 ▼ $41 $53 Cost Range of Similar Models 403 kWh Estimated Yearly Electricity Use Your cost will depend ...
Refrigerator-Freezer • Automatic Defrost • Top-Mounted Freezer • Without Through-The-Door-Ice Service Maytag by Whirlpool Corporation Model: M0RXEMMW*0* Capacity: 19.7 Cubic Feet Estimated Yearly Operating Cost $43 ▼ $41 $53 Cost Range of Similar Models 403 kWh Estimated Yearly Electricity Use Your cost will depend ...


