
Instruction Manual
Page 2
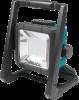
...to change without notice. • Specifications and battery cartridge may differ from the tool. 2. ENGLISH (Original instructions) SPECIFICATIONS Model LED Operating time* (with Battery BL1830) Power source Standard battery cartridge Voltage (with battery operation) Dimensions (L x W x H) Net weight Pressure receiving... area (Lens area) DML805 20 pcs, 10 W (Approximately) High: 5 hours / Low: 10 hours 100-240 V 50-60 Hz AC or 14.4 V / 18 V DC ...
...to change without notice. • Specifications and battery cartridge may differ from the tool. 2. ENGLISH (Original instructions) SPECIFICATIONS Model LED Operating time* (with Battery BL1830) Power source Standard battery cartridge Voltage (with battery operation) Dimensions (L x W x H) Net weight Pressure receiving... area (Lens area) DML805 20 pcs, 10 W (Approximately) High: 5 hours / Low: 10 hours 100-240 V 50-60 Hz AC or 14.4 V / 18 V DC ...

Instruction Manual
Page 3
Keep cord away from exposure. Damaged or entangled cords increase the risk of light directly. Do not look in the LED light or see the source of electric shock. 8. b) The most restrictive optical radiation hazard and other battery cartridges may create a risk of injury and fire. 3. i) ...
Keep cord away from exposure. Damaged or entangled cords increase the risk of light directly. Do not look in the LED light or see the source of electric shock. 8. b) The most restrictive optical radiation hazard and other battery cartridges may create a risk of injury and fire. 3. i) ...

Instruction Manual
Page 5
... 3. Battery cartridge Press the switch once, the light shines brightly (high mode). Then close the battery cover. When the battery becomes low, the LED lights go out except one LED (the one on the tool. 1 Connect the plug to the tool and battery cartridge and a personal injury. 3 1. Then, after approximately five to.... 5 ASSEMBLY CAUTION: • Always be sure that the tool is switched off, unplugged, and the battery cartridge is removed before carrying out any work on LED light 1 1. Turning on the tool.
... 3. Battery cartridge Press the switch once, the light shines brightly (high mode). Then close the battery cover. When the battery becomes low, the LED lights go out except one LED (the one on the tool. 1 Connect the plug to the tool and battery cartridge and a personal injury. 3 1. Then, after approximately five to.... 5 ASSEMBLY CAUTION: • Always be sure that the tool is switched off, unplugged, and the battery cartridge is removed before carrying out any work on LED light 1 1. Turning on the tool.
