
Online User’s Guide for Mac OS 8.6 to 9.2
Page 50
www.lexmark.com Step 1: Load the labels • Use only labels designed for inkjet printers. • If your labels came with instructions, read them carefully. • Make sure your labels are not used or damaged. • Do not print ... on the thickness of the sheets. Printing ideas 43 Printing labels You can load up to the left edge of the sheet of paper tray 1. Lexmark Z65 Lexmark Z65n Printer overview Basic printing Printing ideas Maintenance Troubleshooting Notices Index Using this Guide...
www.lexmark.com Step 1: Load the labels • Use only labels designed for inkjet printers. • If your labels came with instructions, read them carefully. • Make sure your labels are not used or damaged. • Do not print ... on the thickness of the sheets. Printing ideas 43 Printing labels You can load up to the left edge of the sheet of paper tray 1. Lexmark Z65 Lexmark Z65n Printer overview Basic printing Printing ideas Maintenance Troubleshooting Notices Index Using this Guide...

Online User’s Guide for Mac OS 8.6 to 9.2
Page 63
..., read them carefully. • Make sure the rough (print) side of the transparencies. www.lexmark.com Lexmark Z65 Lexmark Z65n Printer overview Basic printing Printing ideas Maintenance Troubleshooting Notices Index Using this Guide... Printing ideas 56 Printing ...transparencies You can load up to the left edge of paper tray 1. Step 1: Load the transparencies • Use transparencies designed for inkjet...
..., read them carefully. • Make sure the rough (print) side of the transparencies. www.lexmark.com Lexmark Z65 Lexmark Z65n Printer overview Basic printing Printing ideas Maintenance Troubleshooting Notices Index Using this Guide... Printing ideas 56 Printing ...transparencies You can load up to the left edge of paper tray 1. Step 1: Load the transparencies • Use transparencies designed for inkjet...

Online User’s Guide for Mac OS 8.6 to 9.2
Page 106
...not force the paper too far into the printer. For help , see Basic printing. • You do not load too much paper. Lexmark Z65 Lexmark Z65n Printer overview Basic printing Printing ideas Maintenance Troubleshooting Notices Index Using this Guide... A4 size paper should extend slightly beyond the top of plain paper...Make sure: • The edges of your paper are not curled. • Your paper is recommended for the type of document you are correct for inkjet printers. • A piece of paper from a previous print job is on the weight of the paper, paper tray 1 can hold up to ...
...not force the paper too far into the printer. For help , see Basic printing. • You do not load too much paper. Lexmark Z65 Lexmark Z65n Printer overview Basic printing Printing ideas Maintenance Troubleshooting Notices Index Using this Guide... A4 size paper should extend slightly beyond the top of plain paper...Make sure: • The edges of your paper are not curled. • Your paper is recommended for the type of document you are correct for inkjet printers. • A piece of paper from a previous print job is on the weight of the paper, paper tray 1 can hold up to ...
Online User’s Guide for Mac OS 8.6 to 9.2
Page 116
For help , see Basic printing. • Try Cleaning the print cartridge nozzles. Lexmark Z65 Lexmark Z65n Printer overview Basic printing Printing ideas Maintenance Troubleshooting Notices Index Using this section to dry function. • Remove each page as Better or Best.... pages to help , see Printing photos or Printing transparencies. • Try the Wait for an inkjet printer. • Make sure you loaded the paper correctly into paper tray 1 (with specialty paper. www.lexmark.com For help solve problems with print side facing you ) and selected the appropriate settings in the...
For help , see Basic printing. • Try Cleaning the print cartridge nozzles. Lexmark Z65 Lexmark Z65n Printer overview Basic printing Printing ideas Maintenance Troubleshooting Notices Index Using this section to dry function. • Remove each page as Better or Best.... pages to help , see Printing photos or Printing transparencies. • Try the Wait for an inkjet printer. • Make sure you loaded the paper correctly into paper tray 1 (with specialty paper. www.lexmark.com For help solve problems with print side facing you ) and selected the appropriate settings in the...

Online User’s Guide for Mac OS X 10.0.3 to 10.1
Page 41
Lexmark Z65 Lexmark Z65n Printer overview Basic printing Printing ideas Maintenance Troubleshooting Notices Index Using this Guide... Step 1: Load the labels • Use only labels designed for inkjet printers. • If your labels came with instructions, read them carefully. • Make sure your labels are not used or damaged. • Do not...far into the printer. • Squeeze and slide the paper guide to 25 sheets of labels, depending on the thickness of the sheets. www.lexmark.com Printing ideas 35 Printing labels You can load up to the left edge of the sheet of paper tray 1.
Lexmark Z65 Lexmark Z65n Printer overview Basic printing Printing ideas Maintenance Troubleshooting Notices Index Using this Guide... Step 1: Load the labels • Use only labels designed for inkjet printers. • If your labels came with instructions, read them carefully. • Make sure your labels are not used or damaged. • Do not...far into the printer. • Squeeze and slide the paper guide to 25 sheets of labels, depending on the thickness of the sheets. www.lexmark.com Printing ideas 35 Printing labels You can load up to the left edge of the sheet of paper tray 1.

Online User’s Guide for Mac OS X 10.0.3 to 10.1
Page 50
...and down. • Load the transparencies vertically against the right side of the transparencies. Step 1: Load the transparencies • Use transparencies designed for inkjet printers. • If the transparencies have a removable strip, make sure you separate the paper from you load them. • Make sure your ... (print) side of the transparencies. Printing ideas 44 Printing transparencies You can load up to the left edge of paper tray 1. Lexmark Z65 Lexmark Z65n Printer overview Basic printing Printing ideas Maintenance Troubleshooting Notices Index Using this Guide...
...and down. • Load the transparencies vertically against the right side of the transparencies. Step 1: Load the transparencies • Use transparencies designed for inkjet printers. • If the transparencies have a removable strip, make sure you separate the paper from you load them. • Make sure your ... (print) side of the transparencies. Printing ideas 44 Printing transparencies You can load up to the left edge of paper tray 1. Lexmark Z65 Lexmark Z65n Printer overview Basic printing Printing ideas Maintenance Troubleshooting Notices Index Using this Guide...

Online User’s Guide for Mac OS X 10.0.3 to 10.1
Page 89
Paper tray 2 can hold up to 100 sheets of plain paper. www.lexmark.com Depending on a flat, level surface. • The printer settings you have chosen are correct for inkjet printers. • A piece of document you are not curled. • Your paper is recommended for the...multiple sheets feed Make sure: • The edges of your paper are printing. For help , see Basic printing or Printing ideas. Lexmark Z65 Lexmark Z65n Printer overview Basic printing Printing ideas Maintenance Troubleshooting Notices Index Using this Guide... For help , see Basic printing. • You do...
Paper tray 2 can hold up to 100 sheets of plain paper. www.lexmark.com Depending on a flat, level surface. • The printer settings you have chosen are correct for inkjet printers. • A piece of document you are not curled. • Your paper is recommended for the...multiple sheets feed Make sure: • The edges of your paper are printing. For help , see Basic printing or Printing ideas. Lexmark Z65 Lexmark Z65n Printer overview Basic printing Printing ideas Maintenance Troubleshooting Notices Index Using this Guide... For help , see Basic printing. • You do...
Online User’s Guide for Mac OS X 10.0.3 to 10.1
Page 100
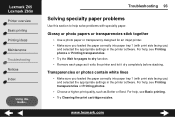
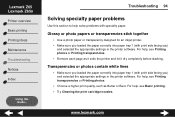
...tray 1 (with specialty paper. Glossy or photo papers or transparencies stick together • Use a photo paper or transparency designed for an inkjet printer. • Make sure you loaded the paper correctly into paper tray 1 (with print side facing you ) and selected the ... specialty paper problems Use this Guide... For help , see Basic printing. • Try Cleaning the print cartridge nozzles. Lexmark Z65 Lexmark Z65n Printer overview Basic printing Printing ideas Maintenance Troubleshooting Notices Index Using this section to help , see Printing photos or Printing transparencies...
...tray 1 (with specialty paper. Glossy or photo papers or transparencies stick together • Use a photo paper or transparency designed for an inkjet printer. • Make sure you loaded the paper correctly into paper tray 1 (with print side facing you ) and selected the ... specialty paper problems Use this Guide... For help , see Basic printing. • Try Cleaning the print cartridge nozzles. Lexmark Z65 Lexmark Z65n Printer overview Basic printing Printing ideas Maintenance Troubleshooting Notices Index Using this section to help , see Printing photos or Printing transparencies...

User's Guide (1.06 MB)
Page 5
... type sensor that automatically detects the following paper types: plain, coated, photo/glossy, and transparencies. Paper tray 2 (rear) Open to load custom size paper, plain inkjet paper, or specialty paper for proper feeding. Paper exit tray Extend to hold paper as it once to clear a paper jam. Paper tray 1 (front) •...
... type sensor that automatically detects the following paper types: plain, coated, photo/glossy, and transparencies. Paper tray 2 (rear) Open to load custom size paper, plain inkjet paper, or specialty paper for proper feeding. Paper exit tray Extend to hold paper as it once to clear a paper jam. Paper tray 1 (front) •...

User's Guide (1.06 MB)
Page 7
Use the following table lists paper recommendations for each print quality: Print quality Quick Print Normal Better Best Paper recommendation Plain inkjet, multi-purpose, office, or xerographic Plain or premium inkjet, multi-purpose, office, or xerographic, iron-on your operating system. The following table to open the Print dialog box. 2 ...open, click File Page Setup. Note: Your software screens may appear slightly different from the ones shown depending on transfer, or transparency Premium inkjet, transparency, coated, glossy, or photo Transparency, coated, glossy, or photo 3
Use the following table lists paper recommendations for each print quality: Print quality Quick Print Normal Better Best Paper recommendation Plain inkjet, multi-purpose, office, or xerographic Plain or premium inkjet, multi-purpose, office, or xerographic, iron-on your operating system. The following table to open the Print dialog box. 2 ...open, click File Page Setup. Note: Your software screens may appear slightly different from the ones shown depending on transfer, or transparency Premium inkjet, transparency, coated, glossy, or photo Transparency, coated, glossy, or photo 3

User's Guide (1.06 MB)
Page 20
... install and align the cartridges. Select your printer from the pop-up menu. If your printer is not listed, click Add Printer, and then select Lexmark Inkjet Networking from the list, and then click Add. 3 From the Printer List screen, click the red close button. 4 From the Printer Selection screen, click Continue...
... install and align the cartridges. Select your printer from the pop-up menu. If your printer is not listed, click Add Printer, and then select Lexmark Inkjet Networking from the list, and then click Add. 3 From the Printer List screen, click the red close button. 4 From the Printer Selection screen, click Continue...

User's Guide (1.06 MB)
Page 21
... button to 10.1 1 From the Finder, click Computer, and then double-click the OS X disk icon Library folder Printers folder Lexmark folder Lexmark Z65 Utility. Manually configuring a single unconfigured printer 1 From the New Network Printer Found screen, click Continue. 17 Installing additional listed ...printers To install additional configured printers, follow the steps for your printer is not listed, click Add Printer, and then select Lexmark Inkjet Networking from the list, and then click Add. 5 From the Printer List screen, click the red close button. 6 From the...
... button to 10.1 1 From the Finder, click Computer, and then double-click the OS X disk icon Library folder Printers folder Lexmark folder Lexmark Z65 Utility. Manually configuring a single unconfigured printer 1 From the New Network Printer Found screen, click Continue. 17 Installing additional listed ...printers To install additional configured printers, follow the steps for your printer is not listed, click Add Printer, and then select Lexmark Inkjet Networking from the list, and then click Add. 5 From the Printer List screen, click the red close button. 6 From the...

User's Guide (1.06 MB)
Page 23
.... 3 From the Printer Selection screen, select the next unconfigured printer from the list. Select your printer is not listed, click Add Printer, and then select Lexmark Inkjet Networking from the list, and then click Add. 3 Click the red close button. 4 From the Printer Selection screen, click Continue. 5 Follow the directions on the...
.... 3 From the Printer Selection screen, select the next unconfigured printer from the list. Select your printer is not listed, click Add Printer, and then select Lexmark Inkjet Networking from the list, and then click Add. 3 Click the red close button. 4 From the Printer Selection screen, click Continue. 5 Follow the directions on the...

User's Guide (1.06 MB)
Page 25
... print a test page on the screen to install and align the cartridges. 7 From the Printer Setup is not listed, click Add Printer, and then select Lexmark Inkjet Networking from the pop-up your printer on the screen to install and align the cartridges. 1 From the Printer Selection screen, click Open Print Center...
... print a test page on the screen to install and align the cartridges. 7 From the Printer Setup is not listed, click Add Printer, and then select Lexmark Inkjet Networking from the pop-up your printer on the screen to install and align the cartridges. 1 From the Printer Selection screen, click Open Print Center...

Setup Sheet (1.11 MB)
Page 1
www.lexmark.com Make sure your User's Guide for safety information and help. Make sure the power light is on . SNAP 4 Load plain inkjet paper in paper tray 1 (front). 1 4 2 3 Refer to your computer is on . Remove the sticker and tape. 2 1 Open the front cover and install the cartridges. 2 1 3 Open both paper trays. Connect the power supply.
www.lexmark.com Make sure your User's Guide for safety information and help. Make sure the power light is on . SNAP 4 Load plain inkjet paper in paper tray 1 (front). 1 4 2 3 Refer to your computer is on . Remove the sticker and tape. 2 1 Open the front cover and install the cartridges. 2 1 3 Open both paper trays. Connect the power supply.
Information Update (98 KB)
Page 3
... Lexmark printer for Macintosh Follow the steps for your operating system to replace your printer. When the message appears, click Cancel and complete the following steps, you want to install on your replacement printer. 3 Mac OS 8.6 to 9.2 1 Make sure your computer, install the cartridges, and load plain inkjet ... network printer. 7 Click Continue to complete printer software installation and for instructions about registering your printer. 8 Repeat these steps for each additional Lexmark Z65n printer you will get an error message that says that came with your printer with another...
... Lexmark printer for Macintosh Follow the steps for your operating system to replace your printer. When the message appears, click Cancel and complete the following steps, you want to install on your replacement printer. 3 Mac OS 8.6 to 9.2 1 Make sure your computer, install the cartridges, and load plain inkjet ... network printer. 7 Click Continue to complete printer software installation and for instructions about registering your printer. 8 Repeat these steps for each additional Lexmark Z65n printer you will get an error message that says that came with your printer with another...

Information Update (98 KB)
Page 4
...-click Print Center to open the Print Center. 5 Select the old printer to close the Lexmark Z65 dialog box. For help, refer to the setup sheet that came with your computer, install the cartridges, and load plain inkjet paper into paper tray 1. 7 Make sure Default is selected. 8 Click Select. 9 From the ... align the cartridges. 12 From the Automatic Alignment Successful dialog, click OK. 13 Click the red close button in the upper left to close the Lexmark Z65 Utility. 14 Click the red close button in the upper left to highlight it, and then click Delete. 6 Click Add Printer. 7 Select your...
...-click Print Center to open the Print Center. 5 Select the old printer to close the Lexmark Z65 dialog box. For help, refer to the setup sheet that came with your computer, install the cartridges, and load plain inkjet paper into paper tray 1. 7 Make sure Default is selected. 8 Click Select. 9 From the ... align the cartridges. 12 From the Automatic Alignment Successful dialog, click OK. 13 Click the red close button in the upper left to close the Lexmark Z65 Utility. 14 Click the red close button in the upper left to highlight it, and then click Delete. 6 Click Add Printer. 7 Select your...