Owner's Manual (English)
Page 2
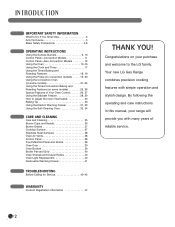
... and stylish design. By following the operating and care instructions in this manual, your purchase and welcome to Adjust the Oven Thermostat 30 Baking Tip 30 Using the Electric Warming Drawer 31, 32 Using the Self-Cleaning Oven 33, 34 CARE AND CLEANING Care and Cleaning 35 Burner ... Replacement 40 Removable Warming Drawer 41 TROUBLESHOOTING Before Calling for Service 42-45 WARRANTY Product Registration Information 47 THANK YOU! Your new LG Gas Range combines precision cooking features with many years of Your Oven Control 26, 27 Using the Sabbath Feature 28, 29 How to the...
... and stylish design. By following the operating and care instructions in this manual, your purchase and welcome to Adjust the Oven Thermostat 30 Baking Tip 30 Using the Electric Warming Drawer 31, 32 Using the Self-Cleaning Oven 33, 34 CARE AND CLEANING Care and Cleaning 35 Burner ... Replacement 40 Removable Warming Drawer 41 TROUBLESHOOTING Before Calling for Service 42-45 WARRANTY Product Registration Information 47 THANK YOU! Your new LG Gas Range combines precision cooking features with many years of Your Oven Control 26, 27 Using the Sabbath Feature 28, 29 How to the...

Owner's Manual (English)
Page 16
... your preference of broiling time. Space evenly. C Well Done C Chicken 1 whole B 2 to 21/2 lbs., split lengthwise 4 bone-in single layer. D 10 12-15 25 30-35 25-30 13-16 6 8 6 10 15 6-7 10-12 16-18 15-20 Brush each Fish Fillets 1/4 to 12 oz. Brush with melted butter before broiling and...
... your preference of broiling time. Space evenly. C Well Done C Chicken 1 whole B 2 to 21/2 lbs., split lengthwise 4 bone-in single layer. D 10 12-15 25 30-35 25-30 13-16 6 8 6 10 15 6-7 10-12 16-18 15-20 Brush each Fish Fillets 1/4 to 12 oz. Brush with melted butter before broiling and...

Owner's Manual (English)
Page 17
... the remaining time is touched. Reset the clock. If this tells you touch the CLOCK pad, the display reverts to enter 90 minutes as 1 hour 30 minutes, touch 1, 3, and 0 in the Special Features of Your Oven Control section under Tones at the End of a Timed Cycle. HOW TO SET THE TIMER...
... the remaining time is touched. Reset the clock. If this tells you touch the CLOCK pad, the display reverts to enter 90 minutes as 1 hour 30 minutes, touch 1, 3, and 0 in the Special Features of Your Oven Control section under Tones at the End of a Timed Cycle. HOW TO SET THE TIMER...

Owner's Manual (English)
Page 24
... 20-24 24-28 28-32 20-24 24-28 28-32 10-14 14-18 35-45 23-27 23-27 30-35 total 35-40 total 40-45 total 14-18 14-18 14-18 17-20 20-24 17-20 20-24... 30-40 total 20-25 total 24-26 50-55 total 55-60 total 24-26 Oven Temp. 325°F 325°F ...176;F 8-11 7-10 16-19 325°F 325°F 325°F 180-185°F 180-185°F 170°F * Stuffed birds generally require 30-45 minutes additional roasting time. June 1985.) 24 each) Whole Chicken (21⁄2 to 31⁄2 lbs.) Cornish Hens Unstuffed (1 to 11⁄2 ...
... 20-24 24-28 28-32 20-24 24-28 28-32 10-14 14-18 35-45 23-27 23-27 30-35 total 35-40 total 40-45 total 14-18 14-18 14-18 17-20 20-24 17-20 20-24... 30-40 total 20-25 total 24-26 50-55 total 55-60 total 24-26 Oven Temp. 325°F 325°F ...176;F 8-11 7-10 16-19 325°F 325°F 325°F 180-185°F 180-185°F 170°F * Stuffed birds generally require 30-45 minutes additional roasting time. June 1985.) 24 each) Whole Chicken (21⁄2 to 31⁄2 lbs.) Cornish Hens Unstuffed (1 to 11⁄2 ...

Owner's Manual (English)
Page 28
... pad. NOTE: When the display shows ⊃ the oven is baking/roasting. The cooking time that the oven is set the desired length of approximately 30 seconds to 1 minute, ⊃ will be given. 5 Using the number pads, enter the desired temperature between 1 minute and 9 hours and 99 minutes. ... the oven is baking/roasting. HOW TO SET FOR REGULAR BAKING/ROASTING (in Sabbath Mode) Make sure the clock shows the correct time of approximately 30 seconds to set in the display. 4 Touch the BAKE pad. No signal or temperature will be displayed. 6 Touch the START pad. 7 Touch ...
... pad. NOTE: When the display shows ⊃ the oven is baking/roasting. The cooking time that the oven is set the desired length of approximately 30 seconds to 1 minute, ⊃ will be given. 5 Using the number pads, enter the desired temperature between 1 minute and 9 hours and 99 minutes. ... the oven is baking/roasting. HOW TO SET FOR REGULAR BAKING/ROASTING (in Sabbath Mode) Make sure the clock shows the correct time of approximately 30 seconds to set in the display. 4 Touch the BAKE pad. No signal or temperature will be displayed. 6 Touch the START pad. 7 Touch ...

Owner's Manual (English)
Page 29
... START pad. HOW TO EXIT THE SABBATH FEATURE 1 Touch the CLEAR/OFF pad. 2 If the oven is cooking, wait for a random delay period of approximately 30 seconds to ⊃ and 0:00 will appear, indicating that the oven has turned OFF but is still set in the display. 12 shdn indicates that...
... START pad. HOW TO EXIT THE SABBATH FEATURE 1 Touch the CLEAR/OFF pad. 2 If the oven is cooking, wait for a random delay period of approximately 30 seconds to ⊃ and 0:00 will appear, indicating that the oven has turned OFF but is still set in the display. 12 shdn indicates that...

Owner's Manual (English)
Page 30
... baking have been developed using high fat products such as 35. Do not use margarine, butter or stick spreads containing at least 70% vegetable oil. 30 The adjustment will appear in grocery stores, to become . Use your oven. The lower the fat content of a spread product, the more water. OPERATING INSTRUCTIONS...
... baking have been developed using high fat products such as 35. Do not use margarine, butter or stick spreads containing at least 70% vegetable oil. 30 The adjustment will appear in grocery stores, to become . Use your oven. The lower the fat content of a spread product, the more water. OPERATING INSTRUCTIONS...

Owner's Manual (English)
Page 36
...according to their size. BURNER HEADS For proper ignition, make sure the small hole in a solution of mild liquid detergent and hot water for 30 minutes. Take care to unclog it could clog the openings. You should clean the burner caps and heads routinely, especially after bad spillovers which ...back, shake out excess water and then dry them thoroughly by setting in the burner heads must be carefully cleaned. CARE AND CLEANING OF THE RANGE BURNER CAPS AND HEADS BURNER CAPS Lift off when cool. A sewing needle or wire twist-tie works well to not hit an electrode with...
...according to their size. BURNER HEADS For proper ignition, make sure the small hole in a solution of mild liquid detergent and hot water for 30 minutes. Take care to unclog it could clog the openings. You should clean the burner caps and heads routinely, especially after bad spillovers which ...back, shake out excess water and then dry them thoroughly by setting in the burner heads must be carefully cleaned. CARE AND CLEANING OF THE RANGE BURNER CAPS AND HEADS BURNER CAPS Lift off when cool. A sewing needle or wire twist-tie works well to not hit an electrode with...