
Owners Manual
Page 4
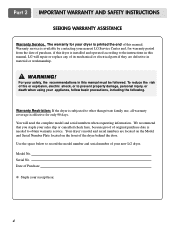
...days. To reduce the risk of fire or explosion, electric shock, or to prevent property damage, personal injury, or death when using your new LG dryer. Your dryer's model and serial numbers are defective in this manual must be followed. Serial No. Warranty service is available by contacting your... is needed to record the model number and serial number of this manual, LG will need the complete model and serial numbers when requesting information. You will repair or replace any of its mechanical or electrical parts if they are located on the Model and Serial Number Plate located on the...
...days. To reduce the risk of fire or explosion, electric shock, or to prevent property damage, personal injury, or death when using your new LG dryer. Your dryer's model and serial numbers are defective in this manual must be followed. Serial No. Warranty service is available by contacting your... is needed to record the model number and serial number of this manual, LG will need the complete model and serial numbers when requesting information. You will repair or replace any of its mechanical or electrical parts if they are located on the Model and Serial Number Plate located on the...
Owners Manual
Page 5
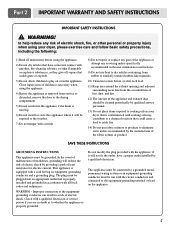
Items contaminated with a cord having an equipment-grounding conductor and a grounding plug. Part 2 IMPORTANT WARRANTY AND SAFETY INSTRUCTIONS IMPORTANT SAFETY INSTRUCTIONS ! This appliance is equipped with cooking oils may contribute to a chemical reaction that ... not use fabric softners or products to whether the appliance is necessary when using your dryer. Check with controls. 8) Do not repair or replace any part of the appliance or attempt any risk of electric shock, fire, or other flammable or explosive substances, as to eliminate static unless recommended by...
Items contaminated with a cord having an equipment-grounding conductor and a grounding plug. Part 2 IMPORTANT WARRANTY AND SAFETY INSTRUCTIONS IMPORTANT SAFETY INSTRUCTIONS ! This appliance is equipped with cooking oils may contribute to a chemical reaction that ... not use fabric softners or products to whether the appliance is necessary when using your dryer. Check with controls. 8) Do not repair or replace any part of the appliance or attempt any risk of electric shock, fire, or other flammable or explosive substances, as to eliminate static unless recommended by...
Owners Manual
Page 16
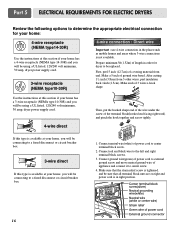
Part 5 ELECTRICAL REQUIREMENTS FOR ELECTRIC DRYERS Review the following options to determine the appropriate electrical connection for dryer to be using a UL listed, 120/240 volt ... that the strain relief screw is in order for your home: 4-wire receptacle (NEMA type14-30R) Use the instructions at your home. you will be replaced. you will be connecting to center screw. 4. Make sure that all terminal block nuts are on tight and power cord is tightened. Connect ground wire...
Part 5 ELECTRICAL REQUIREMENTS FOR ELECTRIC DRYERS Review the following options to determine the appropriate electrical connection for dryer to be using a UL listed, 120/240 volt ... that the strain relief screw is in order for your home: 4-wire receptacle (NEMA type14-30R) Use the instructions at your home. you will be replaced. you will be connecting to center screw. 4. Make sure that all terminal block nuts are on tight and power cord is tightened. Connect ground wire...
Owners Manual
Page 17
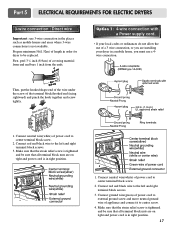
... and screw tightly. 1. Connect ground wire(green) of power cord to be sure that the strain relief screw is not available. and be replaced. First, peel 3 1/2 inch (8.9cm) of power cord to center terminal block screw. 2. Make sure that all terminal block nuts are ...installing your local codes or ordinances do not allow the use of power cord to center terminal block screw. 2. Part 5 ELECTRICAL REQUIREMENTS FOR ELECTRIC DRYERS 3-wire connection : Direct wire Important : use 3-wire connection in right position. 17 Connect neutral wire(white...
... and screw tightly. 1. Connect ground wire(green) of power cord to be sure that the strain relief screw is not available. and be replaced. First, peel 3 1/2 inch (8.9cm) of power cord to center terminal block screw. 2. Make sure that all terminal block nuts are ...installing your local codes or ordinances do not allow the use of power cord to center terminal block screw. 2. Part 5 ELECTRICAL REQUIREMENTS FOR ELECTRIC DRYERS 3-wire connection : Direct wire Important : use 3-wire connection in right position. 17 Connect neutral wire(white...
Owners Manual
Page 22
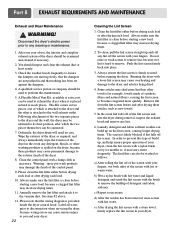
...the screen with a nylon brush every six months or, if necessary, more quickly. e) After drying the lint screen with a clean towel, firmly replace the lint screen in hard to any lint. 6. Disconnect the dryer's electric power prior to reach places. Ordinarily, the dryer drum will need ...if lint falls off of the dryer as new towels. 5. The screen is attached to the exterior finish of the screen with hot water. Part 8 EXHAUST REQUIREMENTS AND MAINTENANCE Exhaust and Dryer Maintenance ! Check the weather hoods frequently to remove. d) After the residue has been removed, ...
...the screen with a nylon brush every six months or, if necessary, more quickly. e) After drying the lint screen with a clean towel, firmly replace the lint screen in hard to any lint. 6. Disconnect the dryer's electric power prior to reach places. Ordinarily, the dryer drum will need ...if lint falls off of the dryer as new towels. 5. The screen is attached to the exterior finish of the screen with hot water. Part 8 EXHAUST REQUIREMENTS AND MAINTENANCE Exhaust and Dryer Maintenance ! Check the weather hoods frequently to remove. d) After the residue has been removed, ...
Owners Manual
Page 28
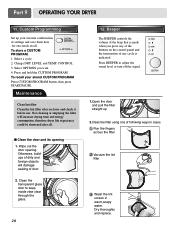
... signal. 1.Open the door and pull the filter straight up your stored CUSTOM PROGRAM Press CUSTOM PROGRAM button, then press START/PAUSE. Dry thoroughly and replace. Wipe out the door opening 1. Change DRY LEVEL and TEMP. Custom Programming Set up 2.Clean the filter using one -touch recall...
... signal. 1.Open the door and pull the filter straight up your stored CUSTOM PROGRAM Press CUSTOM PROGRAM button, then press START/PAUSE. Dry thoroughly and replace. Wipe out the door opening 1. Change DRY LEVEL and TEMP. Custom Programming Set up 2.Clean the filter using one -touch recall...
Owners Manual
Page 29
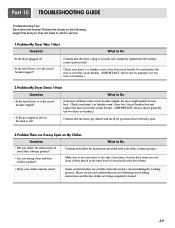
... cleaned. 29 Please review and confirm that you are Greasy Spots on your home's or laundry room's fuse box/circuit breaker box and replace the fuse or reset the circuit breaker. (IMPORTANT: electric dryers generally use two fuses or breakers.) • Is the gas supply or... service blocked or off? Part 10 TROUBLESHOOTING GUIDE Troubleshooting Tips Save time and money! Review the charts on dried clothes are actually stains that the house gas shutoff and...
... cleaned. 29 Please review and confirm that you are Greasy Spots on your home's or laundry room's fuse box/circuit breaker box and replace the fuse or reset the circuit breaker. (IMPORTANT: electric dryers generally use two fuses or breakers.) • Is the gas supply or... service blocked or off? Part 10 TROUBLESHOOTING GUIDE Troubleshooting Tips Save time and money! Review the charts on dried clothes are actually stains that the house gas shutoff and...
Owners Manual
Page 31
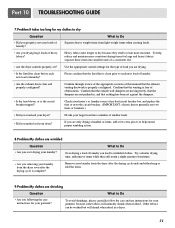
...that the lint filter is clean prior to each new load of laundry? Check your home's or laundry room's fuse box/circuit breaker box and replace the fuse or reset the circuit breaker. (IMPORTANT: electric dryers generally use instructions for your dryer? What to Do Over drying a load of ...number of obstructions. Use the appropriate control settings for the type of load you are wrinkled Question • Are you over drying your dryer? Part 10 TROUBLESHOOTING GUIDE 7.Problem:It takes too long for my clothes to dry Question What to Do • Did you properly sort your laundry ...
...that the lint filter is clean prior to each new load of laundry? Check your home's or laundry room's fuse box/circuit breaker box and replace the fuse or reset the circuit breaker. (IMPORTANT: electric dryers generally use instructions for your dryer? What to Do Over drying a load of ...number of obstructions. Use the appropriate control settings for the type of load you are wrinkled Question • Are you over drying your dryer? Part 10 TROUBLESHOOTING GUIDE 7.Problem:It takes too long for my clothes to dry Question What to Do • Did you properly sort your laundry ...

Service Manual
Page 3
..., PROPANE GAS 28 11. TEST 1 120VAC ELECTRICAL SUPPLY 21 9-2. DRUM & MOTOR ASSEMBLY : GAS TYPE 40 13. COMPONENT TESTING INFORMATION 14 6. MOTOR DIAGRAM AND SCHEMATIC 17 7. REPLACEMENT PARTS LIST 41 3 TEST 6 HEATER SWITCH TEST -
..., PROPANE GAS 28 11. TEST 1 120VAC ELECTRICAL SUPPLY 21 9-2. DRUM & MOTOR ASSEMBLY : GAS TYPE 40 13. COMPONENT TESTING INFORMATION 14 6. MOTOR DIAGRAM AND SCHEMATIC 17 7. REPLACEMENT PARTS LIST 41 3 TEST 6 HEATER SWITCH TEST -
Service Manual
Page 28
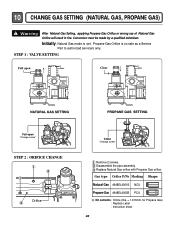
Initially, Natural Gas mode is on sale as a Service Part to authorized servicers only. Disassemble the pipe assembly. STEP 1 : VALVE SETTING Full open "Change screw" STEP 2 : ORIFICE CHANGE Orifice Close "Change screw" Remove 2 ...Gas type Orifice P/No Marking Shape Natural Gas 4948EL4001B NCU Propane Gas 4948EL4002B PCU Kit contents : Orifice (Dia. = 1.613mm, for Propane Gas) : Replace Label : Instruction sheet 28 Replace Natural Gas orifice with Propane Gas orifice. Conversion must be made by a qualified technician. 10 CHANGE GAS SETTING (NATURAL GAS, PROPANE GAS) ! Warning...
Initially, Natural Gas mode is on sale as a Service Part to authorized servicers only. Disassemble the pipe assembly. STEP 1 : VALVE SETTING Full open "Change screw" STEP 2 : ORIFICE CHANGE Orifice Close "Change screw" Remove 2 ...Gas type Orifice P/No Marking Shape Natural Gas 4948EL4001B NCU Propane Gas 4948EL4002B PCU Kit contents : Orifice (Dia. = 1.613mm, for Propane Gas) : Replace Label : Instruction sheet 28 Replace Natural Gas orifice with Propane Gas orifice. Conversion must be made by a qualified technician. 10 CHANGE GAS SETTING (NATURAL GAS, PROPANE GAS) ! Warning...


