
Owners Manual
Page 12
... the bar and pull it out to let both rails out to full extension simultaneously, • Make sure you will need two people to assemble the rail cover. • Hook door supports (1) into rail tabes (2). HOW TO REMOVE AND INSTALL THE PULL OUT DRAWER IMPORTANT: To avoid possible injur or product ...or property damage, you have a right rail cover for each side, Right Rail cover Rail cover • Align the top holes of the rail cover with the top holes of drawer. [] WARNING: DO NOT step or sit down on Freezer Door. 12 Assembly hole • With the drawer pulled out to full ...
... the bar and pull it out to let both rails out to full extension simultaneously, • Make sure you will need two people to assemble the rail cover. • Hook door supports (1) into rail tabes (2). HOW TO REMOVE AND INSTALL THE PULL OUT DRAWER IMPORTANT: To avoid possible injur or product ...or property damage, you have a right rail cover for each side, Right Rail cover Rail cover • Align the top holes of the rail cover with the top holes of drawer. [] WARNING: DO NOT step or sit down on Freezer Door. 12 Assembly hole • With the drawer pulled out to full ...

Owners Manual
Page 18
...and push down until it in 1 (closed to glass cover)and pull sides of the cover outward to cover. While holding the crisper cover support (2), pull the cover up and pull straight out. 2. DESIGN-A-DOOR The door bins are not firmly assembled. To remove the bin, simply lift the bin up ...and out(1 ). Hold the glass cover and overtum crisper cover. 3. To replace the dairy bin, slide it stops. Remove both crisper drawers. 2. To replace the bin, slide ...
...and push down until it in 1 (closed to glass cover)and pull sides of the cover outward to cover. While holding the crisper cover support (2), pull the cover up and pull straight out. 2. DESIGN-A-DOOR The door bins are not firmly assembled. To remove the bin, simply lift the bin up ...and out(1 ). Hold the glass cover and overtum crisper cover. 3. To replace the dairy bin, slide it stops. Remove both crisper drawers. 2. To replace the bin, slide ...
Owners Manual
Page 20
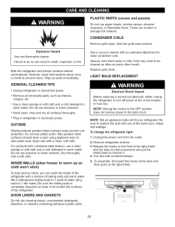
...the light shield. 20 Release the hooks on the front of a flat screwdriver and pull the shield down to clean condenser coils. To assemble, first insert the hooks at the circuit breaker or fuse box, NOTE: Moving the control to the OFF position does not remove power .... These can result in warm water. Remove all surfaces thoroughly. • Plug in warm water. PLASTIC PARTS (covers and panels) Do not use abrasive or harsh cleaners. Both the refrigerator and freezer sections defrost automatically. Coils may need to prevent odors. Unplug the power cord from the outlet, 2. ...
...the light shield. 20 Release the hooks on the front of a flat screwdriver and pull the shield down to clean condenser coils. To assemble, first insert the hooks at the circuit breaker or fuse box, NOTE: Moving the control to the OFF position does not remove power .... These can result in warm water. Remove all surfaces thoroughly. • Plug in warm water. PLASTIC PARTS (covers and panels) Do not use abrasive or harsh cleaners. Both the refrigerator and freezer sections defrost automatically. Coils may need to prevent odors. Unplug the power cord from the outlet, 2. ...


