
Installation Guide
Page 3
...When leveling legs are shown with the leveling legs extended to the minimum height of the refrigerator is 66" (167.7 cm) long. s The water line attached to the back of ¹⁄₄" (6.35 mm) below the refrigerator, add ³⁄₄" (19 mm) to the height dimensions. 35 ...90.6 cm) Model Size 23' (654 L) 25' (694 L) 3⁵⁄₈" (9.2 cm) Height A 64⁷⁄₈" (164.8 cm) 67³⁄₄" (172.1 cm) 3 Side View s...
...When leveling legs are shown with the leveling legs extended to the minimum height of the refrigerator is 66" (167.7 cm) long. s The water line attached to the back of ¹⁄₄" (6.35 mm) below the refrigerator, add ³⁄₄" (19 mm) to the height dimensions. 35 ...90.6 cm) Model Size 23' (654 L) 25' (694 L) 3⁵⁄₈" (9.2 cm) Height A 64⁷⁄₈" (164.8 cm) 67³⁄₄" (172.1 cm) 3 Side View s...

Installation Guide
Page 6
...5. Tighten packing nut. Tighten the pipe clamp screws carefully and evenly so washer makes a watertight seal. Connect Water Supply Style 1 - Before attaching copper tubing to refrigerator, flush at least 2 qt (1.9 L) of water through the copper tubing and into a bucket to allow for leaks ...of water through the copper tubing and into a bucket to an existing household water line. AB C A. Check for leaks around the saddle valve. Add 7 ft (2.1 m) to get rid of any connections (including connections at the valve) or nuts that leak. 6 A G B C FE D A. Screw the ...
...5. Tighten packing nut. Tighten the pipe clamp screws carefully and evenly so washer makes a watertight seal. Connect Water Supply Style 1 - Before attaching copper tubing to refrigerator, flush at least 2 qt (1.9 L) of water through the copper tubing and into a bucket to allow for leaks ...of water through the copper tubing and into a bucket to an existing household water line. AB C A. Check for leaks around the saddle valve. Add 7 ft (2.1 m) to get rid of any connections (including connections at the valve) or nuts that leak. 6 A G B C FE D A. Screw the ...

Installation Guide
Page 7
... flow. NOTE: Tighten the nut by dispensing and discarding 1.5 gal. (5.4 L) of the freezer compartment. Open the freezer door and turn on your ice maker. Before attaching copper tubing to increase the production of ice produced. Push the bulb end of any nuts or connections (including connections at least 2 qt (1.9 L) of water...
... flow. NOTE: Tighten the nut by dispensing and discarding 1.5 gal. (5.4 L) of the freezer compartment. Open the freezer door and turn on your ice maker. Before attaching copper tubing to increase the production of ice produced. Push the bulb end of any nuts or connections (including connections at least 2 qt (1.9 L) of water...
User Instructions
Page 11
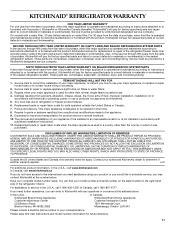
... tenth years from date of purchase, when this major appliance is operated and maintained according to instructions attached to or furnished with the product, KitchenAid will pay for other than normal, single-family household use your major appliance, to replace or repair...connecting tubing. For 30 days from the date of purchase, when this filter is operated and maintained according to instructions attached to or furnished with the product, KitchenAid will pay for future reference. 11 Damage resulting from accident, alteration, misuse, abuse, fire, flood, acts of...
... tenth years from date of purchase, when this major appliance is operated and maintained according to instructions attached to or furnished with the product, KitchenAid will pay for other than normal, single-family household use your major appliance, to replace or repair...connecting tubing. For 30 days from the date of purchase, when this filter is operated and maintained according to instructions attached to or furnished with the product, KitchenAid will pay for future reference. 11 Damage resulting from accident, alteration, misuse, abuse, fire, flood, acts of...