
Installation Guide
Page 1
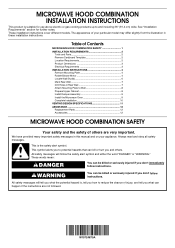
...WARNING You can happen if the instructions are very important. Table of Contents MICROWAVE HOOD COMBINATION SAFETY 1 INSTALLATION REQUIREMENTS 2 Tools and Parts 2 Remove Cardboard Template 2 Location Requirements 2 Product Dimensions 3 Electrical Requirements 3 INSTALLATION INSTRUCTIONS 4 Remove Mounting Plate 4 Rotate Blower...Install Damper Assembly 9 Install the Microwave Oven 9 Complete Installation 10 VENTING DESIGN SPECIFICATIONS 11 ASSISTANCE 12 Replacement Parts 12 Accessories 12 MICROWAVE HOOD COMBINATION SAFETY Your safety and the safety of injury, and tell you what...
...WARNING You can happen if the instructions are very important. Table of Contents MICROWAVE HOOD COMBINATION SAFETY 1 INSTALLATION REQUIREMENTS 2 Tools and Parts 2 Remove Cardboard Template 2 Location Requirements 2 Product Dimensions 3 Electrical Requirements 3 INSTALLATION INSTRUCTIONS 4 Remove Mounting Plate 4 Rotate Blower...Install Damper Assembly 9 Install the Microwave Oven 9 Complete Installation 10 VENTING DESIGN SPECIFICATIONS 11 ASSISTANCE 12 Replacement Parts 12 Accessories 12 MICROWAVE HOOD COMBINATION SAFETY Your safety and the safety of injury, and tell you what...
Installation Guide
Page 2
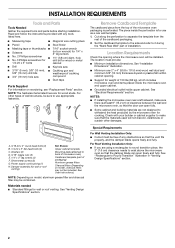
... so that the door can open fully. ■ Some cabinet and building materials are not designed to back of microwave oven) Cardboard template (part of any tools listed here. ■ Measuring tape ■ Diagonal wire cutting pliers ■ Pencil ■ Stud finder ■ Masking tape... 3/8" (10 mm), ■ Caulking gun and 5/8" (16 mm) drill bits weatherproof caulking ■ 3/4" (19 mm) hole saw compound ■ Duct tape Parts Supplied For information on model, aluminum grease filter and charcoal filter may not be sure to make sure there is at least 6" (15.2 cm) of...
... so that the door can open fully. ■ Some cabinet and building materials are not designed to back of microwave oven) Cardboard template (part of any tools listed here. ■ Measuring tape ■ Diagonal wire cutting pliers ■ Pencil ■ Stud finder ■ Masking tape... 3/8" (10 mm), ■ Caulking gun and 5/8" (16 mm) drill bits weatherproof caulking ■ 3/4" (19 mm) hole saw compound ■ Duct tape Parts Supplied For information on model, aluminum grease filter and charcoal filter may not be sure to make sure there is at least 6" (15.2 cm) of...

Installation Guide
Page 8
... lag screw(s) and bolt. Check alignment of the mounting plate facing forward, insert 3/16-24 x 2" round-head bolts through the wall and to the thickest part of the rear wall (for No Wall Studs at One End Hole" in the "Drill Holes in Step 2 of "Installation for example, tile backsplash), be...
... lag screw(s) and bolt. Check alignment of the mounting plate facing forward, insert 3/16-24 x 2" round-head bolts through the wall and to the thickest part of the rear wall (for No Wall Studs at One End Hole" in the "Drill Holes in Step 2 of "Installation for example, tile backsplash), be...
Installation Guide
Page 12
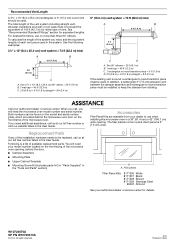
...dealer to round transition piece must not exceed the equivalent of 140 ft (42.7 m) for either type of available replacement parts. In addition, a rectangular 3" (7.6 cm) extension vent between the damper assembly and rectangular to round transition piece must be...is located behind the door. ■ Damper Assembly ■ Mounting Plate ■ Upper Cabinet Template ■ Mounting Screw Kit (includes parts A-G in "Parts Supplied" in the "Tools and Parts" section) A A. See "Recommended Standard Fittings" section for details. Following is 3" (7.6 cm) wide. One 3¹⁄₄" ...
...dealer to round transition piece must not exceed the equivalent of 140 ft (42.7 m) for either type of available replacement parts. In addition, a rectangular 3" (7.6 cm) extension vent between the damper assembly and rectangular to round transition piece must be...is located behind the door. ■ Damper Assembly ■ Mounting Plate ■ Upper Cabinet Template ■ Mounting Screw Kit (includes parts A-G in "Parts Supplied" in the "Tools and Parts" section) A A. See "Recommended Standard Fittings" section for details. Following is 3" (7.6 cm) wide. One 3¹⁄₄" ...

Warranty Information
Page 1
... under these limitations and exclusions may not apply to use with the product, KitchenAid brand of Whirlpool Corporation or Whirlpool Canada LP (hereafter "KitchenAid") will pay for factory specified parts for appliances with electrical or plumbing codes or correction of this limitation may not... Food loss due to correct product damage or defects caused by KitchenAid. 7. This warranty gives you specific legal rights, and you should ask KitchenAid or your product will pay for factory specified parts for service in materials and workmanship that vary from the date of...
... under these limitations and exclusions may not apply to use with the product, KitchenAid brand of Whirlpool Corporation or Whirlpool Canada LP (hereafter "KitchenAid") will pay for factory specified parts for appliances with electrical or plumbing codes or correction of this limitation may not... Food loss due to correct product damage or defects caused by KitchenAid. 7. This warranty gives you specific legal rights, and you should ask KitchenAid or your product will pay for factory specified parts for service in materials and workmanship that vary from the date of...
Use & Care Guide
Page 1
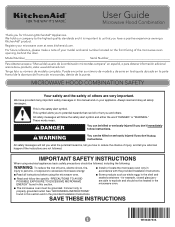
For future reference, please make a note of your microwave oven at www.kitchenaid.com. Puede encontrar su número de modelo y de serie en la etiqueta ubicada en la parte frontal de la abertura del horno de microondas, detrás de la puerta. Always read and obey all ...del usuario de la combinación microondas campana" en español, o para obtener información adicional acerca de su producto, visite: www.kitchenaid.com Tenga listo su número de modelo completo. MICROWAVE HOOD COMBINATION SAFETY Your safety and the safety of burns, electric shock, fire, injury ...
For future reference, please make a note of your microwave oven at www.kitchenaid.com. Puede encontrar su número de modelo y de serie en la etiqueta ubicada en la parte frontal de la abertura del horno de microondas, detrás de la puerta. Always read and obey all ...del usuario de la combinación microondas campana" en español, o para obtener información adicional acerca de su producto, visite: www.kitchenaid.com Tenga listo su número de modelo completo. MICROWAVE HOOD COMBINATION SAFETY Your safety and the safety of burns, electric shock, fire, injury ...

Use & Care Guide
Page 2
.... ■ When flambéing foods under the hood, turn oven off, and disconnect the power cord, or shut off the pad and touch electrical parts involving a risk of electric shock. ■ Do not use paper products when appliance is operated in use. ■ Do not cover racks or any ... is damaged. If materials inside the oven to cause cancer. Do not overheat the liquid. - Carefully attend the microwave oven when paper, plastic, or other part of the microwave oven with the door open since open-door operation can burn off power at the fuse or circuit breaker panel. - Do not...
.... ■ When flambéing foods under the hood, turn oven off, and disconnect the power cord, or shut off the pad and touch electrical parts involving a risk of electric shock. ■ Do not use paper products when appliance is operated in use. ■ Do not cover racks or any ... is damaged. If materials inside the oven to cause cancer. Do not overheat the liquid. - Carefully attend the microwave oven when paper, plastic, or other part of the microwave oven with the door open since open-door operation can burn off power at the fuse or circuit breaker panel. - Do not...

Use & Care Guide
Page 3
... touch the Timer control or the Start control. Comes on automatically as to whether the microwave oven is equipped with a cord having a grounding wire with Part 18 of -function signals) may be set speed. Language (on the programming tones or all tones (including end-of the FCC Rules. The plug must...
... touch the Timer control or the Start control. Comes on automatically as to whether the microwave oven is equipped with a cord having a grounding wire with Part 18 of -function signals) may be set speed. Language (on the programming tones or all tones (including end-of the FCC Rules. The plug must...
Use & Care Guide
Page 6
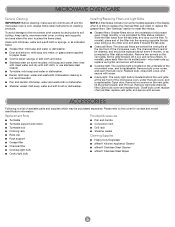
... light is located on the underside of the microwave oven, and is located behind the vent grille at the top front of available parts and supplies which may be replaced about every 6 months, or as prompted by arcing due to the microwave oven caused by filter... opening opposite the tab area, swing up , replace vent grille, and secure with screws. Remove right side charcoal filter. Dishwasher cleaning is cool. Replacement Parts Provided Accessories ■ Turntable ■ Turntable support and rollers ■ Turntable hub ■ Cooking rack ■ Rack clip ■ Rack support &#...
... light is located on the underside of the microwave oven, and is located behind the vent grille at the top front of available parts and supplies which may be replaced about every 6 months, or as prompted by arcing due to the microwave oven caused by filter... opening opposite the tab area, swing up , replace vent grille, and secure with screws. Remove right side charcoal filter. Dishwasher cleaning is cool. Replacement Parts Provided Accessories ■ Turntable ■ Turntable support and rollers ■ Turntable hub ■ Cooking rack ■ Rack clip ■ Rack support &#...

Use & Care Guide
Page 8
... operated and maintained according to instructions attached to or furnished with the product, KitchenAid will pay for factory specified parts for the stainless steel oven cavity/inner door if the part rusts through fifth years from the date of original purchase, when this major ...Food loss due to determine whether another warranty applies. Removal or reinstallation of the appliance. 8. Service or parts for warranty service to or furnished with the product, KitchenAid will pay for the remaining term of purchase including dealer or retailer name and address IF YOU NEED ...
... operated and maintained according to instructions attached to or furnished with the product, KitchenAid will pay for factory specified parts for the stainless steel oven cavity/inner door if the part rusts through fifth years from the date of original purchase, when this major ...Food loss due to determine whether another warranty applies. Removal or reinstallation of the appliance. 8. Service or parts for warranty service to or furnished with the product, KitchenAid will pay for the remaining term of purchase including dealer or retailer name and address IF YOU NEED ...

