Use & Care Guide
Page 2
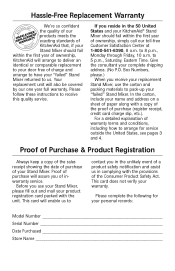
...your door free of charge and arrange to have your "failed" Stand Mixer returned to receive this quality service. Please follow these instructions to us in the 50 United States and your KitchenAid® Stand Mixer should fail within the first year of ownership, simply call our...-Free Replacement Warranty We're so confident the quality of our products meets the exacting standards of KitchenAid that, if your Stand Mixer should fail within the first year of ownership, KitchenAid will enable us to arrange for your personal records: Model Number Serial Number Date Purchased Store Name...
...your door free of charge and arrange to have your "failed" Stand Mixer returned to receive this quality service. Please follow these instructions to us in the 50 United States and your KitchenAid® Stand Mixer should fail within the first year of ownership, simply call our...-Free Replacement Warranty We're so confident the quality of our products meets the exacting standards of KitchenAid that, if your Stand Mixer should fail within the first year of ownership, KitchenAid will enable us to arrange for your personal records: Model Number Serial Number Date Purchased Store Name...
Use & Care Guide
Page 3
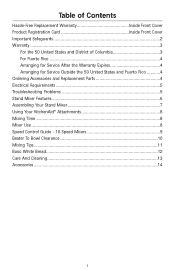
... Outside the 50 United States and Puerto Rico ...........4 Ordering Accessories and Replacement Parts 4 Electrical Requirements 5 Troubleshooting Problems 5 Stand Mixer Features 6 Assembling Your Stand Mixer 7 Using Your KitchenAid® Attachments 8 Mixing Time ...8 Mixer Use ...8 Speed Control Guide - 10 Speed Mixers 9 Beater To Bowl Clearance 10 Mixing Tips...11 Basic White Bread 12 Care And Cleaning 13 Accessories ...14 1
... Outside the 50 United States and Puerto Rico ...........4 Ordering Accessories and Replacement Parts 4 Electrical Requirements 5 Troubleshooting Problems 5 Stand Mixer Features 6 Assembling Your Stand Mixer 7 Using Your KitchenAid® Attachments 8 Mixing Time ...8 Mixer Use ...8 Speed Control Guide - 10 Speed Mixers 9 Beater To Bowl Clearance 10 Mixing Tips...11 Basic White Bread 12 Care And Cleaning 13 Accessories ...14 1
Use & Care Guide
Page 4
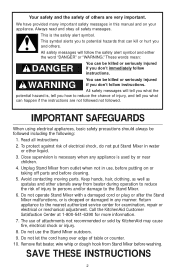
.... All safety messages will tell you what the potential hazard is used by KitchenAid may cause fire, electrical shock or injury. 8. All safety messages will follow instructions. Do not operate Stand Mixer with a damaged cord or plug or after the Stand Mixer malfunctions, or is the safety alert symbol. Keep hands, hair, clothing, as well...
.... All safety messages will tell you what the potential hazard is used by KitchenAid may cause fire, electrical shock or injury. 8. All safety messages will follow instructions. Do not operate Stand Mixer with a damaged cord or plug or after the Stand Mixer malfunctions, or is the safety alert symbol. Keep hands, hair, clothing, as well...
Use & Care Guide
Page 5
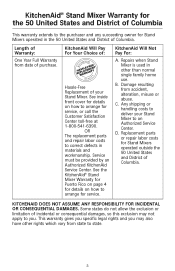
... defects in other rights which vary from date of purchase. B. Any shipping or handling costs to deliver your Stand Mixer. See the KitchenAid® Stand Mixer Warranty for Puerto Rico on page 4 for details on how to arrange for service. D. Replacement parts or repair ... of Columbia. Repairs when Stand Mixer is used in materials and workmanship. KitchenAid Will Pay For Your Choice of: Hassle-Free Replacement of your Stand Mixer to an Authorized Service Center. Damage resulting from accident, alteration, misuse or abuse. KitchenAid® Stand Mixer Warranty for the 50 United...
... defects in other rights which vary from date of purchase. B. Any shipping or handling costs to deliver your Stand Mixer. See the KitchenAid® Stand Mixer Warranty for Puerto Rico on page 4 for details on how to arrange for service. D. Replacement parts or repair ... of Columbia. Repairs when Stand Mixer is used in materials and workmanship. KitchenAid Will Pay For Your Choice of: Hassle-Free Replacement of your Stand Mixer to an Authorized Service Center. Damage resulting from accident, alteration, misuse or abuse. KitchenAid® Stand Mixer Warranty for the 50 United...
Use & Care Guide
Page 6
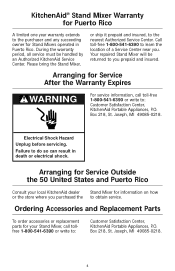
...for Service Outside the 50 United States and Puerto Rico Consult your Stand Mixer, call toll-free 1-800-541-6390 or write to: Customer Satisfaction Center, KitchenAid Portable Appliances, P.O. KitchenAid® Stand Mixer Warranty for Puerto Rico A limited one year warranty extends to the ... For service information, call tollfree 1-800-541-6390 or write to: Customer Satisfaction Center, KitchenAid Portable Appliances, P.O. Arranging for your local KitchenAid dealer Stand Mixer for Stand Mixers operated in death or electrical shock. Joseph, MI 49085-0218. Box 218, St. During...
...for Service Outside the 50 United States and Puerto Rico Consult your Stand Mixer, call toll-free 1-800-541-6390 or write to: Customer Satisfaction Center, KitchenAid Portable Appliances, P.O. KitchenAid® Stand Mixer Warranty for Puerto Rico A limited one year warranty extends to the ... For service information, call tollfree 1-800-541-6390 or write to: Customer Satisfaction Center, KitchenAid Portable Appliances, P.O. Arranging for your local KitchenAid dealer Stand Mixer for Stand Mixers operated in death or electrical shock. Joseph, MI 49085-0218. Box 218, St. During...
Use & Care Guide
Page 7
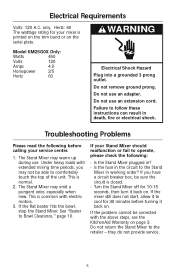
Hertz: 60 The wattage rating for your mixer is closed. - The Stand Mixer may warm up during use an extension cord. If the problem cannot be corrected with the above steps, see the KitchenAid Warranty on the serial plate. Do not use . If the mixer still does not start, allow it to cool for 10-15...
Hertz: 60 The wattage rating for your mixer is closed. - The Stand Mixer may warm up during use an extension cord. If the problem cannot be corrected with the above steps, see the KitchenAid Warranty on the serial plate. Do not use . If the mixer still does not start, allow it to cool for 10-15...
Use & Care Guide
Page 9
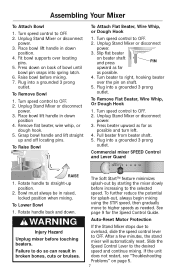
...straight up position. 2. Press beater upward as far as possible. 4. To Lower Bowl 1. After a few minutes, the stand mixer will automatically reset. Unplug Stand Mixer or disconnect power. 3. Rotate handle to straight-up and off locating pins. Bowl must always be in broken bones, ... 1. Commercial mixer SPEED Control and Lever Guard OFREFSE/T0STIR2 4 6 8 10 RAISE 1. To further reduce the potential for the Speed Control Guide. Turn speed control to OFF. 2. Turn speed control to OFF. 2. Failure to OFF. Auto-Reset Motor Protection If the Stand Mixer stops ...
...straight up position. 2. Press beater upward as far as possible. 4. To Lower Bowl 1. After a few minutes, the stand mixer will automatically reset. Unplug Stand Mixer or disconnect power. 3. Rotate handle to straight-up and off locating pins. Bowl must always be in broken bones, ... 1. Commercial mixer SPEED Control and Lever Guard OFREFSE/T0STIR2 4 6 8 10 RAISE 1. To further reduce the potential for the Speed Control Guide. Turn speed control to OFF. 2. Turn speed control to OFF. 2. Failure to OFF. Auto-Reset Motor Protection If the Stand Mixer stops ...
Use & Care Guide
Page 10
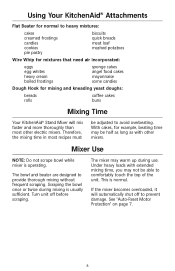
... extended mixing time, you may warm up during mixing is usually sufficient. Under heavy loads with other electric mixers. Scraping the bowl once or twice during use. Using Your KitchenAid® Attachments Flat Beater for normal to heavy mixtures: cakes creamed frostings candies cookies pie pastry biscuits quick ... may be adjusted to avoid overbeating. With cakes, for mixing and kneading yeast doughs: breads rolls coffee cakes buns Mixing Time Your KitchenAid® Stand Mixer will automatically shut off before scraping. Therefore, the mixing time in most other...
... extended mixing time, you may warm up during mixing is usually sufficient. Under heavy loads with other electric mixers. Scraping the bowl once or twice during use. Using Your KitchenAid® Attachments Flat Beater for normal to heavy mixtures: cakes creamed frostings candies cookies pie pastry biscuits quick ... may be adjusted to avoid overbeating. With cakes, for mixing and kneading yeast doughs: breads rolls coffee cakes buns Mixing Time Your KitchenAid® Stand Mixer will automatically shut off before scraping. Therefore, the mixing time in most other...
Use & Care Guide
Page 12
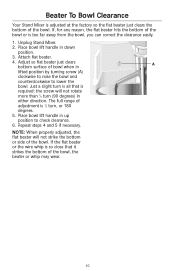
... bowl when in down position. 3. The full range of the bowl, the beater or whip may wear. 10 Repeat steps 4 and 5 if necessary. Unplug Stand Mixer. 2. Place bowl lift handle in A lifted position by turning screw (A) clockwise to raise the bowl and counterclockwise to check clearance. 6. Place bowl lift handle... of the bowl or is adjusted at the factory so the flat beater just clears the bottom of the bowl. Beater To Bowl Clearance Your Stand Mixer is too far away from the bowl, you can correct the clearance easily. 1. Attach flat beater. 4. If the flat beater or the ...
... bowl when in down position. 3. The full range of the bowl, the beater or whip may wear. 10 Repeat steps 4 and 5 if necessary. Unplug Stand Mixer. 2. Place bowl lift handle in A lifted position by turning screw (A) clockwise to raise the bowl and counterclockwise to check clearance. 6. Place bowl lift handle... of the bowl or is adjusted at the factory so the flat beater just clears the bottom of the bowl. Beater To Bowl Clearance Your Stand Mixer is too far away from the bowl, you can correct the clearance easily. 1. Attach flat beater. 4. If the flat beater or the ...
Use & Care Guide
Page 13
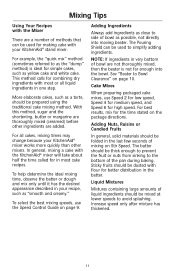
... speeds to avoid splashing. Mixing Tips Using Your Recipes with the Mixer There are a number of methods that can be used for making cake with your KitchenAid® stand mixer. In general, mixing a cake with the KitchenAid® mixer will take about half the time called for in most or all... cakes, mixing times may change because your KitchenAid® mixer works more quickly than other ingredients are not ...
... speeds to avoid splashing. Mixing Tips Using Your Recipes with the Mixer There are a number of methods that can be used for making cake with your KitchenAid® stand mixer. In general, mixing a cake with the KitchenAid® mixer will take about half the time called for in most or all... cakes, mixing times may change because your KitchenAid® mixer works more quickly than other ingredients are not ...
Use & Care Guide
Page 15
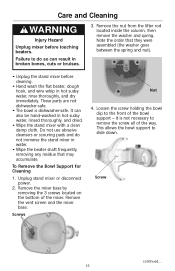
... so can also be hand-washed in hot sudsy water, rinsed thoroughly, and dried. • Wipe the stand mixer with a clean damp cloth. Unplug stand mixer or disconnect power. 2. Remove the mixer base by removing the 3 screws located on the bottom of the way. Loosen the screw holding the bowl... removing any residue that they were assembled (the washer goes between the spring and nut). • Unplug the stand mixer before touching beaters. Care and Cleaning WARNING Injury Hazard Unplug mixer before cleaning. • Hand wash the flat beater, dough hook, and wire whip in hot sudsy water, ...
... so can also be hand-washed in hot sudsy water, rinsed thoroughly, and dried. • Wipe the stand mixer with a clean damp cloth. Unplug stand mixer or disconnect power. 2. Remove the mixer base by removing the 3 screws located on the bottom of the way. Loosen the screw holding the bowl... removing any residue that they were assembled (the washer goes between the spring and nut). • Unplug the stand mixer before touching beaters. Care and Cleaning WARNING Injury Hazard Unplug mixer before cleaning. • Hand wash the flat beater, dough hook, and wire whip in hot sudsy water, ...


