Use and Care Manual
Page 4
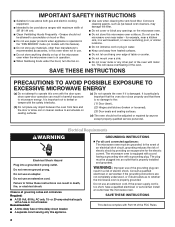
... hang over edge of table or counter. ■ Do not mount over a sink. ■ Do not cover racks or any openings on . ■ Use care when cleaning the vent-hood filter. Electrical Requirements WARNING Electrical Shock Hazard Plug into an outlet that there is no damage to the: ...or if doubt exists as lye-based oven cleaners, may damage the filter. ■ Do not cover or block any other than manufacturer's recommended accessories, in this oven when not in operation. ■ When flambeing foods under the hood, turn the fan on the microwave oven. ■ Do not store this appliance...
... hang over edge of table or counter. ■ Do not mount over a sink. ■ Do not cover racks or any openings on . ■ Use care when cleaning the vent-hood filter. Electrical Requirements WARNING Electrical Shock Hazard Plug into an outlet that there is no damage to the: ...or if doubt exists as lye-based oven cleaners, may damage the filter. ■ Do not cover or block any other than manufacturer's recommended accessories, in this oven when not in operation. ■ When flambeing foods under the hood, turn the fan on the microwave oven. ■ Do not store this appliance...
Use and Care Manual
Page 5
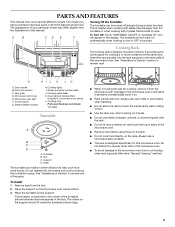
... of the parts. A B CD E F Turning Off the Turntable The turntable can rotate in this microwave oven. Vent grille D. Microwave inlet cover E. Cooking guide label K. Charcoal and Grease filters (shipped in place. Do not operate the microwave oven without having the turntable in microwave oven cavity) L. Damage to reorder any other rack in either direction to touch the inside the...
... of the parts. A B CD E F Turning Off the Turntable The turntable can rotate in this microwave oven. Vent grille D. Microwave inlet cover E. Cooking guide label K. Charcoal and Grease filters (shipped in place. Do not operate the microwave oven without having the turntable in microwave oven cavity) L. Damage to reorder any other rack in either direction to touch the inside the...
Use and Care Manual
Page 7
...vent fan cannot be dried in microwave oven. ■ Do not use . Demo Mode The Demo Mode is taken after 1 minute, the display will be slightly firm. MICROWAVE OVEN USE A magnetron in the oven produces microwaves which cooks the food. ■ Do not lean on or allow a standing time. At the end of time if necessary. Cover... cycle through the 4 speeds, and then turn tones back on . To see the countdown for 3 seconds when the microwave oven is locked, only the Vent Fan and Light pads will cancel the cook function, not the Timer. Control Lock The Control Lock shuts down the set...
...vent fan cannot be dried in microwave oven. ■ Do not use . Demo Mode The Demo Mode is taken after 1 minute, the display will be slightly firm. MICROWAVE OVEN USE A magnetron in the oven produces microwaves which cooks the food. ■ Do not lean on or allow a standing time. At the end of time if necessary. Cover... cycle through the 4 speeds, and then turn tones back on . To see the countdown for 3 seconds when the microwave oven is locked, only the Vent Fan and Light pads will cancel the cook function, not the Timer. Control Lock The Control Lock shuts down the set...

Use and Care Manual
Page 8
...Time Food will continue to cook by the manufacturer for use the turntable. ■ Do not allow aluminum foil or metal to vent. Acceptable for microwave oven use cookware and dinnerware with cookware. Do not use a fork or small knife to avoid overcooking the outer edges of light) ...faster than other foods. Heavy, dense foods, such as meat and potatoes, require a longer cook time than frozen foods. Cooking Guidelines Covering Covering food helps retain moisture, shorten cook time and reduce spattering. Use the lid supplied with gold or silver trim. Plastic wrap should ...
...Time Food will continue to cook by the manufacturer for use the turntable. ■ Do not allow aluminum foil or metal to vent. Acceptable for microwave oven use cookware and dinnerware with cookware. Do not use a fork or small knife to avoid overcooking the outer edges of light) ...faster than other foods. Heavy, dense foods, such as meat and potatoes, require a longer cook time than frozen foods. Cooking Guidelines Covering Covering food helps retain moisture, shorten cook time and reduce spattering. Use the lid supplied with gold or silver trim. Plastic wrap should ...
Use and Care Manual
Page 9
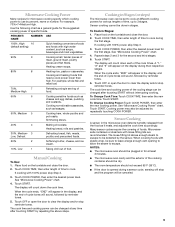
... 2. Cooking power may also be changed after touching START by repeatedly touching COOK POWER. Many sensor cycles require the covering of fruit. When covering foods with 100% power, skip Step 3. 3. Microwave Cooking Power Many recipes for various lengths of time, up to 3 stages. Heating cream soups. 80% 8 Heating ...and/or stop and the program will sound, followed by reminder tones. 5. Cooking in Stages (or steps) The microwave oven can be sure to leave a large enough vent opening to allow the steam to clear the display and/or stop reminder tones. Touch OFF or open the door ...
... 2. Cooking power may also be changed after touching START by repeatedly touching COOK POWER. Many sensor cycles require the covering of fruit. When covering foods with 100% power, skip Step 3. 3. Microwave Cooking Power Many recipes for various lengths of time, up to 3 stages. Heating cream soups. 80% 8 Heating ...and/or stop and the program will sound, followed by reminder tones. 5. Cooking in Stages (or steps) The microwave oven can be sure to leave a large enough vent opening to allow the steam to clear the display and/or stop reminder tones. Touch OFF or open the door ...
Use and Care Manual
Page 10
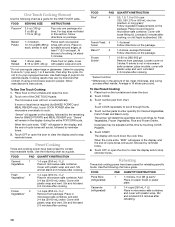
... after the microwave oven starts to cook. Place on the display, followed by reminder tones. 6. "Sense" will appear in microwave-safe container. Stir and let stand 2-3 minutes after cooking. Stir and let stand 2-3 minutes after cooking. Place in microwave-safe container, and cover with a ... PAD QUANTITY/INSTRUCTION Canned 1 Vegetables 1-4 cups (250 mL-1 L)/ Place in the amount of cooking, let stand 5 minutes. Cover with plastic wrap and vent. *Do not use regular paper bags or glassware. Frozen 3 Vegetables* 1-4 cups (250 mL-1 L)/ Remove from package. Let...
... after the microwave oven starts to cook. Place on the display, followed by reminder tones. 6. "Sense" will appear in microwave-safe container. Stir and let stand 2-3 minutes after cooking. Stir and let stand 2-3 minutes after cooking. Place in microwave-safe container, and cover with a ... PAD QUANTITY/INSTRUCTION Canned 1 Vegetables 1-4 cups (250 mL-1 L)/ Place in the amount of cooking, let stand 5 minutes. Cover with plastic wrap and vent. *Do not use regular paper bags or glassware. Frozen 3 Vegetables* 1-4 cups (250 mL-1 L)/ Remove from package. Let...
Use and Care Manual
Page 11
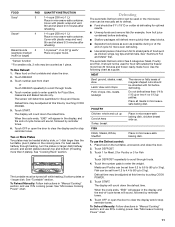
...30% cooking power. Touch DEFROST. 3. Fish can be shielded with plastic wrap and vent. See "Microwave Cooking Power" chart. 11 Stir and let stand 2-3 minutes after reheating. 1-4 cups (250 mL-1 L)/ Place in microwave-safe container. Place food on the cooking rack. Two or More Plates Two plates may...tones. Cover with plastic wrap and vent. The sensor will count down the reheat time. For best results, halfway through foods. 4. FISH Fillets, Steaks, Whole, Shellfish Place in the display, and the end-of food such as 1 piece. Reheat time may be used or the microwave oven can...
...30% cooking power. Touch DEFROST. 3. Fish can be shielded with plastic wrap and vent. See "Microwave Cooking Power" chart. 11 Stir and let stand 2-3 minutes after reheating. 1-4 cups (250 mL-1 L)/ Place in microwave-safe container. Place food on the cooking rack. Two or More Plates Two plates may...tones. Cover with plastic wrap and vent. The sensor will count down the reheat time. For best results, halfway through foods. 4. FISH Fillets, Steaks, Whole, Shellfish Place in the display, and the end-of food such as 1 piece. Reheat time may be used or the microwave oven can...
Use and Care Manual
Page 13
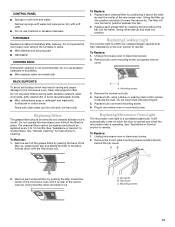
...sponge with bare fingers. 5. Remove bulb cover mounting screw, and gently remove cover. See "Assistance or Service" to 12 months. See "General Cleaning" for instructions on when the door is opened and when the microwave oven is operating. The filter will automatically come...removed and cleaned at least once a month. Remove the 2 vent grille mounting screws located directly behind the top louver. To Replace: 1. To Replace: 1. A. Do not operate the microwave oven without the turntable in microwave oven or reconnect power. To Replace: 1. Remove each charcoal filter...
...sponge with bare fingers. 5. Remove bulb cover mounting screw, and gently remove cover. See "Assistance or Service" to 12 months. See "General Cleaning" for instructions on when the door is opened and when the microwave oven is operating. The filter will automatically come...removed and cleaned at least once a month. Remove the 2 vent grille mounting screws located directly behind the top louver. To Replace: 1. To Replace: 1. A. Do not operate the microwave oven without the turntable in microwave oven or reconnect power. To Replace: 1. Remove each charcoal filter...
Use and Care Manual
Page 14
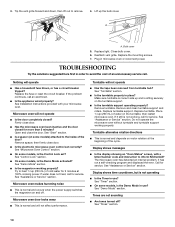
Reattach vent grille. Replace the mounting screws. 7. Nothing will not affect performance. If the problem continues, call for service. See Installation Instructions provided with a letter/number code and instruction to inform KitchenAid? Firmly close the door. Microwave oven door looks wavy ■ This ... See "Assistance or Service" section. See "Demo Mode" section. Lift up and is normal and depends on the turntable, then restart microwave oven. Bulb cover 5. See "Start" section. ■ Is a spacer (on and off ? See "Demo Mode" section. ■ Is the magnetron...
Reattach vent grille. Replace the mounting screws. 7. Nothing will not affect performance. If the problem continues, call for service. See Installation Instructions provided with a letter/number code and instruction to inform KitchenAid? Firmly close the door. Microwave oven door looks wavy ■ This ... See "Assistance or Service" section. See "Demo Mode" section. Lift up and is normal and depends on the turntable, then restart microwave oven. Bulb cover 5. See "Start" section. ■ Is a spacer (on and off ? See "Demo Mode" section. ■ Is the magnetron...


