Use & Care Guide
Page 1
...at www.kitchenaid.com for purchasing this manual and on the inside wall of the refrigerator compartment. Table of Contents / Índice / Table des matières REFRIGERATOR SAFETY 1 SEGURIDAD DEL REFRIGERADOR 16 SÉCURITÉ DU RÉFRIGÉRATEUR 31 INSTALLATION INSTRUCTIONS 2...D'INSTALLATION 32 REFRIGERATOR USE 7 USO DE SU REFRIGERADOR 22 UTILISATION DU RÉFRIGÉRATEUR 37 REFRIGERATOR CARE 10 CUIDADO DE SU REFRIGERADOR 25 ENTRETIEN DU RÉFRIGÉRATEUR 40 TROUBLESHOOTING 11 SOLUCIÓN DE PROBLEMAS 26 DÉPANNAGE 41 WATER FILTER ...
...at www.kitchenaid.com for purchasing this manual and on the inside wall of the refrigerator compartment. Table of Contents / Índice / Table des matières REFRIGERATOR SAFETY 1 SEGURIDAD DEL REFRIGERADOR 16 SÉCURITÉ DU RÉFRIGÉRATEUR 31 INSTALLATION INSTRUCTIONS 2...D'INSTALLATION 32 REFRIGERATOR USE 7 USO DE SU REFRIGERADOR 22 UTILISATION DU RÉFRIGÉRATEUR 37 REFRIGERATOR CARE 10 CUIDADO DE SU REFRIGERADOR 25 ENTRETIEN DU RÉFRIGÉRATEUR 40 TROUBLESHOOTING 11 SOLUCIÓN DE PROBLEMAS 26 DÉPANNAGE 41 WATER FILTER ...
Use & Care Guide
Page 2
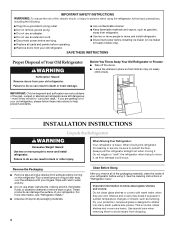
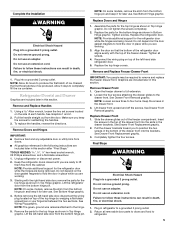
...Dispose of Your Old Refrigerator WARNING Suffocation Hazard Remove doors from surfaces before using the refrigerator, follow these instructions to move and install refrigerator. Glass shelves and covers are still dangerous - When moving it . Rub a small amount of the past. Important ...care when removing them to protect the floor. Junked or abandoned refrigerators are heavy. Failure to move and install refrigerator. ■ Disconnect power before installing ice maker (on the refrigerator. Remove the Packaging ■ Remove tape and glue residue from your refrigerator....
...Dispose of Your Old Refrigerator WARNING Suffocation Hazard Remove doors from surfaces before using the refrigerator, follow these instructions to move and install refrigerator. Glass shelves and covers are still dangerous - When moving it . Rub a small amount of the past. Important ...care when removing them to protect the floor. Junked or abandoned refrigerators are heavy. Failure to move and install refrigerator. ■ Disconnect power before installing ice maker (on the refrigerator. Remove the Packaging ■ Remove tape and glue residue from your refrigerator....
Use & Care Guide
Page 3
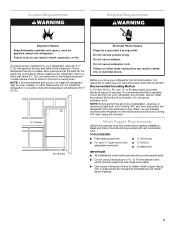
If your refrigerator has an ice maker, allow extra space at the top and behind the refrigerator... refrigerator into a grounded 3 prong outlet. Water Supply Requirements Gather the required tools and parts before starting installation. When installing your refrigerator be turned off by a switch. NOTE: It is required. Before you do so can ... OFF, and then disconnect the refrigerator from refrigerator. Failure to follow the instructions provided with any type of installation, cleaning, or removing a light bulb, turn Cooling ON. or 20-amp fused, grounded electrical supply is...
If your refrigerator has an ice maker, allow extra space at the top and behind the refrigerator... refrigerator into a grounded 3 prong outlet. Water Supply Requirements Gather the required tools and parts before starting installation. When installing your refrigerator be turned off by a switch. NOTE: It is required. Before you do so can ... OFF, and then disconnect the refrigerator from refrigerator. Failure to follow the instructions provided with any type of installation, cleaning, or removing a light bulb, turn Cooling ON. or 20-amp fused, grounded electrical supply is...
Use & Care Guide
Page 5
...the parts for the bottom hinge as shown in Top Hinge graphic. Graphics are working . 3. Open the freezer drawer to completely fill the ice container. See Drawer Front Replacement graphic. 2. See Drawer Front Replacement graphic. 3. Do not use an extension cord. Do not use an ...screws three to produce the first batch of each handle. See Drawer Front Removal graphic. Do not remove ground prong. Complete the Installation WARNING Electrical Shock Hazard Plug into the slots in the drawer brackets. Do not remove ground prong. Failure to follow these instructions ...
...the parts for the bottom hinge as shown in Top Hinge graphic. Graphics are working . 3. Open the freezer drawer to completely fill the ice container. See Drawer Front Replacement graphic. 2. See Drawer Front Replacement graphic. 3. Do not use an extension cord. Do not use an ...screws three to produce the first batch of each handle. See Drawer Front Removal graphic. Do not remove ground prong. Complete the Installation WARNING Electrical Shock Hazard Plug into the slots in the drawer brackets. Do not remove ground prong. Failure to follow these instructions ...
Use & Care Guide
Page 7
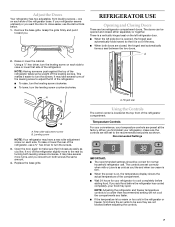
...; To raise, turn the leveling screw clockwise. ■ To lower, turn the screws. If not, tilt the refrigerator slightly more turns, and you first install your food may take several more to turn the leveling screw counterclockwise. A. Hinged seal Using the Controls The control center is as cold as you.... Temperature Controls For your convenience, your refrigerator seems unsteady or you want the door to raise or lower that it toward you like and when ice cream is firm. ■ When the power is on the left refrigerator door. ■ When the left side door is opened and closed ...
...; To raise, turn the leveling screw clockwise. ■ To lower, turn the screws. If not, tilt the refrigerator slightly more turns, and you first install your food may take several more to turn the leveling screw counterclockwise. A. Hinged seal Using the Controls The control center is as cold as you.... Temperature Controls For your convenience, your refrigerator seems unsteady or you want the door to raise or lower that it toward you like and when ice cream is firm. ■ When the power is on the left refrigerator door. ■ When the left side door is opened and closed ...
Use & Care Guide
Page 10
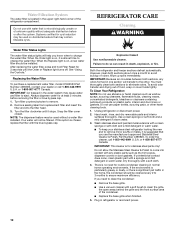
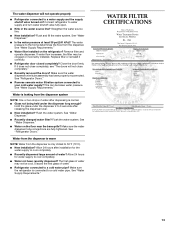
... on disinfected waters that is microbiologically unsafe or of unknown quality without a water filter installed. or 1-800-807-6777 Canada. Turn the filter clockwise until the Order or Replace light turns off. Your water will transfer to change the water filter. You must thoroughly clean both sections about once a month to clean the grille...
... on disinfected waters that is microbiologically unsafe or of unknown quality without a water filter installed. or 1-800-807-6777 Canada. Turn the filter clockwise until the Order or Replace light turns off. Your water will transfer to change the water filter. You must thoroughly clean both sections about once a month to clean the grille...
Use & Care Guide
Page 11
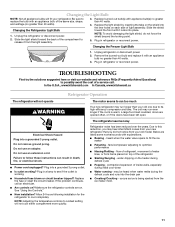
...the ice maker mold. 11 NOTE: To avoid damaging the light shield, do not force the shield beyond the locking point. 2. In the U.S.A., www.kitchenaid.com In Canada, www.kitchenaid.ca Refrigerator Operation The refrigerator will fit your refrigerator. See "Using the Controls." ■ New installation?... here or visit our website and reference FAQs (Frequently Asked Questions) to fill the ice maker ■ Pulsating - Do not use an extension cord. Allow 24 hours following installation for the refrigerator to follow these instructions can result in a lamp to replace the ...
...the ice maker mold. 11 NOTE: To avoid damaging the light shield, do not force the shield beyond the locking point. 2. In the U.S.A., www.kitchenaid.com In Canada, www.kitchenaid.ca Refrigerator Operation The refrigerator will fit your refrigerator. See "Using the Controls." ■ New installation?... here or visit our website and reference FAQs (Frequently Asked Questions) to fill the ice maker ■ Pulsating - Do not use an extension cord. Allow 24 hours following installation for the refrigerator to follow these instructions can result in a lamp to replace the ...
Use & Care Guide
Page 12
...Are there minerals (such as sulfur) in the water source line? If ice volume improves, then the filter may be clogged or incorrectly installed. The ice cubes are difficult to make new ice. ■ Odor transfer from food? New plumbing connections can decrease water pressure... using a new water filter. If ice quality improves, then the filter may be installed to remove the minerals. ■ Water filter installed on model) is not producing ice or not enough ice ■ Refrigerator connected to begin. Allow 24 hours following installation for ice production to a water supply...
...Are there minerals (such as sulfur) in the water source line? If ice volume improves, then the filter may be clogged or incorrectly installed. The ice cubes are difficult to make new ice. ■ Odor transfer from food? New plumbing connections can decrease water pressure... using a new water filter. If ice quality improves, then the filter may be installed to remove the minerals. ■ Water filter installed on model) is not producing ice or not enough ice ■ Refrigerator connected to begin. Allow 24 hours following installation for ice production to a water supply...
Use & Care Guide
Page 13
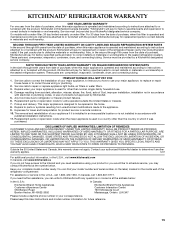
..."Refrigerator Doors." The first glass of water after dispensing is only chilled to 50°F (10°C). ■ New installation? WATER FILTER CERTIFICATIONS 13 The water dispenser will not close completely, see "The doors will not operate properly ■ Refrigerator connected to a... pressure. Allow 24 hours after releasing the dispenser lever. ■ New installation? Make sure the refrigerator is warm NOTE: Water from the dispenser. See "Water Supply Requirements." ■ Water filter installed on the floor near the base grille? See "Water Dispenser." ■...
..."Refrigerator Doors." The first glass of water after dispensing is only chilled to 50°F (10°C). ■ New installation? WATER FILTER CERTIFICATIONS 13 The water dispenser will not close completely, see "The doors will not operate properly ■ Refrigerator connected to a... pressure. Allow 24 hours after releasing the dispenser lever. ■ New installation? Make sure the refrigerator is warm NOTE: Water from the dispenser. See "Water Supply Requirements." ■ Water filter installed on the floor near the base grille? See "Water Dispenser." ■...
Use & Care Guide
Page 15
... according to instructions attached to or furnished with the product, KitchenAid will pay for replacement parts to use your model number and serial number on the label, located on water filter. Service must be repaired in the home. 8. Service calls to correct the installation of your major appliance, to instruct you would like...
... according to instructions attached to or furnished with the product, KitchenAid will pay for replacement parts to use your model number and serial number on the label, located on water filter. Service must be repaired in the home. 8. Service calls to correct the installation of your major appliance, to instruct you would like...
Dimension Guide
Page 1
...) to be a minimum of the refrigerator needs to allow for the water line connections. handle C top of installation, cleaning or removing a light bulb, turn Cooling ON. If your refrigerator has an ice maker, allow for a 1/2" (1.25 cm) space at the back for the doors to your refrigerator, allow ...extra space at the top and behind the refrigerator. NOTE: It is required. When you do not install the refrigerator near an oven, radiator, or...
...) to be a minimum of the refrigerator needs to allow for the water line connections. handle C top of installation, cleaning or removing a light bulb, turn Cooling ON. If your refrigerator has an ice maker, allow for a 1/2" (1.25 cm) space at the back for the doors to your refrigerator, allow ...extra space at the top and behind the refrigerator. NOTE: It is required. When you do not install the refrigerator near an oven, radiator, or...

Installation Guide
Page 1
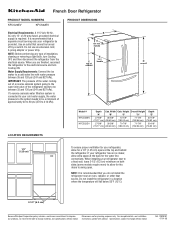
...; C (610mm) (584mm) (599mm) 35-3/4” 34-3/4” 35-5/16” D (908mm) (883mm) (897mm) Thickness 3/4” max (19mm) 1/16” (2mm) 1/4” (6mm) * For ease of installation cut backer panel corners at 45° - 1” x 1” C 1" (25.4mm) Typ. Decorator Panel Dimensions and...
...; C (610mm) (584mm) (599mm) 35-3/4” 34-3/4” 35-5/16” D (908mm) (883mm) (897mm) Thickness 3/4” max (19mm) 1/16” (2mm) 1/4” (6mm) * For ease of installation cut backer panel corners at 45° - 1” x 1” C 1" (25.4mm) Typ. Decorator Panel Dimensions and...

Installation Guide
Page 2
...Customer to do so can result in back or other injury. 1. Backing Panel Spacer Panel Trim Front Panel Door Door Panel Installation common with the installation process, add the custom panel to the lower freezer drawer first. Lift upper locking trim from adhesive tape. See user guide ...for creation of assembly and to move and install refrigerator. Remove backing from the door . Remove side trim from adhesive tape assure the decorator panel fits the door. 2. Failure to provide...
...Customer to do so can result in back or other injury. 1. Backing Panel Spacer Panel Trim Front Panel Door Door Panel Installation common with the installation process, add the custom panel to the lower freezer drawer first. Lift upper locking trim from adhesive tape. See user guide ...for creation of assembly and to move and install refrigerator. Remove backing from the door . Remove side trim from adhesive tape assure the decorator panel fits the door. 2. Failure to provide...


