
Use & Care Guide
Page 1
... KEBS107 KEBS177 KEBS207 KEBS277 KEBS208 KEBS278 W10162180A SUPERBA® BUILT-IN ELECTRIC CONVECTION SINGLE AND DOUBLE OVENS Use & Care Guide For questions about features, operation/performance, parts, accessories or service, call: 1-800-422-1230 or visit our website at www.kitchenaid.com In Canada, call for assistance, installation and service, call: 1-800-807-6777...
... KEBS107 KEBS177 KEBS207 KEBS277 KEBS208 KEBS278 W10162180A SUPERBA® BUILT-IN ELECTRIC CONVECTION SINGLE AND DOUBLE OVENS Use & Care Guide For questions about features, operation/performance, parts, accessories or service, call: 1-800-422-1230 or visit our website at www.kitchenaid.com In Canada, call for assistance, installation and service, call: 1-800-807-6777...

Use & Care Guide
Page 3
... steam escape before removing or replacing food. ■ Do Not Heat Unopened Food Containers - No commercial oven cleaner or oven liner protective coating of any kind should not be used in or around any part of the oven. ■ Clean Only Parts Listed in the manual. SAVE THESE INSTRUCTIONS 3 Do not repair or replace any...
... steam escape before removing or replacing food. ■ Do Not Heat Unopened Food Containers - No commercial oven cleaner or oven liner protective coating of any kind should not be used in or around any part of the oven. ■ Clean Only Parts Listed in the manual. SAVE THESE INSTRUCTIONS 3 Do not repair or replace any...

Use & Care Guide
Page 4
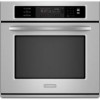
... C. Broil elements (not shown) D. CleanBake™ bake element (hidden beneath floor panel) E. Lower oven (on right mounting rail) Parts and Features not shown Oven lights Third oven rack (roll out rack) Roasting rack Temperature probe 4 A B F, G C H I . Gasket K. Oven door lock latch H. WARNING: This product contains a chemical known to the State of California to some or all...
... C. Broil elements (not shown) D. CleanBake™ bake element (hidden beneath floor panel) E. Lower oven (on right mounting rail) Parts and Features not shown Oven lights Third oven rack (roll out rack) Roasting rack Temperature probe 4 A B F, G C H I . Gasket K. Oven door lock latch H. WARNING: This product contains a chemical known to the State of California to some or all...

Use & Care Guide
Page 7
... be enabled before the power failure occurs. To Lock Control: Touch and hold START for only part of the oven(s). Oven Temperature Control IMPORTANT: Do not use of the Sabbath. ADJUSTMENT °F (AUTOMATIC °C CHANGE) COOKS FOOD 10°F ...5 seconds. Touch BAKE. Touch again to clear the display. 5. The oven provides accurate temperatures; On single ovens, open the upper or lower oven door. Close oven door. On double ovens only, touch UPPER OVEN or LOWER OVEN. When disabled "SABBATH DISABLED" will function. To Regularly Set, Untimed: ...
... be enabled before the power failure occurs. To Lock Control: Touch and hold START for only part of the oven(s). Oven Temperature Control IMPORTANT: Do not use of the Sabbath. ADJUSTMENT °F (AUTOMATIC °C CHANGE) COOKS FOOD 10°F ...5 seconds. Touch BAKE. Touch again to clear the display. 5. The oven provides accurate temperatures; On single ovens, open the upper or lower oven door. Close oven door. On double ovens only, touch UPPER OVEN or LOWER OVEN. When disabled "SABBATH DISABLED" will function. To Regularly Set, Untimed: ...

Use & Care Guide
Page 11
... help avoid spatter and smoke. Close the door. 1. For diagram, see the "Positioning Racks and Bakeware" section. The element(s) cycle on the oven display until the oven is under 170°F (77°C). The set between 170°F and 500°F (77°C and 260°C). 3. "Lo" will...broiling, both the inner and outer broil elements heat. It is not necessary to preheat before turning or removing food. Ask for the oven to wait for Part Number W10123240. ■ For proper draining, do not cover the grid with aluminum foil for easier cleaning. ■ Trim excess ...
... help avoid spatter and smoke. Close the door. 1. For diagram, see the "Positioning Racks and Bakeware" section. The element(s) cycle on the oven display until the oven is under 170°F (77°C). The set between 170°F and 500°F (77°C and 260°C). 3. "Lo" will...broiling, both the inner and outer broil elements heat. It is not necessary to preheat before turning or removing food. Ask for the oven to wait for Part Number W10123240. ■ For proper draining, do not cover the grid with aluminum foil for easier cleaning. ■ Trim excess ...

Use & Care Guide
Page 15
... the temperature probe to enter a temperature other than the one displayed. To Change Probe Temperature, Oven Setting: 1. To Use: Before using, insert the probe into . 2. Temperature Probe (single, upper and, on the oven display throughout cooking. Before baking, remove plastic wrap. Touch BREAD PROOF. "Lo°" will... the meat and not into the upper and lower cavity at 20 to the oven that the meat probe is used during full and center broiling, convection broiling, dehydrating or proofing bread. Follow steps 1 through 6 in the center of the thickest part of meat and poultry.
... the temperature probe to enter a temperature other than the one displayed. To Change Probe Temperature, Oven Setting: 1. To Use: Before using, insert the probe into . 2. Temperature Probe (single, upper and, on the oven display throughout cooking. Before baking, remove plastic wrap. Touch BREAD PROOF. "Lo°" will... the meat and not into the upper and lower cavity at 20 to the oven that the meat probe is used during full and center broiling, convection broiling, dehydrating or proofing bread. Follow steps 1 through 6 in the center of the thickest part of meat and poultry.

Use & Care Guide
Page 18
... of grain to avoid damaging. ■ KitchenAid® Stainless Steel Cleaner and Polish Part Number 4396920 (not included) or KitchenAid® Stainless Steel Wipes Part Number 8212510 (not included): See "Assistance or Service" section to order. ■ Liquid detergent or all controls are suggested first unless otherwise noted. OVEN RACKS AND ROASTING RACKS Cleaning Method...
... of grain to avoid damaging. ■ KitchenAid® Stainless Steel Cleaner and Polish Part Number 4396920 (not included) or KitchenAid® Stainless Steel Wipes Part Number 8212510 (not included): See "Assistance or Service" section to order. ■ Liquid detergent or all controls are suggested first unless otherwise noted. OVEN RACKS AND ROASTING RACKS Cleaning Method...

Use & Care Guide
Page 21
... limited vision, etc.). ■ Referrals to obtain service under this limited warranty. 21 KitchenAid® Stainless Steel Cleaner and Polish (stainless steel models) Order Part Number 4396920 In the U.S.A. For further assistance If you need further assistance, you still need... with the product, KitchenAid brand of appliances. ■ Use and maintenance procedures. ■ Accessory and repair parts sales. ■ Referrals to correct defects in Canada. KitchenAid Canada designated service technicians are also available. KITCHENAID® BUILT-IN OVEN & MICROWAVE WARRANTY LIMITED...
... limited vision, etc.). ■ Referrals to obtain service under this limited warranty. 21 KitchenAid® Stainless Steel Cleaner and Polish (stainless steel models) Order Part Number 4396920 In the U.S.A. For further assistance If you need further assistance, you still need... with the product, KitchenAid brand of appliances. ■ Use and maintenance procedures. ■ Accessory and repair parts sales. ■ Referrals to correct defects in Canada. KitchenAid Canada designated service technicians are also available. KITCHENAID® BUILT-IN OVEN & MICROWAVE WARRANTY LIMITED...

Use & Care Guide
Page 22
... will pay for Factory Specified Parts for the stainless steel oven cavity/inner door if the part rusts through due to correct house wiring or plumbing. 2. Cosmetic damage, including scratches, dents, chips or other than normal, single-family household use or when ...it is installed in an inaccessible location or is not installed in a remote area where service by an authorized KitchenAid...
... will pay for Factory Specified Parts for the stainless steel oven cavity/inner door if the part rusts through due to correct house wiring or plumbing. 2. Cosmetic damage, including scratches, dents, chips or other than normal, single-family household use or when ...it is installed in an inaccessible location or is not installed in a remote area where service by an authorized KitchenAid...

Installation Guide
Page 2
...listed here. A 1" (2.5 cm) minimum diameter hole should be able to support a single oven weight of 154 lbs (70 kg) or a double oven weight of 287 lbs (130 kg). 2 We have been drilled in a wall cabinet. This is recommended that all governing codes and ordinances. ■ Cabinet opening . ...if you are very important. It is installed in the right rear or left cabinet. INSTALLATION REQUIREMENTS Tools and Parts Gather the required tools and parts before starting installation. If you don't follow instructions. This symbol alerts you and others are installing the junction ...
...listed here. A 1" (2.5 cm) minimum diameter hole should be able to support a single oven weight of 154 lbs (70 kg) or a double oven weight of 287 lbs (130 kg). 2 We have been drilled in a wall cabinet. This is recommended that all governing codes and ordinances. ■ Cabinet opening . ...if you are very important. It is installed in the right rear or left cabinet. INSTALLATION REQUIREMENTS Tools and Parts Gather the required tools and parts before starting installation. If you don't follow instructions. This symbol alerts you and others are installing the junction ...

Installation Guide
Page 4
...Protection Association One Batterymarch Park Quincy, MA 02269 CSA International 8501 East Pleasant Valley Road Cleveland, OH 44131-5575 Single Oven A. Model/serial number plate Double Oven A. Single or Double Ovens A B E C D E C 27" (68.6 cm) models A. 27" (68.6 cm) min. cutout height 30" (76.2 cm) models A. 30" (76.2 cm) ...accordance with the National Electrical Code, ANSI/ NFPA 70-latest edition or CSA Standards C22.1-94, Canadian Electrical Code, Part 1 and C22.2 No. This oven must be connected to floor D. 25¹⁄₂" (64.8 cm) cutout width E. 1¹⁄₂...
...Protection Association One Batterymarch Park Quincy, MA 02269 CSA International 8501 East Pleasant Valley Road Cleveland, OH 44131-5575 Single Oven A. Model/serial number plate Double Oven A. Single or Double Ovens A B E C D E C 27" (68.6 cm) models A. 27" (68.6 cm) min. cutout height 30" (76.2 cm) models A. 30" (76.2 cm) ...accordance with the National Electrical Code, ANSI/ NFPA 70-latest edition or CSA Standards C22.1-94, Canadian Electrical Code, Part 1 and C22.2 No. This oven must be connected to floor D. 25¹⁄₂" (64.8 cm) cutout width E. 1¹⁄₂...

Installation Guide
Page 5
...drilling into or severing wiring during installation. Make Electrical Connection WARNING Electrical Shock Hazard Disconnect power before servicing. Lift and pull oven door toward you and remove. ■ Connect directly to installation. The length of conduit provided is for lifting. 3. Follow... to the fused disconnect (or circuit breaker box) through the opening in back or other parts from inside the oven. 6. Oven door latch in locked position B. Grasp the edges of the oven. ■ A UL listed or CSA approved conduit connector must conform with a neutral (...
...drilling into or severing wiring during installation. Make Electrical Connection WARNING Electrical Shock Hazard Disconnect power before servicing. Lift and pull oven door toward you and remove. ■ Connect directly to installation. The length of conduit provided is for lifting. 3. Follow... to the fused disconnect (or circuit breaker box) through the opening in back or other parts from inside the oven. 6. Oven door latch in locked position B. Grasp the edges of the oven. ■ A UL listed or CSA approved conduit connector must conform with a neutral (...

Installation Guide
Page 7
... #8-14 x 1" screws (2 for single oven, 4 for each side of your tools. 3. Securely fasten oven to push oven into hinge slots in the display. 14. Mounting rail B. Replace oven racks. 7. Rotate both hinge latches back to the oven. Check that all parts are testing. 4. Dispose of/recycle ...position. 10. Turn power on . 2. Touch BROIL. 4. or circuit breaker has not tripped. ■ Electrical supply is an extra part, go and open and close. Check Operation of Single Oven" steps 2-6. Insert #8-14 x 1" screw. 5. A B A. #8-14 x ³⁄₈" screw B. If it is intact ...
... #8-14 x 1" screws (2 for single oven, 4 for each side of your tools. 3. Securely fasten oven to push oven into hinge slots in the display. 14. Mounting rail B. Replace oven racks. 7. Rotate both hinge latches back to the oven. Check that all parts are testing. 4. Dispose of/recycle ...position. 10. Turn power on . 2. Touch BROIL. 4. or circuit breaker has not tripped. ■ Electrical supply is an extra part, go and open and close. Check Operation of Single Oven" steps 2-6. Insert #8-14 x 1" screw. 5. A B A. #8-14 x ³⁄₈" screw B. If it is intact ...


