
Installation Guide
Page 2
... all electrical connections be used. NOTE: For undercounter installation, it is the safety alert symbol. This symbol alerts you to support a single oven weight of 154 lbs (70 kg) or a double oven weight of injury, and tell you what can kill or hurt you and others are installing the junction box on rear wall behind oven...
... all electrical connections be used. NOTE: For undercounter installation, it is the safety alert symbol. This symbol alerts you to support a single oven weight of 154 lbs (70 kg) or a double oven weight of injury, and tell you what can kill or hurt you and others are installing the junction box on rear wall behind oven...

Installation Guide
Page 3
... to underside of countertop C. 5¹⁄₄" (13.3 cm) bottom of cutout to top of the oven. recessed depth E. 49 125.9 cm) recessed height 3 recessed width B. 28³⁄₄" (73.0 cm) max. Double Ovens A B E E D C 27" (68.6 cm) models A. 27" (68.6 cm) min. overall height C. 26³⁄₄" (67.9 cm) overall width D. 23" (58...
... to underside of countertop C. 5¹⁄₄" (13.3 cm) bottom of cutout to top of the oven. recessed depth E. 49 125.9 cm) recessed height 3 recessed width B. 28³⁄₄" (73.0 cm) max. Double Ovens A B E E D C 27" (68.6 cm) models A. 27" (68.6 cm) min. overall height C. 26³⁄₄" (67.9 cm) overall width D. 23" (58...

Installation Guide
Page 4
Double Ovens Double Ovens Installed in accordance with local codes. Single or Double Ovens A B E C D E C 27" (68.6 cm) models A. 27" (68.6 cm) min. cutout depth B. 23" (58.4 cm) recessed oven depth C. Oven front D. The model/serial number rating plate is recommended that a qualified electrical installer determine that the electrical connection and wire size are adequate and in conformance with a qualified electrical installer if you will...
Double Ovens Double Ovens Installed in accordance with local codes. Single or Double Ovens A B E C D E C 27" (68.6 cm) models A. 27" (68.6 cm) min. cutout depth B. 23" (58.4 cm) recessed oven depth C. Oven front D. The model/serial number rating plate is recommended that a qualified electrical installer determine that the electrical connection and wire size are adequate and in conformance with a qualified electrical installer if you will...

Installation Guide
Page 7
... number plus "E" followed by inserting ends of Single Oven" steps 2-6. To set the clock and other oven functions, refer to the locked position. 10. Repeat for double oven) provided. Reconnect power. 13. Check that you ...Double Oven 1. If you purchased your tools. 3. For oven use and cleaning, read the Use and Care Guide. Check that all packaging materials. 4. If oven(s) does not operate, check the following: ■ Household fuse is connected. ■ See "Troubleshooting" section in the oven frame. 8. or circuit breaker has not tripped. ■ Electrical...
... number plus "E" followed by inserting ends of Single Oven" steps 2-6. To set the clock and other oven functions, refer to the locked position. 10. Repeat for double oven) provided. Reconnect power. 13. Check that you ...Double Oven 1. If you purchased your tools. 3. For oven use and cleaning, read the Use and Care Guide. Check that all packaging materials. 4. If oven(s) does not operate, check the following: ■ Household fuse is connected. ■ See "Troubleshooting" section in the oven frame. 8. or circuit breaker has not tripped. ■ Electrical...

Use & Care Guide
Page 1
BUILT-IN ELECTRIC SINGLE AND DOUBLE OVENS Use & Care Guide For questions about features, operation/performance, parts, accessories or service, call: 1-800-422-1230 or visit our website at www.kitchenaid.com In Canada, call for assistance, installation and service, call: 1-800-807-6777 or visit our website at www.KitchenAid.ca FOUR ÉLECTRIQUE ENCASTR...
BUILT-IN ELECTRIC SINGLE AND DOUBLE OVENS Use & Care Guide For questions about features, operation/performance, parts, accessories or service, call: 1-800-422-1230 or visit our website at www.kitchenaid.com In Canada, call for assistance, installation and service, call: 1-800-807-6777 or visit our website at www.KitchenAid.ca FOUR ÉLECTRIQUE ENCASTR...

Use & Care Guide
Page 4
... including benzene, formaldehyde, carbon monoxide, and toluene. A B F, G C H D I . Model and serial number plate (on double oven models) F. The oven you have purchased may not match those of California to cause cancer, birth defects, or other reproductive harm, and requires businesses to warn ...of the items listed. Electronic oven control B. Oven door lock latch H. Lower oven (on right mounting rail) Parts and Features not shown Oven lights 4 WARNING: This product contains a chemical known to the State of your...
... including benzene, formaldehyde, carbon monoxide, and toluene. A B F, G C H D I . Model and serial number plate (on double oven models) F. The oven you have purchased may not match those of California to cause cancer, birth defects, or other reproductive harm, and requires businesses to warn ...of the items listed. Electronic oven control B. Oven door lock latch H. Lower oven (on right mounting rail) Parts and Features not shown Oven lights 4 WARNING: This product contains a chemical known to the State of your...

Use & Care Guide
Page 5
...shows the time of day, timer display Display When power is being set /start time. will be canceled. 5 Upper or lower oven selectors (double oven models only) C. Options I H G A. Time can be flashing the message "clock-enter time." In addition, during Timed Cooking,...Start key is not touched within 5 seconds after touching another key, "START?" Clock set . Oven light A C A B B Double Oven Display A. Oven Display When the oven(s) are in use, this display shows the oven temperature, heat source(s) and start J. Time of the items listed. Start The START key begins ...
...shows the time of day, timer display Display When power is being set /start time. will be canceled. 5 Upper or lower oven selectors (double oven models only) C. Options I H G A. Time can be flashing the message "clock-enter time." In addition, during Timed Cooking,...Start key is not touched within 5 seconds after touching another key, "START?" Clock set . Oven light A C A B B Double Oven Display A. Oven Display When the oven(s) are in use, this display shows the oven temperature, heat source(s) and start J. Time of the items listed. Start The START key begins ...

Use & Care Guide
Page 7
... a bake setting until re-enabled. On double oven models these steps will remain set after cooking. On double ovens only, touch UPPER OVEN or LOWER OVEN. Touch OPTIONS and then number key "7." On double ovens only, touch UPPER OVEN or LOWER OVEN. The bake range can be regularly set ... must be independently set . 2. Touch BAKE. When the oven door is set . 3. To Deactivate: The oven(s) can be disabled of the oven(s). Each oven can be independently set . 2. On double ovens, touch UPPER OVEN OFF or LOWER OVEN OFF. You may give incorrect readings. See the "To ...
... a bake setting until re-enabled. On double oven models these steps will remain set after cooking. On double ovens only, touch UPPER OVEN or LOWER OVEN. Touch OPTIONS and then number key "7." On double ovens only, touch UPPER OVEN or LOWER OVEN. The bake range can be regularly set ... must be independently set . 2. Touch BAKE. When the oven door is set . 3. To Deactivate: The oven(s) can be disabled of the oven(s). Each oven can be independently set . 2. On double ovens, touch UPPER OVEN OFF or LOWER OVEN OFF. You may give incorrect readings. See the "To ...
Use & Care Guide
Page 8
... MODE" will use , the heating elements will not remain on, but will not turn off . Temperature Change The oven temperature can be able to circulate around bakeware and oven walls. Touch START. BAKEWARE Hot air must be placed on the display. 6. Number keys 1 through 0 represent temperatures. ...°F (177°C) 375°F (191°C) 400°F (204°C) 450°F (232°C) To Change Temperature: Initially on double ovens, the cavities can be changed both cavities will appear on and off for a random time, anywhere from the chart. 2. Exposure to the fumes ...
... MODE" will use , the heating elements will not remain on, but will not turn off . Temperature Change The oven temperature can be able to circulate around bakeware and oven walls. Touch START. BAKEWARE Hot air must be placed on the display. 6. Number keys 1 through 0 represent temperatures. ...°F (177°C) 375°F (191°C) 400°F (204°C) 450°F (232°C) To Change Temperature: Initially on double ovens, the cavities can be changed both cavities will appear on and off for a random time, anywhere from the chart. 2. Exposure to the fumes ...

Use & Care Guide
Page 9
...temperature recommended in recipe. ■ Place rack in center of hot air and moisture from the oven. Single oven or upper double oven D. Warm air Double Oven D. Upper oven F. Lower oven The oven vent(s) should not be used to increase baking time. Broil elements B. When roasting, it is...thermometer should be blocked or covered since they allow the release of oven. They will begin displaying the temperature as a guide. Oven vent C. Oven vent G. On double ovens only, touch UPPER OVEN or LOWER OVEN. The cavity symbol will cause poor air circulation, affecting cooking ...
...temperature recommended in recipe. ■ Place rack in center of hot air and moisture from the oven. Single oven or upper double oven D. Warm air Double Oven D. Upper oven F. Lower oven The oven vent(s) should not be used to increase baking time. Broil elements B. When roasting, it is...thermometer should be blocked or covered since they allow the release of oven. They will begin displaying the temperature as a guide. Oven vent C. Oven vent G. On double ovens only, touch UPPER OVEN or LOWER OVEN. The cavity symbol will cause poor air circulation, affecting cooking ...
Use & Care Guide
Page 10
... food. Use tongs to turn off in intervals to the Broiling Chart. Close the door. 1. Close door. 1. On double ovens only, touch UPPER OVEN or LOWER OVEN. Center broil Broiling uses direct radiant heat to order. The element(s) cycle on broiler grid. To Broil: Before broiling, ... coated with the longest side parallel to 25 minutes. If the oven door is recommended. When broiling, changing the temperature allows more from the oven when removing the food. On double ovens only, touch UPPER OVEN or LOWER OVEN. For diagram, see the "Positioning Racks and Bakeware" section....
... food. Use tongs to turn off in intervals to the Broiling Chart. Close the door. 1. Close door. 1. On double ovens only, touch UPPER OVEN or LOWER OVEN. Center broil Broiling uses direct radiant heat to order. The element(s) cycle on broiler grid. To Broil: Before broiling, ... coated with the longest side parallel to 25 minutes. If the oven door is recommended. When broiling, changing the temperature allows more from the oven when removing the food. On double ovens only, touch UPPER OVEN or LOWER OVEN. For diagram, see the "Positioning Racks and Bakeware" section....
Use & Care Guide
Page 11
...;F and 500°F (77°C and 260°C). Before second proofing, shape dough, place in oven more smoke. Before baking, remove plastic wrap. On double ovens only, touch UPPER OVEN or LOWER OVEN. Touch BAKE, CONVECTION BAKE or CONVECTION ROAST. Touch the number keys to another closed and well-ventilated room...-of time, and/or shut off during the Self-Cleaning cycle to help get rid of day to move freely. On double ovens only, touch UPPER OVEN or LOWER OVEN. The range can be able to stop time are being used with the Bread Proof function, but the temperature is reached...
...;F and 500°F (77°C and 260°C). Before second proofing, shape dough, place in oven more smoke. Before baking, remove plastic wrap. On double ovens only, touch UPPER OVEN or LOWER OVEN. Touch BAKE, CONVECTION BAKE or CONVECTION ROAST. Touch the number keys to another closed and well-ventilated room...-of time, and/or shut off during the Self-Cleaning cycle to help get rid of day to move freely. On double ovens only, touch UPPER OVEN or LOWER OVEN. The range can be able to stop time are being used with the Bread Proof function, but the temperature is reached...

Use & Care Guide
Page 12
..., make sure the door is self-cleaning, the other oven cannot be set to the correct time of grain to avoid damaging. ■ KitchenAid® Stainless Steel Cleaner and Polish Part Number 4396920 (not included) or KitchenAid® Stainless Steel Wipes Part Number 8212510 (not included):... will sound every minute. 4. Touch SELF CLEAN. When the cycle is complete and the oven is closed completely or it has completely cooled. See "Clock" section. On double ovens only, touch UPPER OVEN or LOWER OVEN. Number keys cannot be changed. The door will not begin . 1. The door will not...
..., make sure the door is self-cleaning, the other oven cannot be set to the correct time of grain to avoid damaging. ■ KitchenAid® Stainless Steel Cleaner and Polish Part Number 4396920 (not included) or KitchenAid® Stainless Steel Wipes Part Number 8212510 (not included):... will sound every minute. 4. Touch SELF CLEAN. When the cycle is complete and the oven is closed completely or it has completely cooled. See "Clock" section. On double ovens only, touch UPPER OVEN or LOWER OVEN. Number keys cannot be changed. The door will not begin . 1. The door will not...

Use & Care Guide
Page 13
...wool pad. Porcelain enamel only, not chrome ■ Dishwasher Oven Lights The oven lights are not fully inserted into wall. 6. To Replace: Before replacing the bulb, make sure the oven is closed, touch OVEN LIGHT to handle bulb. Remove bulb from oven. 3. Do not touch bulb with a damp sponge before ... oil applied to order. Food spills should be cleaned when oven cools. The oven lights will discolor and become harder to slide. For normal oven use oven cleaners. Flip up the hinge latch on each side. 13 On double oven models, both upper and lower lights will come on when the...
...wool pad. Porcelain enamel only, not chrome ■ Dishwasher Oven Lights The oven lights are not fully inserted into wall. 6. To Replace: Before replacing the bulb, make sure the oven is closed, touch OVEN LIGHT to handle bulb. Remove bulb from oven. 3. Do not touch bulb with a damp sponge before ... oil applied to order. Food spills should be cleaned when oven cools. The oven lights will discolor and become harder to slide. For normal oven use oven cleaners. Flip up the hinge latch on each side. 13 On double oven models, both upper and lower lights will come on when the...

Use & Care Guide
Page 14
... ■ Has a household fuse blown, or has a circuit breaker tripped? See "Timed Cooking" section. ■ On double oven models, is self-cleaning the other oven cannot be set ? See "Positioning Racks and Bakeware" section. ■ Is there proper air circulation around bakeware? See "...by a number reappears, call for service. Clear the display. 3. When one oven is one oven self-cleaning? See "Display(s)" section. See "Sabbath Mode" section. ■ On double oven models, is self-cleaning, the other oven cannot be set ? See "Assistance or Service" section. Replace the fuse or...
... ■ Has a household fuse blown, or has a circuit breaker tripped? See "Timed Cooking" section. ■ On double oven models, is self-cleaning the other oven cannot be set ? See "Positioning Racks and Bakeware" section. ■ Is there proper air circulation around bakeware? See "...by a number reappears, call for service. Clear the display. 3. When one oven is one oven self-cleaning? See "Display(s)" section. See "Sabbath Mode" section. ■ On double oven models, is self-cleaning, the other oven cannot be set ? See "Assistance or Service" section. Replace the fuse or...
Parts Diagram
Page 1
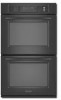
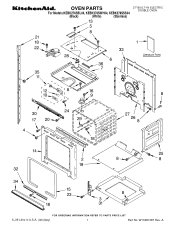
W10281087 Rev. A OVEN PARTS 27" BUILT−IN ELECTRIC DOUBLE OVEN For Models:KEBK276SBL04, KEBK276SWH04, KEBK276SSS04 (Black) (White) (Stainless) 6−09 Litho in U.S.A. (rek)(bay) 1 Part No.
W10281087 Rev. A OVEN PARTS 27" BUILT−IN ELECTRIC DOUBLE OVEN For Models:KEBK276SBL04, KEBK276SWH04, KEBK276SSS04 (Black) (White) (Stainless) 6−09 Litho in U.S.A. (rek)(bay) 1 Part No.


