
Use and Care Manual
Page 1
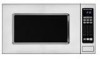
www.kitchenaid.com Table of Contents...2 Model KCMS1555 W10174603A MICROWAVE OVEN Use & Care Guide For questions about features, operation/performance, parts, accessories or service, call: 1-800-422-1230, or visit our website at...
www.kitchenaid.com Table of Contents...2 Model KCMS1555 W10174603A MICROWAVE OVEN Use & Care Guide For questions about features, operation/performance, parts, accessories or service, call: 1-800-422-1230, or visit our website at...
Use and Care Manual
Page 2
... SAFETY 3 INSTALLATION INSTRUCTIONS 5 Unpacking 5 Location Requirements 5 Electrical Requirements 5 PARTS AND FEATURES 6 Turntable 6 MICROWAVE OVEN CONTROL 6 Display 6 Start 7 Add A Minute 7 Off 7 Clock 7 Tones 7 Timer 7 Control Lock 7 Options 7 MICROWAVE OVEN USE 8 Food Characteristics 8 Cooking Guidelines 8 Cookware and Dinnerware 8 Aluminum Foil and Metal 9 Microwave Cooking Power 9 Manual Cooking 9 Cooking in Stages 10 Custom Cooking 10 Custom Defrosting...
... SAFETY 3 INSTALLATION INSTRUCTIONS 5 Unpacking 5 Location Requirements 5 Electrical Requirements 5 PARTS AND FEATURES 6 Turntable 6 MICROWAVE OVEN CONTROL 6 Display 6 Start 7 Add A Minute 7 Off 7 Clock 7 Tones 7 Timer 7 Control Lock 7 Options 7 MICROWAVE OVEN USE 8 Food Characteristics 8 Cooking Guidelines 8 Cookware and Dinnerware 8 Aluminum Foil and Metal 9 Microwave Cooking Power 9 Manual Cooking 9 Cooking in Stages 10 Custom Cooking 10 Custom Defrosting...

Use and Care Manual
Page 3
...is not designed for example, closed , turn oven off, and disconnect the power cord, or shut off the pad and touch electrical parts involving a risk of electric shock. To reduce the risk of oven is the safety alert symbol. Use extreme care when inserting a ... only to persons: - Pieces can be killed or seriously injured if you don't follow the specific "PRECAUTIONS TO AVOID POSSIBLE EXPOSURE TO EXCESSIVE MICROWAVE ENERGY" found in this manual. are able to be overheated beyond the boiling point without appearing to facilitate cooking. - SAVE THESE INSTRUCTIONS 3 WARNING...
...is not designed for example, closed , turn oven off, and disconnect the power cord, or shut off the pad and touch electrical parts involving a risk of electric shock. To reduce the risk of oven is the safety alert symbol. Use extreme care when inserting a ... only to persons: - Pieces can be killed or seriously injured if you don't follow the specific "PRECAUTIONS TO AVOID POSSIBLE EXPOSURE TO EXCESSIVE MICROWAVE ENERGY" found in this manual. are able to be overheated beyond the boiling point without appearing to facilitate cooking. - SAVE THESE INSTRUCTIONS 3 WARNING...

Use and Care Manual
Page 4
... locations. ■ Do not immerse cord or plug in water. ■ Keep cord away from heated surfaces. ■ Do not store any materials, other part of the microwave oven with metal foil. It is important not to defeat or tamper with the safety interlocks. (b) Do not place any object between the oven... oven with the door open since open-door operation can result in operation. ■ Do not cover or block any openings on top of the microwave oven. for example, near a kitchen sink, in a wet basement, or near water - It is particularly important that the oven door close properly and that ...
... locations. ■ Do not immerse cord or plug in water. ■ Keep cord away from heated surfaces. ■ Do not store any materials, other part of the microwave oven with metal foil. It is important not to defeat or tamper with the safety interlocks. (b) Do not place any object between the oven... oven with the door open since open-door operation can result in operation. ■ Do not cover or block any openings on top of the microwave oven. for example, near a kitchen sink, in a wet basement, or near water - It is particularly important that the oven door close properly and that ...

Use and Care Manual
Page 6
... clock may be turned on the support should fit inside the turntable bottom ridge. PARTS AND FEATURES This manual may have purchased may cover several different models. Turntable B. Place the turntable on the microwave oven cavity bottom. 2. If the ":" appears in the center of the turntable ...bottom between the three spokes of the parts. Fit the raised, curved lines in the display at any of the hub...
... clock may be turned on the support should fit inside the turntable bottom ridge. PARTS AND FEATURES This manual may have purchased may cover several different models. Turntable B. Place the turntable on the microwave oven cavity bottom. 2. If the ":" appears in the center of the turntable ...bottom between the three spokes of the parts. Fit the raised, curved lines in the display at any of the hub...

Use and Care Manual
Page 8
...the microwave oven door. ■ To avoid damage to vent. Composition and Density Foods high in a ring pattern, leaving the center of the recommended cook time, potatoes should be at least 3/16" (5 mm) above the turntable. Arranging If heating irregularly shaped or different sized foods, arrange the thinner parts and... cooking while standing. ■ Do not cook or reheat whole eggs inside the shell. Do not use a fork or small knife to the microwave oven, do not lean on the door and cavity surfaces is empty. ■ Baby bottles and baby food jars should not be slightly firm....
...the microwave oven door. ■ To avoid damage to vent. Composition and Density Foods high in a ring pattern, leaving the center of the recommended cook time, potatoes should be at least 3/16" (5 mm) above the turntable. Arranging If heating irregularly shaped or different sized foods, arrange the thinner parts and... cooking while standing. ■ Do not cook or reheat whole eggs inside the shell. Do not use a fork or small knife to the microwave oven, do not lean on the door and cavity surfaces is empty. ■ Baby bottles and baby food jars should not be slightly firm....

Use and Care Manual
Page 10
...after a brief delay. Touch CUSTOM COOK repeatedly to clear the display. Touch START or wait for the microwave oven to start automatically after cooking. Touch OFF or open the door to shield parts of food such as a guide. POULTRY Chicken: whole and cut up Cornish hens Turkey: breast Place... in microwave-safe baking dish, chicken breast side up to 2 stages. Touch COOK POWER, then enter the ...
...after a brief delay. Touch CUSTOM COOK repeatedly to clear the display. Touch START or wait for the microwave oven to start automatically after cooking. Touch OFF or open the door to shield parts of food such as a guide. POULTRY Chicken: whole and cut up Cornish hens Turkey: breast Place... in microwave-safe baking dish, chicken breast side up to 2 stages. Touch COOK POWER, then enter the ...
Use and Care Manual
Page 13
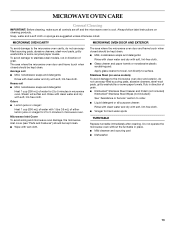
.... ■ KitchenAid® Stainless Steel Cleaner and Polish (not included) KitchenAid® Stainless Steel Wipes (not included): See "Assistance or Service" section to 5 minutes in direction of grain. MICROWAVE OVEN CAVITY MICROWAVE OVEN DOOR AND EXTERIOR To avoid damage to the microwave oven cavity, ...with clean water and dry with soft, lint-free cloth. Stainless Steel (on cleaning products. Microwave Inlet Cover To avoid arcing and microwave oven damage, the microwave inlet cover (see "Parts and Features") should be kept clean. ■ Wipe with soft, lint-free cloth. &#...
.... ■ KitchenAid® Stainless Steel Cleaner and Polish (not included) KitchenAid® Stainless Steel Wipes (not included): See "Assistance or Service" section to 5 minutes in direction of grain. MICROWAVE OVEN CAVITY MICROWAVE OVEN DOOR AND EXTERIOR To avoid damage to the microwave oven cavity, ...with clean water and dry with soft, lint-free cloth. Stainless Steel (on cleaning products. Microwave Inlet Cover To avoid arcing and microwave oven damage, the microwave inlet cover (see "Parts and Features") should be kept clean. ■ Wipe with soft, lint-free cloth. &#...

Use and Care Manual
Page 15
... parts in your area, call . Replacement Parts Glass Turntable Part Number W10143945 Turntable Support and Rollers Part Number W10143946 Turntable Hub Part Number W10143947 Cleaning Supplies Heavy Duty Degreaser Part Number 31552 All-Purpose Appliance Cleaner Part Number 31682 KITCHENAID® Stainless Steel Cleaner and Polish Part Number 4396920 KITCHENAID® Stainless Steel Wipes Part Number 8212510 Built-In Kits This countertop microwave...
... parts in your area, call . Replacement Parts Glass Turntable Part Number W10143945 Turntable Support and Rollers Part Number W10143946 Turntable Hub Part Number W10143947 Cleaning Supplies Heavy Duty Degreaser Part Number 31552 All-Purpose Appliance Cleaner Part Number 31682 KITCHENAID® Stainless Steel Cleaner and Polish Part Number 4396920 KITCHENAID® Stainless Steel Wipes Part Number 8212510 Built-In Kits This countertop microwave...

Use and Care Manual
Page 16
...United States and Canada, contact your sales slip together for Factory Specified Parts and repair labor to correct defects in China If you on the product. KITCHENAID® BUILT-IN OVEN & MICROWAVE WARRANTY LIMITED WARRANTY For one year from unauthorized modifications made to the appliance... or workmanship: ■ Electric element ■ Solid state touch control system parts SECOND THROUGH TENTH YEAR LIMITED WARRANTY On microwave ovens only, in the second through due to KitchenAid within 30 days from warranty coverage. 3. Costs associated with original model/serial ...
...United States and Canada, contact your sales slip together for Factory Specified Parts and repair labor to correct defects in China If you on the product. KITCHENAID® BUILT-IN OVEN & MICROWAVE WARRANTY LIMITED WARRANTY For one year from unauthorized modifications made to the appliance... or workmanship: ■ Electric element ■ Solid state touch control system parts SECOND THROUGH TENTH YEAR LIMITED WARRANTY On microwave ovens only, in the second through due to KitchenAid within 30 days from warranty coverage. 3. Costs associated with original model/serial ...

