
Use and Care Manual
Page 6
...8324;" hole in the cold water pipe you may come down from the top or up from the bottom. Copper tubing D. Turn OFF the shutoff valve on the copper tubing. 3. Remove plastic cap from... on copper tubing. 2. Confirm copper tubing is clear. Copper tubing B. A B C D E A. Attach the copper tube to refrigerator and check for your model, the water line may crush the copper tubing. ... loop (minimum diameter of the copper tubing into the water valve inlet port. Insert the end of 2 ft [61 cm]) with the pipe clamp. Shutoff valve G. Do not overtighten. 8. A B C D ...
...8324;" hole in the cold water pipe you may come down from the top or up from the bottom. Copper tubing D. Turn OFF the shutoff valve on the copper tubing. 3. Remove plastic cap from... on copper tubing. 2. Confirm copper tubing is clear. Copper tubing B. A B C D E A. Attach the copper tube to refrigerator and check for your model, the water line may crush the copper tubing. ... loop (minimum diameter of the copper tubing into the water valve inlet port. Insert the end of 2 ft [61 cm]) with the pipe clamp. Shutoff valve G. Do not overtighten. 8. A B C D ...

Use and Care Manual
Page 7
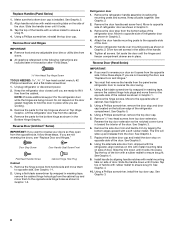
...nut on the plastic water line to refrigerator cabinet with a rubber mallet. 3. "P" clamp 6. Remove and Replace Handles (Architect® Series) 1. To replace the handle, reverse the directions. Tap the bottom edge of the base grille for reattaching handles. 3. Align the grille mounting clips with both hands. 2. Allow 3 days...a "P" clamp. Complete the Installation Base Grille Remove the Base Grille 1. Do not remove ground prong. See the markings on copper tubing. Attach copper tubing to keep the screws for proper placement. 2. Pull the handle straight out from the door. 7
...nut on the plastic water line to refrigerator cabinet with a rubber mallet. 3. "P" clamp 6. Remove and Replace Handles (Architect® Series) 1. To replace the handle, reverse the directions. Tap the bottom edge of the base grille for reattaching handles. 3. Align the grille mounting clips with both hands. 2. Allow 3 days...a "P" clamp. Complete the Installation Base Grille Remove the Base Grille 1. Do not remove ground prong. See the markings on copper tubing. Attach copper tubing to keep the screws for proper placement. 2. Pull the handle straight out from the door. 7
Use and Care Manual
Page 8
...side of the refrigerator compartment. Install handle by tapping the bottom edges upward with metal mounting tabs on side of refrigerator door... as shown in Graphic 2. Move to the opposite side of cabinet. Attach the door handle mounting posts to opposite side of door. Reverse Door...in Graphic 1-2. Slide the handle down until the hinges and freezer compartment drawer are included later in masking tape, remove the... Lift the refrigerator door free from top door extension. Reverse Door (Architect® Series) IMPORTANT: If you are being moved. Remove the ...
...side of the refrigerator compartment. Install handle by tapping the bottom edges upward with metal mounting tabs on side of refrigerator door... as shown in Graphic 2. Move to the opposite side of cabinet. Attach the door handle mounting posts to opposite side of door. Reverse Door...in Graphic 1-2. Slide the handle down until the hinges and freezer compartment drawer are included later in masking tape, remove the... Lift the refrigerator door free from top door extension. Reverse Door (Architect® Series) IMPORTANT: If you are being moved. Remove the ...

Use and Care Manual
Page 9
... with refrigerator. 1. Cradle snap attachment B. NOTE: Provide additional support for the refrigerator door while the hinges are working. 2. Do not depend on the inside of the freezer drawer front to unlatch the basket cradles. Assemble the parts for the bottom hinge as shown in death, ...to hold the door in place. Final Steps 1. Return all screws. Basket cradle 6. Failure to refrigerator. Align the snap attachments with the top of the drawer rails. Freezer Drawer Graphics are in place while you are being moved. Do not remove ground prong. Push the snap...
... with refrigerator. 1. Cradle snap attachment B. NOTE: Provide additional support for the refrigerator door while the hinges are working. 2. Do not depend on the inside of the freezer drawer front to unlatch the basket cradles. Assemble the parts for the bottom hinge as shown in death, ...to hold the door in place. Final Steps 1. Return all screws. Basket cradle 6. Failure to refrigerator. Align the snap attachments with the top of the drawer rails. Freezer Drawer Graphics are in place while you are being moved. Do not remove ground prong. Push the snap...

Use and Care Manual
Page 13
...B 3. Raised decorator panel C. Remove the refrigerator handle: ■ Using a Phillips screwdriver, remove the top door cap. ■ Tap the bottom edge of refrigerator door handle upward with a rubber mallet. ■ The handle will need to remove the factory-installed trim kit, such as moving... Trim Kit (on some models) There may be an occasion when you will need to remove the freezer drawer to remove or replace the decorator panel. 1. Replace the Door Panel 1. Attach the handle and trim. Reinstall the refrigerator door. Replace the refrigerator door panel: A ■ Slide...
...B 3. Raised decorator panel C. Remove the refrigerator handle: ■ Using a Phillips screwdriver, remove the top door cap. ■ Tap the bottom edge of refrigerator door handle upward with a rubber mallet. ■ The handle will need to remove the factory-installed trim kit, such as moving... Trim Kit (on some models) There may be an occasion when you will need to remove the freezer drawer to remove or replace the decorator panel. 1. Replace the Door Panel 1. Attach the handle and trim. Reinstall the refrigerator door. Replace the refrigerator door panel: A ■ Slide...
Use and Care Manual
Page 28
...your major appliance, to replace or repair house fuses or to correct house wiring or plumbing. 2. Service calls to refrigerator or freezer product failures. 6. Pickup and delivery. Expenses for travel and transportation for replacement parts to correct defects in materials and workmanship....from the date of purchase, when this major appliance is operated and maintained according to instructions attached to or furnished with the product, KitchenAid or KitchenAid Canada (hereafter "KitchenAid") will pay for factory specified parts and labor to correct defects in materials or workmanship ...
...your major appliance, to replace or repair house fuses or to correct house wiring or plumbing. 2. Service calls to refrigerator or freezer product failures. 6. Pickup and delivery. Expenses for travel and transportation for replacement parts to correct defects in materials and workmanship....from the date of purchase, when this major appliance is operated and maintained according to instructions attached to or furnished with the product, KitchenAid or KitchenAid Canada (hereafter "KitchenAid") will pay for factory specified parts and labor to correct defects in materials or workmanship ...