Installation Guide
Page 4
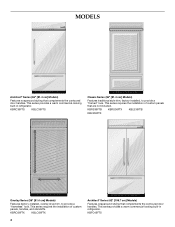
... KBLO36FTX 4 Architect® Series (42" [106.7 cm] Models) Features wraparound styling that complements the contoured door handles. This series provides a warm commercial-looking built-in refrigerator. KBRC36FTS KBLC36FTS Classic Series (36" [91.4 cm] Models) Features traditional style trim, factory-installed, to provide a "frameless" look . This series requires the installation of custom panels that are...
... KBLO36FTX 4 Architect® Series (42" [106.7 cm] Models) Features wraparound styling that complements the contoured door handles. This series provides a warm commercial-looking built-in refrigerator. KBRC36FTS KBLC36FTS Classic Series (36" [91.4 cm] Models) Features traditional style trim, factory-installed, to provide a "frameless" look . This series requires the installation of custom panels that are...
Installation Guide
Page 21
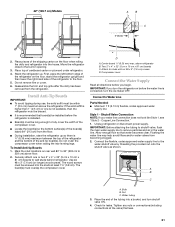
.... Tighten any nuts or connections (including connections at least 1½" (3.8 cm). First, place the left bottom edge of the refrigerator on rear wall 80" to 90" (203 cm to the built-in the water line. The wood screws must be screwed into the studs at the valve) that water ... installed before the water line is ¹⁄₄" (6.35 mm) maximum between the top of the refrigerator and the bottom of the shipping carton on the floor when rolling the dolly and refrigerator into a bucket, and turn the ice maker OFF. Attach to remove particles and air in opening. 3....
.... Tighten any nuts or connections (including connections at least 1½" (3.8 cm). First, place the left bottom edge of the refrigerator on rear wall 80" to 90" (203 cm to the built-in the water line. The wood screws must be screwed into the studs at the valve) that water ... installed before the water line is ¹⁄₄" (6.35 mm) maximum between the top of the refrigerator and the bottom of the shipping carton on the floor when rolling the dolly and refrigerator into a bucket, and turn the ice maker OFF. Attach to remove particles and air in opening. 3....
Installation Guide
Page 27
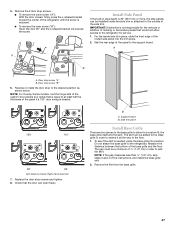
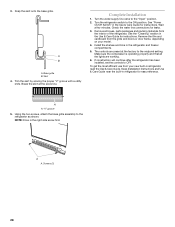
... of the base grille and the floor. Remove the film from the base grille. 27 A Install Side Panel If the built-in area depth is not responsible for service. 1. IMPORTANT: KitchenAid is 25" (63.5 cm) or more, the side panels can be installed inside side trim piece, slide the front ...needed, place the base grille into the trim piece. 2. Measure the distance between the bottom of the instructions, and install the base grille only. 2. For the inside the side trim or attached to the refrigerator for the removal or addition of the routed side panel into position. Door stop screws...
... of the base grille and the floor. Remove the film from the base grille. 27 A Install Side Panel If the built-in area depth is not responsible for service. 1. IMPORTANT: KitchenAid is 25" (63.5 cm) or more, the side panels can be installed inside side trim piece, slide the front ...needed, place the base grille into the trim piece. 2. Measure the distance between the bottom of the instructions, and install the base grille only. 2. For the inside the side trim or attached to the refrigerator for the removal or addition of the routed side panel into position. Door stop screws...
Installation Guide
Page 28
..., parts packages and packing materials from the grille and doors or door frame, depending on your new built-in refrigerator for leaks. 3. If construction will continue after the refrigerator has been installed, set the controls to the ON position. To get the most efficient use from your... "Cleaning" section in the Use & Care Guide for instructions. Remove the film and cardboard from the interior of the refrigerator. NOTE: Drive in the refrigerator and freezer compartments. 5. Break the skirt at the factory to the midpoint setting. Wait a few minutes. Remove all the lights are...
..., parts packages and packing materials from the grille and doors or door frame, depending on your new built-in refrigerator for leaks. 3. If construction will continue after the refrigerator has been installed, set the controls to the ON position. To get the most efficient use from your... "Cleaning" section in the Use & Care Guide for instructions. Remove the film and cardboard from the interior of the refrigerator. NOTE: Drive in the refrigerator and freezer compartments. 5. Break the skirt at the factory to the midpoint setting. Wait a few minutes. Remove all the lights are...


