

Instruction manual
Page 2
JVC KENWOOD Corporation 2967-3, ISHIKAWA-MACHI, HACHIOJI-SHI, TOKYO, JAPAN THIS PRODUCT COMPLIES WITH DHHS RULES 21CFR SUBCHAPTER J IN EFFECT AT DATE OF MANUFACTURE. Location : Top Plate ... seja devolvida ao fabricante ou importador. Changes or modifications to this equipment does cause harmful interference to provide reasonable protection against harmful interference in a residential installation. If this equipment may cause harmful interference unless the modifications are designed to radio or television reception, which contains Perchlorate Material-special handling may generate...
JVC KENWOOD Corporation 2967-3, ISHIKAWA-MACHI, HACHIOJI-SHI, TOKYO, JAPAN THIS PRODUCT COMPLIES WITH DHHS RULES 21CFR SUBCHAPTER J IN EFFECT AT DATE OF MANUFACTURE. Location : Top Plate ... seja devolvida ao fabricante ou importador. Changes or modifications to this equipment does cause harmful interference to provide reasonable protection against harmful interference in a residential installation. If this equipment may cause harmful interference unless the modifications are designed to radio or television reception, which contains Perchlorate Material-special handling may generate...
Instruction manual
Page 6
... iHeartRadio® 15 Spotify 16 SiriusXM® Radio 17 BLUETOOTH® 20 AUDIO SETTINGS 29 DISPLAY SETTINGS 32 TROUBLESHOOTING 33 REFERENCES 36 Maintenance More information INSTALLATION/ CONNECTION 39 SPECIFICATIONS 43 2 ENGLISH BEFORE USE IMPORTANT • To ensure proper use, please read through this manual before playing digital sources to avoid damaging...
... iHeartRadio® 15 Spotify 16 SiriusXM® Radio 17 BLUETOOTH® 20 AUDIO SETTINGS 29 DISPLAY SETTINGS 32 TROUBLESHOOTING 33 REFERENCES 36 Maintenance More information INSTALLATION/ CONNECTION 39 SPECIFICATIONS 43 2 ENGLISH BEFORE USE IMPORTANT • To ensure proper use, please read through this manual before playing digital sources to avoid damaging...

Instruction manual
Page 14
...version of the unit (USB input terminal). CD/USB/iPod/ANDROID Start playback The source changes automatically and playback starts. Follow the instructions to install KENWOOD MUSIC PLAY APP" is shown. Press and hold to select ALL RANDOM.*7 *1 KCA-iP102 : 30-pin type, KCA-iP103 : Lightning ...type *2 Do not leave the cable inside the car when not using. *3 When connecting an Android device, "Press [VIEW] to install the application. Press repeatedly. Press and hold S / . CA-U1EX (max.: 500 mA) (optional accessory) iPod/iPhone KCA-iP102/KCA-iP103 (optional ...
...version of the unit (USB input terminal). CD/USB/iPod/ANDROID Start playback The source changes automatically and playback starts. Follow the instructions to install KENWOOD MUSIC PLAY APP" is shown. Press and hold to select ALL RANDOM.*7 *1 KCA-iP102 : 30-pin type, KCA-iP103 : Lightning ...type *2 Do not leave the cable inside the car when not using. *3 When connecting an Android device, "Press [VIEW] to install the application. Press repeatedly. Press and hold S / . CA-U1EX (max.: 500 mA) (optional accessory) iPod/iPhone KCA-iP102/KCA-iP103 (optional ...

Instruction manual
Page 15
... source, press 5 repeatedly. Stored songs in the Android device. HAND MODE : Control Android device using the iPod itself via KENWOOD MUSIC PLAY application installed in the following drive will output the sound from this unit. For iPod 1/iPod 2/iPod USB source 1 Turn the volume ... For iPod/ANDROID, applicable only when [MODE OFF]/[BROWSE MODE] is selected. *7 For CD: Only for a character other media player applications installed in iPod 1/iPod 2/iPod USB source, press 5 repeatedly. Select control mode While in the Android device. Quick Search (applicable only for a...
... source, press 5 repeatedly. Stored songs in the Android device. HAND MODE : Control Android device using the iPod itself via KENWOOD MUSIC PLAY application installed in the following drive will output the sound from this unit. For iPod 1/iPod 2/iPod USB source 1 Turn the volume ... For iPod/ANDROID, applicable only when [MODE OFF]/[BROWSE MODE] is selected. *7 For CD: Only for a character other media player applications installed in iPod 1/iPod 2/iPod USB source, press 5 repeatedly. Select control mode While in the Android device. Quick Search (applicable only for a...
Instruction manual
Page 16
...: The next drive ([DRIVE 1] to search for iPod 1, iPod 2, iPod USB, ANDROID 1, ANDROID 2 and ANDROID source. Preparation: Install the latest version of KENWOOD Remote application on your device before connecting. Repeat steps 1 to 3 to select the following table), then press the knob. 3 Repeat ...step 2 until the desired item is designed to use KENWOOD Remote application KENWOOD Remote application is selected or activated. 4 Press and hold . To return to iPod 1, iPod 2, iPod USB, ANDROID 1, ANDROID 2 ...
...: The next drive ([DRIVE 1] to search for iPod 1, iPod 2, iPod USB, ANDROID 1, ANDROID 2 and ANDROID source. Preparation: Install the latest version of KENWOOD Remote application on your device before connecting. Repeat steps 1 to 3 to select the following table), then press the knob. 3 Repeat ...step 2 until the desired item is designed to use KENWOOD Remote application KENWOOD Remote application is selected or activated. 4 Press and hold . To return to iPod 1, iPod 2, iPod USB, ANDROID 1, ANDROID 2 ...

Instruction manual
Page 17
... [SOURCE SELECT]. ( 5) Start listening 1 Connect a portable audio player (commercially available). 3.5 mm (1/8") stereo mini plug with "L" shaped connector (commercially available) Portable audio player Pandora® Preparation: Install the latest version of the Pandora application on your device to select PANDORA 1/PANDORA 2/ PANDORA. Set the AUX name While listening to a portable audio player...
... [SOURCE SELECT]. ( 5) Start listening 1 Connect a portable audio player (commercially available). 3.5 mm (1/8") stereo mini plug with "L" shaped connector (commercially available) Portable audio player Pandora® Preparation: Install the latest version of the Pandora application on your device to select PANDORA 1/PANDORA 2/ PANDORA. Set the AUX name While listening to a portable audio player...
Instruction manual
Page 19
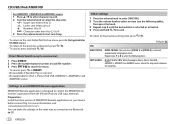
... appears, you can also connect to the USB 2 cable from the rear of the unit. 3 Press repeatedly to select IHEARTRADIO 1/IHEARTRADIO 2/ IHEARTRADIO. iHeartRadio® Preparation: Install the latest version of iHeartAuto application on your device to the USB input terminal. To store a station: Press and hold . Press T.
... appears, you can also connect to the USB 2 cable from the rear of the unit. 3 Press repeatedly to select IHEARTRADIO 1/IHEARTRADIO 2/ IHEARTRADIO. iHeartRadio® Preparation: Install the latest version of iHeartAuto application on your device to the USB input terminal. To store a station: Press and hold . Press T.
Instruction manual
Page 20
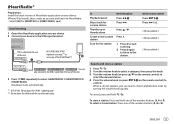
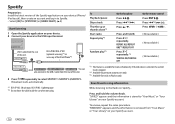
... favorite song information While listening to the Radio on your device. 2 Connect your device to the USB input terminal. Press J / K. Press and hold 5. Spotify Preparation: Install the latest version of the Spotify application on your device (iPhone/ iPod touch), then create an account and log in to Spotify. • Select [ON...
... favorite song information While listening to the Radio on your device. 2 Connect your device to the USB input terminal. Press J / K. Press and hold 5. Spotify Preparation: Install the latest version of the Spotify application on your device (iPhone/ iPod touch), then create an account and log in to Spotify. • Select [ON...

Instruction manual
Page 25
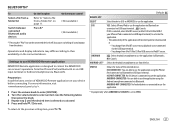
... the Bluetooth device for the first time 1 Press to turn on the unit. 2 Search and select this unit model name (KDC-X7**/KDC-BT7**HD/ KMR-D7**BT/KDC-X5**/KDC-BT5**U) on . - [AUTO PAIRING] is set to [ON]. ( 26) - Automatic pairing request is completed. Once pairing ... device ( 10) and [BROWSE MODE] is automatically activated. Connect the device to the unit manually. • Refer to start pairing. KENWOOD MUSIC PLAY application is installed on the display. • For some Bluetooth devices, you connect iPhone/iPod touch/Android device to the USB input terminal, pairing request (...
... the Bluetooth device for the first time 1 Press to turn on the unit. 2 Search and select this unit model name (KDC-X7**/KDC-BT7**HD/ KMR-D7**BT/KDC-X5**/KDC-BT5**U) on . - [AUTO PAIRING] is set to [ON]. ( 26) - Automatic pairing request is completed. Once pairing ... device ( 10) and [BROWSE MODE] is automatically activated. Connect the device to the unit manually. • Refer to start pairing. KENWOOD MUSIC PLAY application is installed on the display. • For some Bluetooth devices, you connect iPhone/iPod touch/Android device to the USB input terminal, pairing request (...
Instruction manual
Page 31
...USB input terminal) to activate the application. • The connectivity of [SELECT] is connected to use KENWOOD Remote application KENWOOD Remote application is designed to control the KENWOOD car receiver's operations from iPod 1/iPod 2/iPod USB source to iPod BT source. IOS ANDROID YES: Selects... using the iPhone/ iPod connected via USB input terminal. ; You change from the device. NO: Cancels. Preparation: Install the latest version of KENWOOD Remote application on the connected device itself also causes switching of the selected device. IOS CONNECTED: You are able to ...
...USB input terminal) to activate the application. • The connectivity of [SELECT] is connected to use KENWOOD Remote application KENWOOD Remote application is designed to control the KENWOOD car receiver's operations from iPod 1/iPod 2/iPod USB source to iPod BT source. IOS ANDROID YES: Selects... using the iPhone/ iPod connected via USB input terminal. ; You change from the device. NO: Cancels. Preparation: Install the latest version of KENWOOD Remote application on the connected device itself also causes switching of the selected device. IOS CONNECTED: You are able to ...

Instruction manual
Page 38
.... New station creation is unstable. Communication is unsuccessful. Registration of thumbs up /thumbs down has failed due to unit. ( 37) • Make sure KENWOOD MUSIC PLAY APP is installed on the Android device. ( 10) • Reconnect the Android device and select the appropriate control mode. • If this does not solve the...
.... New station creation is unstable. Communication is unsuccessful. Registration of thumbs up /thumbs down has failed due to unit. ( 37) • Make sure KENWOOD MUSIC PLAY APP is installed on the Android device. ( 10) • Reconnect the Android device and select the appropriate control mode. • If this does not solve the...

Instruction manual
Page 43
Secure the wires with metal parts to protect the wires. Do not touch the metal parts of this unit during and shortly after installation. - REFERENCES Source name iPod 1/iPod 2/iPod USB/ iPod BT or ANDROID 1/ ANDROID 2/ANDROID Display information When [MODE OFF]/[BROWSE MODE] is selected ( 11): Song...and mounting to the car's chassis again after use of less than 30º. • If your vehicle. Consult the car audio dealer. • Install this unit to professionals. on and off by the ignition key. • Keep all cables away from heat dissipate metal parts. • After the ...
Secure the wires with metal parts to protect the wires. Do not touch the metal parts of this unit during and shortly after installation. - REFERENCES Source name iPod 1/iPod 2/iPod USB/ iPod BT or ANDROID 1/ ANDROID 2/ANDROID Display information When [MODE OFF]/[BROWSE MODE] is selected ( 11): Song...and mounting to the car's chassis again after use of less than 30º. • If your vehicle. Consult the car audio dealer. • Install this unit to professionals. on and off by the ignition key. • Keep all cables away from heat dissipate metal parts. • After the ...

Instruction manual
Page 44
... Remove the mounting sleeve and trim plate from the ignition switch, then disconnect the [ terminal of the car battery. 2 Connect the wires properly. INSTALLATION/CONNECTION Part list for / ) Basic procedure 1 Remove the key from the unit. 2 Align the holes in the unit (on both sides) ...with the vehicle mounting bracket and secure the unit with screws (supplied/commercially available). Use only the specified screws. See Installing the unit (in-dash mounting). 4 Connect the [ terminal of the trim plate, then pull it out. 3 Insert the extraction keys deeply...
... Remove the mounting sleeve and trim plate from the ignition switch, then disconnect the [ terminal of the car battery. 2 Connect the wires properly. INSTALLATION/CONNECTION Part list for / ) Basic procedure 1 Remove the key from the unit. 2 Align the holes in the unit (on both sides) ...with the vehicle mounting bracket and secure the unit with screws (supplied/commercially available). Use only the specified screws. See Installing the unit (in-dash mounting). 4 Connect the [ terminal of the trim plate, then pull it out. 3 Insert the extraction keys deeply...
Instruction manual
Page 45
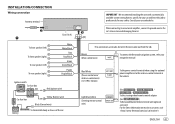
... or to the antenna control terminal in the vehicle (For / / / ) To the steering wheel remote control adapter (For ) To Kenwood Marine Remote Control unit (optional accessory) For the latest information on marine accessories, visit ENGLISH 41 Brown (Mute control wire) To connect the... external amplifier, connect its ground wire to the car's chassis to professionals for your car and leave this job to avoid damaging the unit. INSTALLATION/CONNECTION Wiring connection Antenna terminal Fuse (10 A) To front speaker (left) To front speaker (right) To rear speaker (left) To rear ...
... or to the antenna control terminal in the vehicle (For / / / ) To the steering wheel remote control adapter (For ) To Kenwood Marine Remote Control unit (optional accessory) For the latest information on marine accessories, visit ENGLISH 41 Brown (Mute control wire) To connect the... external amplifier, connect its ground wire to the car's chassis to professionals for your car and leave this job to avoid damaging the unit. INSTALLATION/CONNECTION Wiring connection Antenna terminal Fuse (10 A) To front speaker (left) To front speaker (right) To rear speaker (left) To rear ...

Instruction manual
Page 48
... Impedance ≤ 600 Ω / / : 5 000 mV/10 kΩ : 4 000 mV/10 kΩ : 2 500 mV/10 kΩ General Operating Voltage Maximum Current Consumption Operational Temperature Range Installation Size (W × H × D) Net Weight (includes Trimplate, Mounting Sleeve) 14.4 V (10.5 V - 16 V allowable) 10 A -10°C - +60°C 182 mm × 53 mm × 158...
... Impedance ≤ 600 Ω / / : 5 000 mV/10 kΩ : 4 000 mV/10 kΩ : 2 500 mV/10 kΩ General Operating Voltage Maximum Current Consumption Operational Temperature Range Installation Size (W × H × D) Net Weight (includes Trimplate, Mounting Sleeve) 14.4 V (10.5 V - 16 V allowable) 10 A -10°C - +60°C 182 mm × 53 mm × 158...
