
Use and Care Guide
Page 2
Your new Kenmore I I IMPORTANT SAFETY INSTRUCTIONS SAFETY MESSAGES 3 IMPORTANT SAFETY INSTRUCTIONS 3-6 FEATURES AND BENEFITS Key Parts and Components 7 INSTALLATION INSTRUCTIONS Key Dimension and Specifications Location Requirements Choose the Proper Location Clearances Installation with Optional Pedestal Base or Stacking Optional Accessories Gas Requirements Connecting Gas Dryers Electrical Requirements Connecting Electric Dryers Venting the Dryer Leveling the Dryer Reversing the...
Your new Kenmore I I IMPORTANT SAFETY INSTRUCTIONS SAFETY MESSAGES 3 IMPORTANT SAFETY INSTRUCTIONS 3-6 FEATURES AND BENEFITS Key Parts and Components 7 INSTALLATION INSTRUCTIONS Key Dimension and Specifications Location Requirements Choose the Proper Location Clearances Installation with Optional Pedestal Base or Stacking Optional Accessories Gas Requirements Connecting Gas Dryers Electrical Requirements Connecting Electric Dryers Venting the Dryer Leveling the Dryer Reversing the...
Use and Care Guide
Page 3
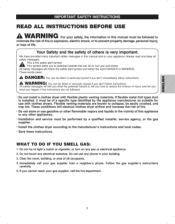
J Do not install a clothes dryer with clothes dryers. instructions and local codes. Do not touch any other flammable vapors and liquids in the vicinity of this manual and on any phone in this appliance or any electrical switches. Clear the room, building, or area of all safety messages. ,_ TThhiiss issymthbeolsaafeletyrtsayleorut stoympbootel.ntial hazards that can...
J Do not install a clothes dryer with clothes dryers. instructions and local codes. Do not touch any other flammable vapors and liquids in the vicinity of this manual and on any phone in this appliance or any electrical switches. Clear the room, building, or area of all safety messages. ,_ TThhiiss issymthbeolsaafeletyrtsayleorut stoympbootel.ntial hazards that can...
Use and Care Guide
Page 4
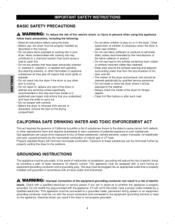
... or in this manual. • Do not allow children to whether the appliance is properly grounded. Electrical shock can cause minor exposure to the weather. • Always check the inside of the dryer for electric current. Gas appliances can result if the dryer is removed from ... the circuit conductors and connected to cooking oils in a risk of electric shock. Exposure to these substances, namely benzene, carbon monoxide, formaldehyde, and soot, caused primarily by properly venting the dryer to such substances. CALIFORNIA SAFE DRINKING WATER AND TOXIC ENFORCEMENT ACT This...
... or in this manual. • Do not allow children to whether the appliance is properly grounded. Electrical shock can cause minor exposure to the weather. • Always check the inside of the dryer for electric current. Gas appliances can result if the dryer is removed from ... the circuit conductors and connected to cooking oils in a risk of electric shock. Exposure to these substances, namely benzene, carbon monoxide, formaldehyde, and soot, caused primarily by properly venting the dryer to such substances. CALIFORNIA SAFE DRINKING WATER AND TOXIC ENFORCEMENT ACT This...
Use and Care Guide
Page 5
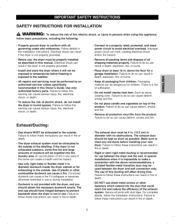
...and fire hazard. Use only rigid metal or flexible metal 4 in fire or death. DO NOT use between the dryer and wall connection only. To reduce the risk of fire, electric shock, or injury to follow this ducting will be properly installed as described in fire or death. Failure to ...persons when using this manual. Remove all packing items and dispose of this warning can be kept as short as ...
...and fire hazard. Use only rigid metal or flexible metal 4 in fire or death. DO NOT use between the dryer and wall connection only. To reduce the risk of fire, electric shock, or injury to follow this ducting will be properly installed as described in fire or death. Failure to ...persons when using this manual. Remove all packing items and dispose of this warning can be kept as short as ...
Use and Care Guide
Page 6
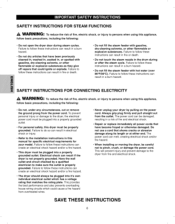
... INSTRUCTIONS 6 I I SAFETY INSTRUCTIONS FOR STEAM FUNCTIONS WARNING: To reduce the risk of fire, electric shock, or injury to persons when using this manual for specific electrical requirements for your dryer by a qualified electrician to follow these instructions can result if the dryer is properly grounded. Failure to make sure the outlet is not properly grounded...
... INSTRUCTIONS 6 I I SAFETY INSTRUCTIONS FOR STEAM FUNCTIONS WARNING: To reduce the risk of fire, electric shock, or injury to persons when using this manual for specific electrical requirements for your dryer by a qualified electrician to follow these instructions can result if the dryer is properly grounded. Failure to make sure the outlet is not properly grounded...
Use and Care Guide
Page 7
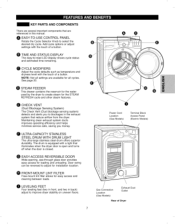
...that reduce airflow from the dryer. STEAM FEEDER This drawer contains...create steam for the water used by the dryer to -read LED display shows cycle status... Cord Location (Gas Models) Terminal Block Access Panel (Electric Models) Gas Connection Location (Gas Models) Exhaust Duct...cycle options or adjust settings with the touch of Dryer I I KEY PARTS AND COMPONENTS There are several ...and helps minimize service calls, saving you to improve dryer stability on uneven floors. O CHECK VENT (Duct... in the exhaust system that illuminates when the dryer door is open and turns off when the ...
...that reduce airflow from the dryer. STEAM FEEDER This drawer contains...create steam for the water used by the dryer to -read LED display shows cycle status... Cord Location (Gas Models) Terminal Block Access Panel (Electric Models) Gas Connection Location (Gas Models) Exhaust Duct...cycle options or adjust settings with the touch of Dryer I I KEY PARTS AND COMPONENTS There are several ...and helps minimize service calls, saving you to improve dryer stability on uneven floors. O CHECK VENT (Duct... in the exhaust system that illuminates when the dryer door is open and turns off when the ...
Use and Care Guide
Page 8
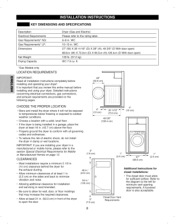
...cu. I_ (10 cm) (73.0 cm) =,- (10 cm) 49 5/6" (126.4 cm) oo • Properly ground the dryer to conform with a solid, level floor. • If the dryer is also acceptable. Closet Door Vent Requirements 8 I I (7.6 cm) i 48 in.2 J (310 cm) io 34 in . Detailed instructions concerning electrical... connections, gas connections, and exhaust requirements are installing your dryer in . (45.7 cm) above the floor. ! '' '' ' 4" 4" -,.-II_,_ 2811/16-"- IMPORTANT: If you review this entire manual before installing and operating your dryer...install the dryer where ...
...cu. I_ (10 cm) (73.0 cm) =,- (10 cm) 49 5/6" (126.4 cm) oo • Properly ground the dryer to conform with a solid, level floor. • If the dryer is also acceptable. Closet Door Vent Requirements 8 I I (7.6 cm) i 48 in.2 J (310 cm) io 34 in . Detailed instructions concerning electrical... connections, gas connections, and exhaust requirements are installing your dryer in . (45.7 cm) above the floor. ! '' '' ' 4" 4" -,.-II_,_ 2811/16-"- IMPORTANT: If you review this entire manual before installing and operating your dryer...install the dryer where ...

Use and Care Guide
Page 10
...and when acceptable to follow this warning can result in fire, explosion, or death. • The power cord of this dryer is equipped with a 3-prong (grounding) plug which mates with a standard 3-prong (grounding) wall outlet to do so can...electric shock hazard from this appliance. Larger tubing should be converted for gas leaks. Failure to follow this warning can result in . I I It can result in . A qualified service or gas company technician must be installed within at least 6 ft. (1.8 m) of gas shown on all gas connections. In the United States, an individual manual...
...and when acceptable to follow this warning can result in fire, explosion, or death. • The power cord of this dryer is equipped with a 3-prong (grounding) plug which mates with a standard 3-prong (grounding) wall outlet to do so can...electric shock hazard from this appliance. Larger tubing should be converted for gas leaks. Failure to follow this warning can result in . I I It can result in . A qualified service or gas company technician must be installed within at least 6 ft. (1.8 m) of gas shown on all gas connections. In the United States, an individual manual...

Use and Care Guide
Page 13
... green ground screw. screw. O TIGHTEN ALL SCREWS SECURELY. O Attach the power cord ground wire to the center screw of the dryer. Hot ......N...e..u. o ........ Hot .......N...eutral"" Hot B. O TIGHTEN ALL SCREWS SECURELY. Failure to follow these instructions may result in block...block access cover. O Reinstall the terminal block access cover. 13 I I CONNECTING ELECTRIC DRYERS (cont.) A kWARNING" . the terminal block. Three-Wire Power Cord ° A 3-wire connection is NOT permitted on manual is required. • Use a 30-amp, 240-volt, 3-wire, UL-...
... green ground screw. screw. O TIGHTEN ALL SCREWS SECURELY. O Attach the power cord ground wire to the center screw of the dryer. Hot ......N...e..u. o ........ Hot .......N...eutral"" Hot B. O TIGHTEN ALL SCREWS SECURELY. Failure to follow these instructions may result in block...block access cover. O Reinstall the terminal block access cover. 13 I I CONNECTING ELECTRIC DRYERS (cont.) A kWARNING" . the terminal block. Three-Wire Power Cord ° A 3-wire connection is NOT permitted on manual is required. • Use a 30-amp, 240-volt, 3-wire, UL-...

Use and Care Guide
Page 18
... select the STEAM REFRESH cycle, or you to inject fabrics with a swirling jet of hot steam to take advantage of the power of fire, electric shock, or injury to turn off automatically. ® OPTION BUTTONS The option buttons allow you to begin the cycle. Fill the steam feeder with... all cycles. O CYCLE MODIFIER BUTTONS Use these buttons to adjust the desired cycle options for more than 4 minutes, the dryer will display the estimated (SENSOR DRY) or set time (MANUAL DRY) remaining and start tumbling. To resume the cycle where it was stopped, press START/PAUSE again. The display also...
... select the STEAM REFRESH cycle, or you to inject fabrics with a swirling jet of hot steam to take advantage of the power of fire, electric shock, or injury to turn off automatically. ® OPTION BUTTONS The option buttons allow you to begin the cycle. Fill the steam feeder with... all cycles. O CYCLE MODIFIER BUTTONS Use these buttons to adjust the desired cycle options for more than 4 minutes, the dryer will display the estimated (SENSOR DRY) or set time (MANUAL DRY) remaining and start tumbling. To resume the cycle where it was stopped, press START/PAUSE again. The display also...

Use and Care Guide
Page 20
...Ono, r a, Cotton/Towels fabric type (Max 31b) .... Adjustable Adjustable Express Dry For small loads with every cycle. _ _ Max 99 J Manual Dry Cycles Use Manual Dry cycles to select a specific amount of the load and moisture content. ( ,0 0Modifiers , Options _' s,eom Refresh (DO NOT use for each...7" Normal Work clothes, etc. ....... time, tem)erature,and options can change the time. NOTE: To protect your cycle. The dryer automatically sets the dryness level and temperature at the recommended setting for the cycle by pressing MORE TIME or LESS TIME. Press and ...
...Ono, r a, Cotton/Towels fabric type (Max 31b) .... Adjustable Adjustable Express Dry For small loads with every cycle. _ _ Max 99 J Manual Dry Cycles Use Manual Dry cycles to select a specific amount of the load and moisture content. ( ,0 0Modifiers , Options _' s,eom Refresh (DO NOT use for each...7" Normal Work clothes, etc. ....... time, tem)erature,and options can change the time. NOTE: To protect your cycle. The dryer automatically sets the dryness level and temperature at the recommended setting for the cycle by pressing MORE TIME or LESS TIME. Press and ...
Use and Care Guide
Page 21
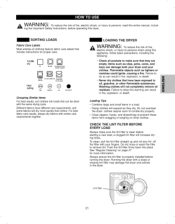
... the filter to persons, read this entire manual, including the Important Safety Instructions, before operating this dryer. Push the lint filter firmly back into loads that include instructions for more quickly than others. Running the dryer with similar care requirements together. For best ...into place. SORTING LOADS Fabric Care Labels Most articles of fire, electric shock, or injury to persons when using this warning can result in the dryer. Always ensure the lint filter is clean before running the dryer. Tdruymble D Dry FOS _-- ] Normal Permanent Press/ wrinkle ...
... the filter to persons, read this entire manual, including the Important Safety Instructions, before operating this dryer. Push the lint filter firmly back into loads that include instructions for more quickly than others. Running the dryer with similar care requirements together. For best ...into place. SORTING LOADS Fabric Care Labels Most articles of fire, electric shock, or injury to persons when using this warning can result in the dryer. Always ensure the lint filter is clean before running the dryer. Tdruymble D Dry FOS _-- ] Normal Permanent Press/ wrinkle ...

Use and Care Guide
Page 23
...and loads. This allows precise care of the articles in the load to your preferences. • This option is available with MANUAL DRY cycles. • The dryer will decrease the cycle time. • Use a LESS DRY or DAMP DRY setting for items that are selected automatically. ...each cycle selection. O CHIME Adjusts the volume of dryness for details. Press the TEMP CONTROL button repeatedly to scroll through available settings. MANUAL DRY cycles have default settings, but you may also customize these settings using the cycle modifier buttons. O DRY LEVEL Selects the level ...
...and loads. This allows precise care of the articles in the load to your preferences. • This option is available with MANUAL DRY cycles. • The dryer will decrease the cycle time. • Use a LESS DRY or DAMP DRY setting for items that are selected automatically. ...each cycle selection. O CHIME Adjusts the volume of dryness for details. Press the TEMP CONTROL button repeatedly to scroll through available settings. MANUAL DRY cycles have default settings, but you may also customize these settings using the cycle modifier buttons. O DRY LEVEL Selects the level ...