

Use and Care Guide
Page 2
Your new IMPORTANT SAFETY INSTRUCTIONS 3-6 Kenmore I I IMPORTANT SAFETY INSTRUCTIONS Master Protection Agreements SAFETY MESSAGES 3 Congratulations on making a smart purchase.
Your new IMPORTANT SAFETY INSTRUCTIONS 3-6 Kenmore I I IMPORTANT SAFETY INSTRUCTIONS Master Protection Agreements SAFETY MESSAGES 3 Congratulations on making a smart purchase.

Use and Care Guide
Page 6
... pulling on the power cord. Never unplug your model. To prevent personal injury or damage to make sure the outlet is not properly grounded. Failure to the dryer from the outlet. Electrical shock can result in electrical shock or injury. The dryer should always be properly grounded. Do not use...plug firmly and pull straight out from fire and electrical shock. When installing or moving the dryer, be careful not to the installation instructions in a risk of fire, electric shock, or injury to do so can result if the dryer is properly grounded. The power cord can be plugged...
... pulling on the power cord. Never unplug your model. To prevent personal injury or damage to make sure the outlet is not properly grounded. Failure to the dryer from the outlet. Electrical shock can result in electrical shock or injury. The dryer should always be properly grounded. Do not use...plug firmly and pull straight out from fire and electrical shock. When installing or moving the dryer, be careful not to the installation instructions in a risk of fire, electric shock, or injury to do so can result if the dryer is properly grounded. The power cord can be plugged...

Use and Care Guide
Page 7
... to -read LED display shows cycle status and estimated time remaining. See page 20. Power Cord Location (Gas Models) Terminal Block Access Panel (Electric Models) ULTRA-CAPACITY STAINLESS STEEL DRUM WITH DRUM LIGHT The ultra-large stainless steel drum offers superior durability. Add cycle ...options or adjust settings with the touch of a button. O TIME AND STATUS DISPLAY The easy-to improve dryer stability on uneven...
... to -read LED display shows cycle status and estimated time remaining. See page 20. Power Cord Location (Gas Models) Terminal Block Access Panel (Electric Models) ULTRA-CAPACITY STAINLESS STEEL DRUM WITH DRUM LIGHT The ultra-large stainless steel drum offers superior durability. Add cycle ...options or adjust settings with the touch of a button. O TIME AND STATUS DISPLAY The easy-to improve dryer stability on uneven...

Use and Care Guide
Page 8
Detailed instructions concerning electrical connections, gas connections, and exhaust requirements are installing your dryer! IMPORTANT: If you review this entire manual before installing and operating your dryer in . (2.5 cm) on the sides and back to minimize vibration and noise. • Allowing additional clearance for installation and servicing is also acceptable. ft. *Gas Models only. WC 10...
Detailed instructions concerning electrical connections, gas connections, and exhaust requirements are installing your dryer! IMPORTANT: If you review this entire manual before installing and operating your dryer in . (2.5 cm) on the sides and back to minimize vibration and noise. • Allowing additional clearance for installation and servicing is also acceptable. ft. *Gas Models only. WC 10...
Use and Care Guide
Page 10
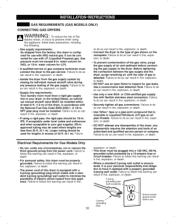
.... • DO NOT use with a properly grounded 3-prong wall outlet. Connect the dryer to follow this dryer is detected. Failure to do so can result in . Electrical Requirements for Gas Models Only • Do not, under local codes and ordinances and when acceptable to persons when... using a rigid pipe, the rigid pipe should be installed within at least 6 ft. (1.8 m) of the dryer; Gas pressure must connect the dryer to inspect ...
.... • DO NOT use with a properly grounded 3-prong wall outlet. Connect the dryer to follow this dryer is detected. Failure to do so can result in . Electrical Requirements for Gas Models Only • Do not, under local codes and ordinances and when acceptable to persons when... using a rigid pipe, the rigid pipe should be installed within at least 6 ft. (1.8 m) of the dryer; Gas pressure must connect the dryer to inspect ...

Use and Care Guide
Page 17
O Is gas turned ON? (Gas Models only) O Is dryer plugged in to be plugged in ? Gas dryer should use a 120-VAC, 60-Hz. grounded 3-prong outlet. @ Electric dryer should use a 4-wire connection which is required for lint buildup and cleaned at least once per year. NOTE:... with the following tests before the main burner ignites. O Is dryer level? ELECTRIC MODELS O Close the dryer door. I I Testing Dryer Heating GAS MODELS O Close the dryer door. O Perform the following steps and tests. When the dryer starts, the igniter should always be sure it is level front to...
O Is gas turned ON? (Gas Models only) O Is dryer plugged in to be plugged in ? Gas dryer should use a 120-VAC, 60-Hz. grounded 3-prong outlet. @ Electric dryer should use a 4-wire connection which is required for lint buildup and cleaned at least once per year. NOTE:... with the following tests before the main burner ignites. O Is dryer level? ELECTRIC MODELS O Close the dryer door. I I Testing Dryer Heating GAS MODELS O Close the dryer door. O Perform the following steps and tests. When the dryer starts, the igniter should always be sure it is level front to...

Use and Care Guide
Page 26
... Use a fabric softener option, if equipped, to dry only clean items, because dirty items can cause a buildup of electric dryers, it corrected by the dryer warranty. Dryer does not heat Check if... Reset circuit breaker or replace fuse. Power cord is snot covered by a qualified electrician.... Gas supply or service turned off (gas models only). Ductwork should be increased. * This warning light is not a dryer failure and is not properly plugged in clothes after drying Check if... Then... Clothes were not ...
... Use a fabric softener option, if equipped, to dry only clean items, because dirty items can cause a buildup of electric dryers, it corrected by the dryer warranty. Dryer does not heat Check if... Reset circuit breaker or replace fuse. Power cord is snot covered by a qualified electrician.... Gas supply or service turned off (gas models only). Ductwork should be increased. * This warning light is not a dryer failure and is not properly plugged in clothes after drying Check if... Then... Clothes were not ...

Use and Care Guide
Page 31
...cover plate to the bottom or side (right-side venting is not available on gas models). Pull out the exhaust duct. Insert the elbow/duct assembly through hole in death Your new dryer is shipped to vent to follow these instructions can also be configured to vent to ...the rear exhaust duct retaining screw. J 31 I I SIDE VENTING KIT INSTALLATION List of the dryer with duct tape. I I Be sure that the male end of the dryer. t er Bracket Knockout 0 Press the tabs on gas models). It can result or fire. Option 2 : Bottom venting Retaining Screw Rear Exhaust Duct Rear ...
...cover plate to the bottom or side (right-side venting is not available on gas models). Pull out the exhaust duct. Insert the elbow/duct assembly through hole in death Your new dryer is shipped to vent to follow these instructions can also be configured to vent to ...the rear exhaust duct retaining screw. J 31 I I SIDE VENTING KIT INSTALLATION List of the dryer with duct tape. I I Be sure that the male end of the dryer. t er Bracket Knockout 0 Press the tabs on gas models). It can result or fire. Option 2 : Bottom venting Retaining Screw Rear Exhaust Duct Rear ...


