Operation Manual
Page 2
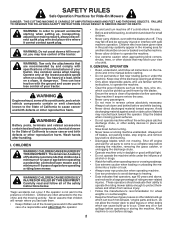
...leaves or other safety devices in reverse unless absolutely necessary. They may fall off blades, set parking brake, stop before operating a riding lawn mower. GENERAL OPERATION • Read, understand, and follow all parts to come to a complete stop engine, and remove keys before ... Operate only at all instructions on a slope. CHILDREN WARNING! The American Academy of children. WARNING! II. Keep clear of the tractor. Stop machine if anyone . Avoid discharging material against a wall or obstruction. Material may lose control of the discharge opening at the...
...leaves or other safety devices in reverse unless absolutely necessary. They may fall off blades, set parking brake, stop before operating a riding lawn mower. GENERAL OPERATION • Read, understand, and follow all parts to come to a complete stop engine, and remove keys before ... Operate only at all instructions on a slope. CHILDREN WARNING! The American Academy of children. WARNING! II. Keep clear of the tractor. Stop machine if anyone . Avoid discharging material against a wall or obstruction. Material may lose control of the discharge opening at the...
Operation Manual
Page 10
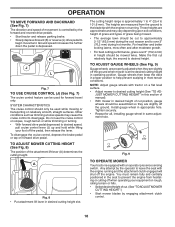
... types of cut. (See "TO ADJUST MOWER CUTTING HEIGHT".) • Start mower blades by the forward and reverse drive pedals. • Start tractor and release parking brake. • Slowly depress forward (K) or reverse (L) drive pedal to 101,6 mm). The heights are slightly off when operating ...WHEELS (See Fig. 9) Gauge wheels are properly adjusted when they are measured from hesitating or cutting off the ground. For healthier and better looking lawns, mow often and after moderate growth. • For best cutting performance, grass over 3" (76,2 mm) during hot months. These heights are...
... types of cut. (See "TO ADJUST MOWER CUTTING HEIGHT".) • Start mower blades by the forward and reverse drive pedals. • Start tractor and release parking brake. • Slowly depress forward (K) or reverse (L) drive pedal to 101,6 mm). The heights are slightly off when operating ...WHEELS (See Fig. 9) Gauge wheels are properly adjusted when they are measured from hesitating or cutting off the ground. For healthier and better looking lawns, mow often and after moderate growth. • For best cutting performance, grass over 3" (76,2 mm) during hot months. These heights are...
Operation Manual
Page 19
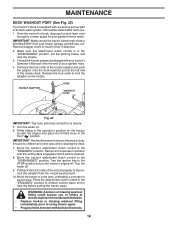
... chute is directed AWAY from the nozzle washout port. 10.Move the tractor to help dry before putting the tractor away. Turn the water on your lawn, near enough to a water spigot for your garden hose to the "DISENGAGED" position. While sitting in the operator's position on the nozzle. IMPORTANT: Recheck the ...
... chute is directed AWAY from the nozzle washout port. 10.Move the tractor to help dry before putting the tractor away. Turn the water on your lawn, near enough to a water spigot for your garden hose to the "DISENGAGED" position. While sitting in the operator's position on the nozzle. IMPORTANT: Recheck the ...

Operation Manual
Page 22
... be level side-to lower the front mower. PRECISION SIDE-TO-SIDE ADJUSTMENT (See Fig. 30) • With all tires properly inflated and if your lawn appears unevenly cut, determine which side of mower, or, counterclockwise ( ) (loosen) to -side. ment nut (B) clockwise ( ) (tighten) to raise the front of mower is ... in its highest position. • At both sides of mower, position blade at front and rear tip of the blade. • If front tip of tractor. Fig. 31 • With an 11/16" or adjustable wrench, loosen jam nut A several turns to 12,7 mm) lower than the rear tip. • Hold...
... be level side-to lower the front mower. PRECISION SIDE-TO-SIDE ADJUSTMENT (See Fig. 30) • With all tires properly inflated and if your lawn appears unevenly cut, determine which side of mower, or, counterclockwise ( ) (loosen) to -side. ment nut (B) clockwise ( ) (tighten) to raise the front of mower is ... in its highest position. • At both sides of mower, position blade at front and rear tip of the blade. • If front tip of tractor. Fig. 31 • With an 11/16" or adjustable wrench, loosen jam nut A several turns to 12,7 mm) lower than the rear tip. • Hold...


