
Owners Manual
Page 4
... product. Please state the type designation and serial number when ordering spare parts. Read the manual carefully before you for purchasing a Husqvarna stump grinder. By moving the blade in us, you need spare parts or support in service questions, guarantee issues, etc., please consult the following... time. It describes your new machine. Use The stump grinder is specified on the crankcase to remove tree stumps. Good service Husqvarna products are sold all -inclusive insurance for more information. The engine's serial number is a valuable document. Please contact your machine...
... product. Please state the type designation and serial number when ordering spare parts. Read the manual carefully before you for purchasing a Husqvarna stump grinder. By moving the blade in us, you need spare parts or support in service questions, guarantee issues, etc., please consult the following... time. It describes your new machine. Use The stump grinder is specified on the crankcase to remove tree stumps. Good service Husqvarna products are sold all -inclusive insurance for more information. The engine's serial number is a valuable document. Please contact your machine...
Owners Manual
Page 8
...emergency arise. • The machine is responsible for training users. • Engage an authorized Husqvarna workshop for removing tree stumps. Failure to vibration. For this manual. • Husqvarna original spare parts are using the machine so that could have been caused by overexposure to do , always seek... expert assistance. Contact your doctor if you experience symptoms that you can call for help should only use Husqvarna original spare parts. • Learn how to use the machine and its use. • Never allow the machine to maintain high quality and...
...emergency arise. • The machine is responsible for training users. • Engage an authorized Husqvarna workshop for removing tree stumps. Failure to vibration. For this manual. • Husqvarna original spare parts are using the machine so that could have been caused by overexposure to do , always seek... expert assistance. Contact your doctor if you experience symptoms that you can call for help should only use Husqvarna original spare parts. • Learn how to use the machine and its use. • Never allow the machine to maintain high quality and...

Owners Manual
Page 9
...anti-slip and preferably with steel toes. • Use a helmet with good grip and protective clothing which you can catch in moving machine parts and thrown out. 8011-198 • Find and locate all fixed objects in the surface of objects such as sprinkler systems, poles, water... valves, bases for washing lines, etc. Ask your dealer about approved protective clothing and approved protective equipment recommended by Husqvarna. 9 Ask your legs from the machine. • Clear the area of the lawn. Always run the machine around these objects. See the...
...anti-slip and preferably with steel toes. • Use a helmet with good grip and protective clothing which you can catch in moving machine parts and thrown out. 8011-198 • Find and locate all fixed objects in the surface of objects such as sprinkler systems, poles, water... valves, bases for washing lines, etc. Ask your dealer about approved protective clothing and approved protective equipment recommended by Husqvarna. 9 Ask your legs from the machine. • Clear the area of the lawn. Always run the machine around these objects. See the...

Owners Manual
Page 10
... when backing. Never work tools. • DO NOT use your feet or other parts of your hands and feet away from moving parts have stopped before beginning again. • Whatever happens, you run over parts. If necessary, make repairs before leaving the operating position behind the machine. Gasoline is...you should always park the machine on even ground, disengage the drive, activate the parking, turn off the engine and wait until all moving parts. • Keep your body to gain greater bearing pressure against the stump. • Smoking, open flames or sparks in the vicinity ...
... when backing. Never work tools. • DO NOT use your feet or other parts of your hands and feet away from moving parts have stopped before beginning again. • Whatever happens, you run over parts. If necessary, make repairs before leaving the operating position behind the machine. Gasoline is...you should always park the machine on even ground, disengage the drive, activate the parking, turn off the engine and wait until all moving parts. • Keep your body to gain greater bearing pressure against the stump. • Smoking, open flames or sparks in the vicinity ...

Owners Manual
Page 13
... sure all nuts, bolts, etc. Remove the spark plug cable. • Be careful when checking work . • Keep all components in the machine. 13 This can cause fires or burn the user. Check regularly to perform service on the machine. • Do not disassemble the engine. Keep the machine... fast, you have caught in serviceable condition and make adjustments with the engine running the engine with overly high RPM. Follow all moving parts come to maintain sound levels at an approved level and keep direct exhaust away from the engine are extremely hot and may contain sparks ...
... sure all nuts, bolts, etc. Remove the spark plug cable. • Be careful when checking work . • Keep all components in the machine. 13 This can cause fires or burn the user. Check regularly to perform service on the machine. • Do not disassemble the engine. Keep the machine... fast, you have caught in serviceable condition and make adjustments with the engine running the engine with overly high RPM. Follow all moving parts come to maintain sound levels at an approved level and keep direct exhaust away from the engine are extremely hot and may contain sparks ...

Owners Manual
Page 24
Choke control When starting the engine cold or partially warm, place the lever completely or partly to the left. When starting the engine warm, the lever should be best to the SLOW(START)/ DISENGAGE position. . Throttle Set the throttle on handlebar. ...
Choke control When starting the engine cold or partially warm, place the lever completely or partly to the left. When starting the engine warm, the lever should be best to the SLOW(START)/ DISENGAGE position. . Throttle Set the throttle on handlebar. ...
Owners Manual
Page 44
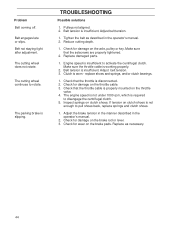
... is worn - Adjust the brake tension in the manner described in the operator's manual. 2. Check for wear on the brake rod or lever. 3. Replace damaged parts. 1. Problem Belt coming off. Clutch is disconnected. 2.
... is worn - Adjust the brake tension in the manner described in the operator's manual. 2. Check for wear on the brake rod or lever. 3. Replace damaged parts. 1. Problem Belt coming off. Clutch is disconnected. 2.
Owners Manual
Page 45
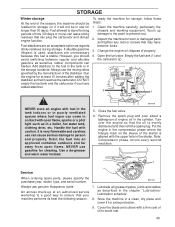
... of time (30 days or more) can leave sticky residues that can plug the carburetor and disrupt engine function. Service When ordering spare parts, please specify the puschase year, model, type, and serial number. 8011-131 Always use the mixing ratios specified by the manufacturer of the...the cylinder. Add stabilizer to ensure that your as in contact with caution. Always use genuine Husqvarna parts. 7. dispose of engine oil in a clean, dry place and cover it for worn or damaged parts and tighten any nuts or screws that may have added stabilizer. Open the fuel valve. ...
... of time (30 days or more) can leave sticky residues that can plug the carburetor and disrupt engine function. Service When ordering spare parts, please specify the puschase year, model, type, and serial number. 8011-131 Always use the mixing ratios specified by the manufacturer of the...the cylinder. Add stabilizer to ensure that your as in contact with caution. Always use genuine Husqvarna parts. 7. dispose of engine oil in a clean, dry place and cover it for worn or damaged parts and tighten any nuts or screws that may have added stabilizer. Open the fuel valve. ...

Parts List
Page 3
...539 99 05-63 ........4 ........ HCS 5/16-18 X 3/4, GR5 12 ...... 539 99 01-84 ........14 ...... NUT 5/16-18, CENTER LOCK 13 ...... 539 02 00-94 ........1 ........ WHEEL W/DISC, 12" SNOW HOG 17 ...... 539 02 00-85 ........1 ........ NUT 1/4-20, CENTER LOCK 21...539 02 00-28 ........2 ........ LOCKWASHER, 1/4 23 ...... 539 99 05-98 ........6 ........ NUT 3/8-16 27 ...... 539 02 00-20 ........1 ........ DECK ASSEMBLY ITEM PART NO. BRACKET, HANDLE POSTIONING 6 ........ 539 02 00-82 ........2 ........ KIT, CLUTCH SHOES & SPRINGS (NOT SHOWN) 28 ...... 539 91 70-33 ........1 ........ DEFLECTOR...
...539 99 05-63 ........4 ........ HCS 5/16-18 X 3/4, GR5 12 ...... 539 99 01-84 ........14 ...... NUT 5/16-18, CENTER LOCK 13 ...... 539 02 00-94 ........1 ........ WHEEL W/DISC, 12" SNOW HOG 17 ...... 539 02 00-85 ........1 ........ NUT 1/4-20, CENTER LOCK 21...539 02 00-28 ........2 ........ LOCKWASHER, 1/4 23 ...... 539 99 05-98 ........6 ........ NUT 3/8-16 27 ...... 539 02 00-20 ........1 ........ DECK ASSEMBLY ITEM PART NO. BRACKET, HANDLE POSTIONING 6 ........ 539 02 00-82 ........2 ........ KIT, CLUTCH SHOES & SPRINGS (NOT SHOWN) 28 ...... 539 91 70-33 ........1 ........ DEFLECTOR...

Parts List
Page 5
...1 ........ SWITCH, TOGGLE 5 ........ 539 02 00-41 ........1 ........ HANDLE, POSITION ADJ. 11 ...... 539 10 90-89 ........1 ........ RIVET, SNAP-FEMALE HALF 13 ...... 539 10 29-98 ........1 ........ DESCRIPTION 1 ........ 539 10 99-51 ........1 ........ BUSHING 17 ...... 539 97 69-38 ........1 ........ PIN, HAIR, 5/...64 X 1 7/16 33 ...... 539 10 86-48 ........1 ........ COTTER PIN 23 ...... 539 02 00-35 ........1 ........ UPPER HANDLE BAR ITEM PART NO. HANDLE, WHEEL BRAKE 19 ...... 539 10 89-96 ........1 ........ NUT 5/16, PUSH CAP 7 ........ 540 02 02-01 ........1 ...........
...1 ........ SWITCH, TOGGLE 5 ........ 539 02 00-41 ........1 ........ HANDLE, POSITION ADJ. 11 ...... 539 10 90-89 ........1 ........ RIVET, SNAP-FEMALE HALF 13 ...... 539 10 29-98 ........1 ........ DESCRIPTION 1 ........ 539 10 99-51 ........1 ........ BUSHING 17 ...... 539 97 69-38 ........1 ........ PIN, HAIR, 5/...64 X 1 7/16 33 ...... 539 10 86-48 ........1 ........ COTTER PIN 23 ...... 539 02 00-35 ........1 ........ UPPER HANDLE BAR ITEM PART NO. HANDLE, WHEEL BRAKE 19 ...... 539 10 89-96 ........1 ........ NUT 5/16, PUSH CAP 7 ........ 540 02 02-01 ........1 ...........

Parts List
Page 7
........... LOCKWASHER 3/8 11 ...... 539 10 93-32 ........ 3 ........ NUT 3/8-16, JAM 12 ...... 539 20 07-51 ........ 1 ........ SET OF 2 13 ...... 540 02 02-12 ........ 1 ........ QTY. LOCKWASHER 3/8 15 ...... 539 10 87-46 ........ 3 ........ DEFLECTOR, NEOPRENE, LEFT SIDE 17 .......... HCS 5/16-18 X 3/4, GR5 PLATE, COVER 5 ........ 539 99 06-92 ........ 14 ...... BELT COVER ITEM PART NO. KEY 1/4 SQ X 2 2 ........ 539 11 14-01 ........ 1 ........ BELT GUARD BACK 4 ........ 539 10 82-13 ........ 1 ........ HCS 5/16-24 X 1, GR5 8 ........ 539 10 85-05 ........ 1 ........ HCS 3/8-16 X...
........... LOCKWASHER 3/8 11 ...... 539 10 93-32 ........ 3 ........ NUT 3/8-16, JAM 12 ...... 539 20 07-51 ........ 1 ........ SET OF 2 13 ...... 540 02 02-12 ........ 1 ........ QTY. LOCKWASHER 3/8 15 ...... 539 10 87-46 ........ 3 ........ DEFLECTOR, NEOPRENE, LEFT SIDE 17 .......... HCS 5/16-18 X 3/4, GR5 PLATE, COVER 5 ........ 539 99 06-92 ........ 14 ...... BELT COVER ITEM PART NO. KEY 1/4 SQ X 2 2 ........ 539 11 14-01 ........ 1 ........ BELT GUARD BACK 4 ........ 539 10 82-13 ........ 1 ........ HCS 5/16-24 X 1, GR5 8 ........ 539 10 85-05 ........ 1 ........ HCS 3/8-16 X...

Parts List
Page 9
... BORE POCKET (4 EA THREADED POCKETS (4 EA LEFT TOOTH (4 EA RIGHT TOOTH (4 EA SOCKET HEAD SCREWS (8 EA) 5 ........ 539 02 02-29 ........1 ........ SHROUD AND BLADE ASSEMBLY ITEM PART NO. CUTTING WHEEL ASSEMBLY (NO TEETH) 4 ........ 539 02 02-28 ........1 ........ ALLEN WRENCH, 1/2" X 8" (NOT SHOWN) DESCRIPTION 1 ........ 540 02 02-25 ........1 ........
... BORE POCKET (4 EA THREADED POCKETS (4 EA LEFT TOOTH (4 EA RIGHT TOOTH (4 EA SOCKET HEAD SCREWS (8 EA) 5 ........ 539 02 02-29 ........1 ........ SHROUD AND BLADE ASSEMBLY ITEM PART NO. CUTTING WHEEL ASSEMBLY (NO TEETH) 4 ........ 539 02 02-28 ........1 ........ ALLEN WRENCH, 1/2" X 8" (NOT SHOWN) DESCRIPTION 1 ........ 540 02 02-25 ........1 ........

Parts List
Page 11
... ...... 539 10 97-02 ........1 ........ DECAL, NASCAR 14 ...... 539 20 07-62 ........1 ........ DECAL, 107DBA SOUND POWER 15 ...... 539 11 05-90 ........ 1 ........ DECAL, CE968999239 13 ...... 539 10 50-71 ........1 ........ DECAL, LOGO HUSQVARNA 2 ........ 539 11 10-44 ........1 ........ DESCRIPTION 1 ........ 539 11 10-46 ........1 ........ DECAL, NO STEP 6 ........ 539 11 10-60 ........1 ........ DECAL, SG13A STUMP GRINDER 7 ........ 539 10...
... ...... 539 10 97-02 ........1 ........ DECAL, NASCAR 14 ...... 539 20 07-62 ........1 ........ DECAL, 107DBA SOUND POWER 15 ...... 539 11 05-90 ........ 1 ........ DECAL, CE968999239 13 ...... 539 10 50-71 ........1 ........ DECAL, LOGO HUSQVARNA 2 ........ 539 11 10-44 ........1 ........ DESCRIPTION 1 ........ 539 11 10-46 ........1 ........ DECAL, NO STEP 6 ........ 539 11 10-60 ........1 ........ DECAL, SG13A STUMP GRINDER 7 ........ 539 10...


