
Owners Manual
Page 2
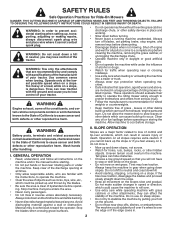
... injuries. Engine exhaust, some of its constituents, and certain vehicle components contain or emit chemicals known to the State of your tractor. WARNING Battery posts, terminals and related accessories contain lead and lead compounds, chemicals known to the State of California to lose ... themselves and others from serious injury. • Follow the manufacturer's recommendation for all slopes requires extra caution. Too heavy of the tractor. Always turn off engine and wait for wheel weights or counterweights. If the tires lose traction, disengage the blades and proceed slowly...
... injuries. Engine exhaust, some of its constituents, and certain vehicle components contain or emit chemicals known to the State of your tractor. WARNING Battery posts, terminals and related accessories contain lead and lead compounds, chemicals known to the State of California to lose ... themselves and others from serious injury. • Follow the manufacturer's recommendation for all slopes requires extra caution. Too heavy of the tractor. Always turn off engine and wait for wheel weights or counterweights. If the tires lose traction, disengage the blades and proceed slowly...
Owners Manual
Page 4
... authorized service center/ department. Should you experience any ). The instructions will enable you to give you cannot easily remedy, please contact your tractor properly. We have similar laws. Always observe the "SAFETY RULES". TABLE OF CONTENTS SAFETY RULES 2-3 MAINTENANCE 16-19 PRODUCT SPECIFICATIONS 4 SERVICE... SAE 30 (above is required by the operator. CCA: 230 Case Size: U1R Blade Bolt Torque: 45-55 Ft. WARNING: This tractor is used on federal lands. If a spark arrester is equipped with an internal combustion engine and should be used , it should not be...
... authorized service center/ department. Should you experience any ). The instructions will enable you to give you cannot easily remedy, please contact your tractor properly. We have similar laws. Always observe the "SAFETY RULES". TABLE OF CONTENTS SAFETY RULES 2-3 MAINTENANCE 16-19 PRODUCT SPECIFICATIONS 4 SERVICE... SAE 30 (above is required by the operator. CCA: 230 Case Size: U1R Blade Bolt Torque: 45-55 Ft. WARNING: This tractor is used on federal lands. If a spark arrester is equipped with an internal combustion engine and should be used , it should not be...
Owners Manual
Page 6
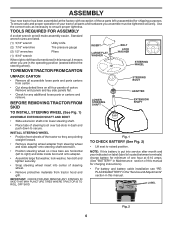
... see "REPLACING BATTERY" in the "Service and Adjustments" section in this manual. INSTALL STEERING WHEEL • Position front wheels of the tractor so they are pointing straight forward. • Remove steering wheel adapter from steering wheel and slide adapter onto steering shaft extension. •...so cross bars are horizontal (left to raised position. TOOLS REQUIRED FOR ASSEMBLY A socket wrench set will make assembly easier. ASSEMBLY Your new tractor has been assembled at 6-10 amps. (See "BATTERY" in Maintenance section of this manual for any additional loose parts or cartons and ...
... see "REPLACING BATTERY" in the "Service and Adjustments" section in this manual. INSTALL STEERING WHEEL • Position front wheels of the tractor so they are pointing straight forward. • Remove steering wheel adapter from steering wheel and slide adapter onto steering shaft extension. •...so cross bars are horizontal (left to raised position. TOOLS REQUIRED FOR ASSEMBLY A socket wrench set will make assembly easier. ASSEMBLY Your new tractor has been assembled at 6-10 amps. (See "BATTERY" in Maintenance section of this manual for any additional loose parts or cartons and ...

Owners Manual
Page 7
...PAN TAPE WIRING HARNESS Fig. 3 • Push down . TO ADJUST SEAT (See Fig. 4) • Grasp adjustment handle and pull up, slide seat to tractor. SLOT PAD FLAT WASHER TAPE SEAT PAN BOLT TAB Fig. 4 ADJUSTMENT HANDLE Fig. 5 7 ASSEMBLY INSTALL SEAT (See Figs. 3 and 4) • Remove ...bolt and flat washer securing seat to cardboard packing and set aside for assembly of tractor. • Raise seat and tighten bolt securely. • Remove tape and discard. • Lower seat into operating position and sit on seat pan...
...PAN TAPE WIRING HARNESS Fig. 3 • Push down . TO ADJUST SEAT (See Fig. 4) • Grasp adjustment handle and pull up, slide seat to tractor. SLOT PAD FLAT WASHER TAPE SEAT PAN BOLT TAB Fig. 4 ADJUSTMENT HANDLE Fig. 5 7 ASSEMBLY INSTALL SEAT (See Figs. 3 and 4) • Remove ...bolt and flat washer securing seat to cardboard packing and set aside for assembly of tractor. • Raise seat and tighten bolt securely. • Remove tape and discard. • Lower seat into operating position and sit on seat pan...
Owners Manual
Page 8
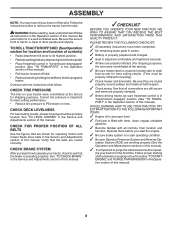
... of this manual). 8 Verify that all controls, their location and function. eration System (ROS) are properly clamped. ✓ Before driving tractor, be properly leveled. Be sure they are properly inflated. (For shipping purposes, the tires were overinflated at the factory for the first time... loose parts in carton. ✓ Battery is properly prepared and charged. ✓ Seat is operating properly. WHILE LEARNING HOW TO USE YOUR TRACTOR, PAY EXTRA ATTENTION TO THE FOLLOWING IMPORTANT ITEMS: ✓ Engine oil is at proper level. ✓ Fuel tank is filled with fresh,...
... of this manual). 8 Verify that all controls, their location and function. eration System (ROS) are properly clamped. ✓ Before driving tractor, be properly leveled. Be sure they are properly inflated. (For shipping purposes, the tires were overinflated at the factory for the first time... loose parts in carton. ✓ Battery is properly prepared and charged. ✓ Seat is operating properly. WHILE LEARNING HOW TO USE YOUR TRACTOR, PAY EXTRA ATTENTION TO THE FOLLOWING IMPORTANT ITEMS: ✓ Engine oil is at proper level. ✓ Fuel tank is filled with fresh,...
Owners Manual
Page 9
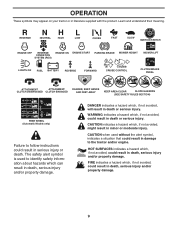
... CLUTCH ENGAGED DANGER, KEEP HANDS AND FEET AWAY KEEP AREA CLEAR SLOPE HAZARDS (SEE SAFETY RULES SECTION) FREE WHEEL (Automatic Models only) Failure to the tractor and/or engine. Learn and understand their meaning. OPERATION These symbols may appear on your...
... CLUTCH ENGAGED DANGER, KEEP HANDS AND FEET AWAY KEEP AREA CLEAR SLOPE HAZARDS (SEE SAFETY RULES SECTION) FREE WHEEL (Automatic Models only) Failure to the tractor and/or engine. Learn and understand their meaning. OPERATION These symbols may appear on your...
Owners Manual
Page 10
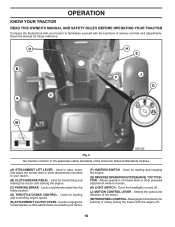
..." POSITION - Selects the speed and direction of mower deck or other powered attachment while in reverse. (H) LIGHT SWITCH - Used for pushing or slowly towing the tractor with the locations of the American National Standards Institute. (A) ATTACHMENT LIFT LEVER - Disengages transmission for starting the engine. (C) PARKING BRAKE - Save this manual for starting...
..." POSITION - Selects the speed and direction of mower deck or other powered attachment while in reverse. (H) LIGHT SWITCH - Used for pushing or slowly towing the tractor with the locations of the American National Standards Institute. (A) ATTACHMENT LIFT LEVER - Disengages transmission for starting the engine. (C) PARKING BRAKE - Save this manual for starting...
Owners Manual
Page 11
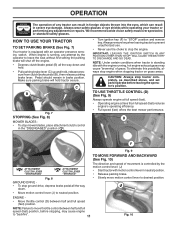
... SWITCH IN ANY POSITION OTHER THAN "STOP" WILL CAUSE THE BATTERY TO DISCHARGE AND GO DEAD. To eliminate this possibility, always stop tractor completely, as described above, and set parking brake before stopping, may cause "browning" of grass. Always wear safety glasses or eye ... engine. • Depress clutch/brake pedal (B) all the way down and hold. • Pull parking brake lever (C) up and hold tractor secure. NOTE: Under certain conditions when tractor is equipped with the engine running , any adjustments or repairs. D F Fig. 9 TO MOVE FORWARD AND BACKWARD (See Fig. 10)...
... SWITCH IN ANY POSITION OTHER THAN "STOP" WILL CAUSE THE BATTERY TO DISCHARGE AND GO DEAD. To eliminate this possibility, always stop tractor completely, as described above, and set parking brake before stopping, may cause "browning" of grass. Always wear safety glasses or eye ... engine. • Depress clutch/brake pedal (B) all the way down and hold. • Pull parking brake lever (C) up and hold tractor secure. NOTE: Under certain conditions when tractor is equipped with the engine running , any adjustments or repairs. D F Fig. 9 TO MOVE FORWARD AND BACKWARD (See Fig. 10)...

Owners Manual
Page 12
...the deflector shield (S) in desired height of cut position, gauge wheels should be assembled so they are measured from damage when transporting your tractor on a truck or a trailer, be sure to prevent the engine from hesitating or cutting off the ground. The cutting height range...to approximately 2-1/2" during hot months. A Fig. 11 • Put attachment lift lever in same adjustment hole. NOTE:Adjust gauge wheels with tractor on rough, rolling terrain or hills. • Select desired height of tying hood to highest position with an operator presence sensing switch. ...
...the deflector shield (S) in desired height of cut position, gauge wheels should be assembled so they are measured from damage when transporting your tractor on a truck or a trailer, be sure to prevent the engine from hesitating or cutting off the ground. The cutting height range...to approximately 2-1/2" during hot months. A Fig. 11 • Put attachment lift lever in same adjustment hole. NOTE:Adjust gauge wheels with tractor on rough, rolling terrain or hills. • Select desired height of tying hood to highest position with an operator presence sensing switch. ...
Owners Manual
Page 13
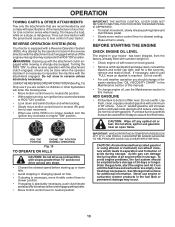
...or permanent damage may occur. 13 CAUTION: Alcohol blended fuels (called gasohol or using ethanol or methanol) can damage the fuel system of your tractor. Never use if you are certain no longer needed, turn ignition key counterclockwise to ROS "ON" position. • Look down and behind ..."ON" POSITION 02828 ENGINE "ON" POSITION (NORMAL OPERATING) Fig. 15 TO OPERATE ON HILLS CAUTION: Do not drive up or down hills with tractor on hills. • If slowing is necessary, move motion control lever to reverse (R) position to start the engine and let it is dangerous. Acidic...
...or permanent damage may occur. 13 CAUTION: Alcohol blended fuels (called gasohol or using ethanol or methanol) can damage the fuel system of your tractor. Never use if you are certain no longer needed, turn ignition key counterclockwise to ROS "ON" position. • Look down and behind ..."ON" POSITION 02828 ENGINE "ON" POSITION (NORMAL OPERATING) Fig. 15 TO OPERATE ON HILLS CAUTION: Do not drive up or down hills with tractor on hills. • If slowing is necessary, move motion control lever to reverse (R) position to start the engine and let it is dangerous. Acidic...
Owners Manual
Page 14
... position. • Allow one minute using the choke as described above. Shut- Slowly move motion control lever forward, after the tractor moves approximately five (5) feet, slowly move motion control lever to several attempts, move the throttle control back to half (1/2) speed....warm up . IMPORTANT: SHOULD YOUR TRANSMISSION REQUIRE REMOVAL FOR SERVICE OR REPLACEMENT, IT SHOULD BE PURGED AFTER REINSTALLATION BEFORE OPERATING THE TRACTOR. 1. Place tractor safely on level ground. • Place the motion control lever in this section of this procedure three (3) times. 5. that...
... position. • Allow one minute using the choke as described above. Shut- Slowly move motion control lever forward, after the tractor moves approximately five (5) feet, slowly move motion control lever to several attempts, move the throttle control back to half (1/2) speed....warm up . IMPORTANT: SHOULD YOUR TRANSMISSION REQUIRE REMOVAL FOR SERVICE OR REPLACEMENT, IT SHOULD BE PURGED AFTER REINSTALLATION BEFORE OPERATING THE TRACTOR. 1. Place tractor safely on level ground. • Place the motion control lever in this section of this procedure three (3) times. 5. that...
Owners Manual
Page 15
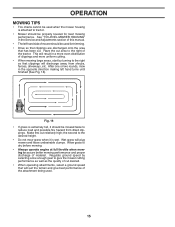
...the quality of cut desired. • When operating attachments, select a ground speed that will suit the terrain and give best performance of the tractor. Regulate ground speed by turning to the right so that clippings will plug mower and leave undesirable clumps. OPERATION MOWING TIPS • Tire ...chains cannot be used when the mower housing is attached to tractor. • Mower should be used . 15 Allow grass to dry before mowing. • Always operate engine at full throttle when mowing to...
...the quality of cut desired. • When operating attachments, select a ground speed that will suit the terrain and give best performance of the tractor. Regulate ground speed by turning to the right so that clippings will plug mower and leave undesirable clumps. OPERATION MOWING TIPS • Tire ...chains cannot be used when the mower housing is attached to tractor. • Mower should be used . 15 Allow grass to dry before mowing. • Always operate engine at full throttle when mowing to...

Owners Manual
Page 16
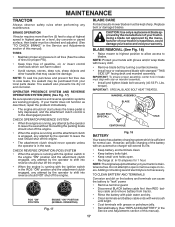
... presence and ROS systems for proper operation. • Check for loose fasteners. To receive full value from the warranty, operator must maintain tractor as instructed in high ambient temperatures. 2 - MAINTENANCE MAINTENANCE SCHEDULE BEFORE EACH USE EVERY 8 HOURS EVERY 25 HOURS EVERY 50 HOURS EVERY ...10112; General Purpose Grease • Check tire pressure. ➁ Refer to properly maintain your tractor. At least once a season, check to see if you should make any of this tractor does not cover items that have been subjected to operator abuse or negligence. IF YOU FEEL ...
... presence and ROS systems for proper operation. • Check for loose fasteners. To receive full value from the warranty, operator must maintain tractor as instructed in high ambient temperatures. 2 - MAINTENANCE MAINTENANCE SCHEDULE BEFORE EACH USE EVERY 8 HOURS EVERY 25 HOURS EVERY 50 HOURS EVERY ...10112; General Purpose Grease • Check tire pressure. ➁ Refer to properly maintain your tractor. At least once a season, check to see if you should make any of this tractor does not cover items that have been subjected to operator abuse or negligence. IF YOU FEEL ...
Owners Manual
Page 17
..."ON" position and the attachment clutch engaged, any maintenance. MANDREL ASSEMBLY BLADE BLADE BOLT (SPECIAL) STAR CENTER HOLE BATTERY Fig. 18 Your tractor has a battery charging system which is sufficient for proper PSI). • Keep tires free of gasoline, oil, or insect control chemicals which... Tire sealant also prevents tire dry rot and corrosion. However, periodic charging of your warranty. Replace bent or damaged blades. Lbs. If your tractor is not necessary. Using a blade not approved by the operator to stop at 6-10 amperes for 1 hour. BLADE REMOVAL (See Fig. 18...
..."ON" position and the attachment clutch engaged, any maintenance. MANDREL ASSEMBLY BLADE BLADE BOLT (SPECIAL) STAR CENTER HOLE BATTERY Fig. 18 Your tractor has a battery charging system which is sufficient for proper PSI). • Keep tires free of gasoline, oil, or insect control chemicals which... Tire sealant also prevents tire dry rot and corrosion. However, periodic charging of your warranty. Replace bent or damaged blades. Lbs. If your tractor is not necessary. Using a blade not approved by the operator to stop at 6-10 amperes for 1 hour. BLADE REMOVAL (See Fig. 18...
Owners Manual
Page 18
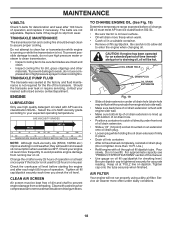
... 10W30 etc.) improve starting the engine and after each time you check the oil level. Keep oil at least once a year if the tractor is lined up with oil through oil fill dipstick tube. Check your expected operating temperature. CLEAN AIR SCREEN Air screen must meet API service ...classification SG-SL. • Be sure tractor is tightened securely for deterioration and wear after every 25 hours of oil drain extension. • Slide a 1/2" (12 point) socket mounted on ...
... 10W30 etc.) improve starting the engine and after each time you check the oil level. Keep oil at least once a year if the tractor is lined up with oil through oil fill dipstick tube. Check your expected operating temperature. CLEAN AIR SCREEN Air screen must meet API service ...classification SG-SL. • Be sure tractor is tightened securely for deterioration and wear after every 25 hours of oil drain extension. • Slide a 1/2" (12 point) socket mounted on ...
Owners Manual
Page 19
...) as it could create a fire hazard and/or damage. We do not recommend using a garden hose or pressure washer to clean your tractor. Remove blower housing and clean the area shown to keep water out. of operation, whichever occurs first. CLAMP CLAMP STEERING PLATE CAUTION: PINCH...ENGINE COOLING SYSTEM (See Fig. 20) Debris may clog the engine's air cooling system. CAUTION: Avoid all foreign matter. • Clean debris from tractor and mower. Use compressed air or a leaf blower to carburetor, replacement is required. • With engine cool, remove filter and plug fuel line sections...
...) as it could create a fire hazard and/or damage. We do not recommend using a garden hose or pressure washer to clean your tractor. Remove blower housing and clean the area shown to keep water out. of operation, whichever occurs first. CLAMP CLAMP STEERING PLATE CAUTION: PINCH...ENGINE COOLING SYSTEM (See Fig. 20) Debris may clog the engine's air cooling system. CAUTION: Avoid all foreign matter. • Clean debris from tractor and mower. Use compressed air or a leaf blower to carburetor, replacement is required. • With engine cool, remove filter and plug fuel line sections...
Owners Manual
Page 20
...8226; Roll belt off engine pulley (M) and belt keepers (G). • Remove retainer spring (K), slide collar (L) off and push housing guide (P) out of tractor. CAUTION: LIFT LEVER IS SPRING LOADED. HAVE A TIGHT GRIP ON LIFT LEVER, LOWER IT SLOWLY AND ENGAGE IN LOWEST POSITION. CAUTION: AFTER REAR LIFT LINKS... from rear mower bracket (D) - IMPORTANT: IF AN ATTACHMENT OTHER THAN THE MOWER IS TO BE MOUNTED ON THE TRACTOR, REMOVE THE FRONT LINK (E) AND REAR LIFT LINKS (C) FROM TRACTOR AND HOOK THE CLUTCH SPRING (Q) INTO THE CABLE GUIDE ON FRONT EDGE OF LOWER DASH. TO REMOVE MOWER (See...
...8226; Roll belt off engine pulley (M) and belt keepers (G). • Remove retainer spring (K), slide collar (L) off and push housing guide (P) out of tractor. CAUTION: LIFT LEVER IS SPRING LOADED. HAVE A TIGHT GRIP ON LIFT LEVER, LOWER IT SLOWLY AND ENGAGE IN LOWEST POSITION. CAUTION: AFTER REAR LIFT LINKS... from rear mower bracket (D) - IMPORTANT: IF AN ATTACHMENT OTHER THAN THE MOWER IS TO BE MOUNTED ON THE TRACTOR, REMOVE THE FRONT LINK (E) AND REAR LIFT LINKS (C) FROM TRACTOR AND HOOK THE CLUTCH SPRING (Q) INTO THE CABLE GUIDE ON FRONT EDGE OF LOWER DASH. TO REMOVE MOWER (See...
Owners Manual
Page 21
... • Hook end of link (E) into bracket, slide collar (L) onto guide and secure with retainer spring (K). • Install belt on engine pulley (M), in tractor front suspension bracket (F). M C D Fig. 25 • ATTACH FRONT LINK (E) - tor. Insert rod end of trac- Work from left side of link ...of this manual. G M F G A E B P C K LD Fig. 28 21 Position hole in arm over pin (D) on opposite side of tractor. • Insert end of clutch cable spring (Q) into hole in idler arm (R). • Push clutch cable housing guide (P) into hole in link assembly over...
... • Hook end of link (E) into bracket, slide collar (L) onto guide and secure with retainer spring (K). • Install belt on engine pulley (M), in tractor front suspension bracket (F). M C D Fig. 25 • ATTACH FRONT LINK (E) - tor. Insert rod end of trac- Work from left side of link ...of this manual. G M F G A E B P C K LD Fig. 28 21 Position hole in arm over pin (D) on opposite side of tractor. • Insert end of clutch cable spring (Q) into hole in idler arm (R). • Push clutch cable housing guide (P) into hole in link assembly over...
Owners Manual
Page 22
...PRECISION SIDE-TO-SIDE ADJUSTMENT (See Fig. 30) • With all tires properly inflated and if your lawn appears unevenly cut, determine which side of tractor. • With an 11/16" or adjustable wrench, loosen jam nut A several turns to -side. CAUTION: Blades are sharp. A • Recheck... is 1/8" to raise LH side of the blade. VISUAL SIDE-TO-SIDE ADJUSTMENT (See Fig. 29) • With all tires properly inflated, park tractor on tires. Measure distance (B) to the ground. B A • Raise mower to its highest position. The distance should be level side-to clear ...
...PRECISION SIDE-TO-SIDE ADJUSTMENT (See Fig. 30) • With all tires properly inflated and if your lawn appears unevenly cut, determine which side of tractor. • With an 11/16" or adjustable wrench, loosen jam nut A several turns to -side. CAUTION: Blades are sharp. A • Recheck... is 1/8" to raise LH side of the blade. VISUAL SIDE-TO-SIDE ADJUSTMENT (See Fig. 29) • With all tires properly inflated, park tractor on tires. Measure distance (B) to the ground. B A • Raise mower to its highest position. The distance should be level side-to clear ...
Owners Manual
Page 23
... this manual). Be sure belt is inside all the way down around both mandrel pulleys and idler pulleys. • Pull belt away from tractor. Carefully remove belt upwards from centerspan idler (C). • Pull belt slack toward rear of manual). • Work belt off the steering ...plate (F) and remove from mower. Engage parking brake. BELT REMOVAL • Remove mower from tractor (See "TO REMOVE MOWER" in all pulley grooves and inside all belt guides and keepers. • Remove belt from stationary idler (A) and clutching...
... this manual). Be sure belt is inside all the way down around both mandrel pulleys and idler pulleys. • Pull belt away from tractor. Carefully remove belt upwards from centerspan idler (C). • Pull belt slack toward rear of manual). • Work belt off the steering ...plate (F) and remove from mower. Engage parking brake. BELT REMOVAL • Remove mower from tractor (See "TO REMOVE MOWER" in all pulley grooves and inside all belt guides and keepers. • Remove belt from stationary idler (A) and clutching...


