
Manual
Page 1
Owner's Manual Operating and Servicing Instructions Español - página E1 TM Carpet Cleaner www.hoover.com IMPORTANT: READ CAREFULLY BEFORE ASSEMBLY AND USE. THIS PRODUCT IS INTENDED FOR HOUSEHOLD USE ONLY. IF USED COMMERCIALLY WARRANTY IS VOID. ©2010 Techtronic Floor Care Technology Limited. For assistance, please call Customer Service at 1-800-944-9200 Mon-Fri 8am-7pm EST before returning this product to the store. All rights reserved. #960009654 ID101394-R1 Questions or concerns?
Owner's Manual Operating and Servicing Instructions Español - página E1 TM Carpet Cleaner www.hoover.com IMPORTANT: READ CAREFULLY BEFORE ASSEMBLY AND USE. THIS PRODUCT IS INTENDED FOR HOUSEHOLD USE ONLY. IF USED COMMERCIALLY WARRANTY IS VOID. ©2010 Techtronic Floor Care Technology Limited. For assistance, please call Customer Service at 1-800-944-9200 Mon-Fri 8am-7pm EST before returning this product to the store. All rights reserved. #960009654 ID101394-R1 Questions or concerns?

Manual
Page 2
...product to register your HOOVER® product. Be sure to the store. 2 Manufacturing code (Label located under cleaner) Contents Important Safeguards 3 Assembling Cleaner 5 Carton contents 5 How To Use...7 Cleaner Description 7 Preparing the Carpet 8 Remove and Replace Clean Water Solution Tank 8 Carpet Cleaning 9 Above Floor ... Verification of date of purchase may be required for choosing a HOOVER® product. Please do not return this owner's manual. Thank you for warranty service of your product online at hoover.com. Mon- Fri 8am- 7pm EST. Please enter the ...
...product to register your HOOVER® product. Be sure to the store. 2 Manufacturing code (Label located under cleaner) Contents Important Safeguards 3 Assembling Cleaner 5 Carton contents 5 How To Use...7 Cleaner Description 7 Preparing the Carpet 8 Remove and Replace Clean Water Solution Tank 8 Carpet Cleaning 9 Above Floor ... Verification of date of purchase may be required for choosing a HOOVER® product. Please do not return this owner's manual. Thank you for warranty service of your product online at hoover.com. Mon- Fri 8am- 7pm EST. Please enter the ...

Manual
Page 3
...parts of body away from outlet when not in this manual. To unplug, grasp the plug, not the cord. • Do not handle plug or appliance with any object into water, return it should always be present. • Keep the carpet cleaner on stairs. • Do not use to a service... wet hands. • Do not put any opening blocked; Do not run appliance over cord. keep brush rotating smoothly. • WARNING: Fully assemble carpet cleaner before servicing. • Do not use cord as a toy. Unplug from openings and moving parts. • Do not pick up flammable or combustible ...
...parts of body away from outlet when not in this manual. To unplug, grasp the plug, not the cord. • Do not handle plug or appliance with any object into water, return it should always be present. • Keep the carpet cleaner on stairs. • Do not use to a service... wet hands. • Do not put any opening blocked; Do not run appliance over cord. keep brush rotating smoothly. • WARNING: Fully assemble carpet cleaner before servicing. • Do not use cord as a toy. Unplug from openings and moving parts. • Do not pick up flammable or combustible ...

Manual
Page 12
... using other hand to remove the two screws. Secure by inserting end furthest from moving parts unplug cleaner before changing belt. 3.1 Belt: What to Remove 3.1 Flip cleaner on motor shaft, then slip brushroll through belt. Arrows show location of injury from brushroll first. ...3.7 With belt in place, pull and slide brushroll into position. hoover.com to Remove and Replace ! Place belt in the correct orientation (Diagram A). 3.8 Replace belt cover by replacing the two screws. IMPORTANT Rotate brushroll manually to Replace 3.5 Remove belt. How to Buy For Belt Style 7...
... using other hand to remove the two screws. Secure by inserting end furthest from moving parts unplug cleaner before changing belt. 3.1 Belt: What to Remove 3.1 Flip cleaner on motor shaft, then slip brushroll through belt. Arrows show location of injury from brushroll first. ...3.7 With belt in place, pull and slide brushroll into position. hoover.com to Remove and Replace ! Place belt in the correct orientation (Diagram A). 3.8 Replace belt cover by replacing the two screws. IMPORTANT Rotate brushroll manually to Replace 3.5 Remove belt. How to Buy For Belt Style 7...
Manual
Page 16
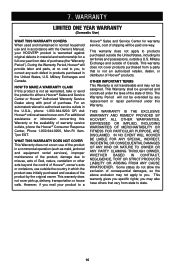
... not as maid, janitorial and equipment rental services), improper maintenance of the product, damage due to either a Hoover® Sales and Service Center or Hoover® Authorized Warranty Service Dealer along with the Owner's Manual, your product to correct any replacement or repair performed under the laws of the state of the product...
... not as maid, janitorial and equipment rental services), improper maintenance of the product, damage due to either a Hoover® Sales and Service Center or Hoover® Authorized Warranty Service Dealer along with the Owner's Manual, your product to correct any replacement or repair performed under the laws of the state of the product...


