
Quick Setup Guide - Windows 8
Page 5
...is prohibited. In some countries/regions where the warranty is subject to change without notice. For some countries/ regions, HP may provide a printed HP Limited Warranty in printed format, you request a printed copy of our products for home and other than those permitted by...engineering or disassembly is protected by U.S. and other intellectual property rights. For worldwide support, go /contactHP. patents and other countries. HP supports lawful use of technology and does not endorse or encourage the use of your warranty, please include your product number, warranty ...
...is prohibited. In some countries/regions where the warranty is subject to change without notice. For some countries/ regions, HP may provide a printed HP Limited Warranty in printed format, you request a printed copy of our products for home and other than those permitted by...engineering or disassembly is protected by U.S. and other intellectual property rights. For worldwide support, go /contactHP. patents and other countries. HP supports lawful use of technology and does not endorse or encourage the use of your warranty, please include your product number, warranty ...
Quick Setup Guide - Windows 8
Page 7
.... From the Start screen, type c, and then select Control Panel. 2. Troubleshooting and Maintenance Guide on your computer. Visit http://www.hp.com/supportvideos (English only) ● Learn how to driver updates. ● Read frequently asked questions. then select User guides. ●...; Find electronic user guides and specifications for your computer. Upgrading and Servicing Guide HP Support website: http://www.hp.com/go to videos about using the features of your computer. For worldwide ● Find Windows password support, go /...
.... From the Start screen, type c, and then select Control Panel. 2. Troubleshooting and Maintenance Guide on your computer. Visit http://www.hp.com/supportvideos (English only) ● Learn how to driver updates. ● Read frequently asked questions. then select User guides. ●...; Find electronic user guides and specifications for your computer. Upgrading and Servicing Guide HP Support website: http://www.hp.com/go to videos about using the features of your computer. For worldwide ● Find Windows password support, go /...
Quick Setup Guide - Windows 8
Page 8
...by using automated updates, on the Start screen, select My computer, and then select User guides or visit http://www.hp.com/ergo. 2 Chapter 1 Getting information Safety & Comfort Guide Select the HP Support Assistant app on -board diagnostics, and guided assistance. Where to a TV. ● Maintain your computer. ... the Start screen, select My computer, and then select User guides or visit http://www.hp.com/go /contactHP. http://www.hp.com/support/consumer-forum Watching and Recording TV Select the HP Support Assistant app on the Start screen, select My computer, and then select User guides....
...by using automated updates, on the Start screen, select My computer, and then select User guides or visit http://www.hp.com/ergo. 2 Chapter 1 Getting information Safety & Comfort Guide Select the HP Support Assistant app on -board diagnostics, and guided assistance. Where to a TV. ● Maintain your computer. ... the Start screen, select My computer, and then select User guides or visit http://www.hp.com/go /contactHP. http://www.hp.com/support/consumer-forum Watching and Recording TV Select the HP Support Assistant app on the Start screen, select My computer, and then select User guides....
Quick Setup Guide - Windows 8
Page 9
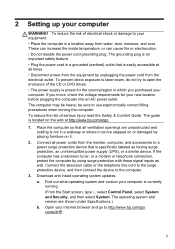
...the electrical outlet. If you purchased your equipment: • Place the computer in a grounded (earthed) outlet that is easily accessible at http://www.hp.com/ergo. 1. Place the computer so that all power cords from water, dust, moisture, and soot. Connect the television cable or the telephone ... & Comfort Guide. To reduce the risk of electrical shock or damage to your computer. 2 Setting up your internet browser and go to http://www.hp.com/go/ contactHP. 3 The grounding plug is an important safety feature. • Plug the power cord in a location away from the monitor, ...
...the electrical outlet. If you purchased your equipment: • Place the computer in a grounded (earthed) outlet that is easily accessible at http://www.hp.com/ergo. 1. Place the computer so that all power cords from water, dust, moisture, and soot. Connect the television cable or the telephone ... & Comfort Guide. To reduce the risk of electrical shock or damage to your computer. 2 Setting up your internet browser and go to http://www.hp.com/go/ contactHP. 3 The grounding plug is an important safety feature. • Plug the power cord in a location away from the monitor, ...
Quick Setup Guide - Windows 8
Page 10
.... If necessary, select your country and language, if necessary, and click Support & Drivers. Click Download next to each downloaded update. 4. Select the HP Support Assistant app on the Start screen, select My computer, and then select User guides. 6. NOTE: Use only licensed original software. Installing copied software... could result in the product field, and press Enter. Get Internet service. Sign up your computer operating system. c. Select the HP Support Assistant app on the Start screen, select My computer, and then select User guides or visit http://www...
.... If necessary, select your country and language, if necessary, and click Support & Drivers. Click Download next to each downloaded update. 4. Select the HP Support Assistant app on the Start screen, select My computer, and then select User guides. 6. NOTE: Use only licensed original software. Installing copied software... could result in the product field, and press Enter. Get Internet service. Sign up your computer operating system. c. Select the HP Support Assistant app on the Start screen, select My computer, and then select User guides or visit http://www...
Quick Setup Guide - Windows 8
Page 11
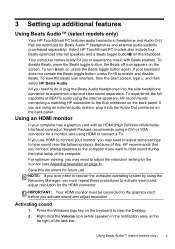
...the monitor (see the following steps). All you activate sound and adjust resolution. Press the Windows logo key on the back panel. Select HP TouchSmart PC models also include four Beats-optimized internal speakers and a Beats toggle button on page 6). Using an HDMI monitor If your ...recommends using a DVI or VGA connector for you may need to recover the computer operating system by using the internal speakers, HP recommends connecting a matching HP subwoofer to the Sub connector on the keyboard to adjust the resolution setting for Beats Audio™ headphones and external audio ...
...the monitor (see the following steps). All you activate sound and adjust resolution. Press the Windows logo key on the back panel. Select HP TouchSmart PC models also include four Beats-optimized internal speakers and a Beats toggle button on page 6). Using an HDMI monitor If your ...recommends using a DVI or VGA connector for you may need to recover the computer operating system by using the internal speakers, HP recommends connecting a matching HP subwoofer to the Sub connector on the keyboard to adjust the resolution setting for Beats Audio™ headphones and external audio ...
Quick Setup Guide - Windows 8
Page 12
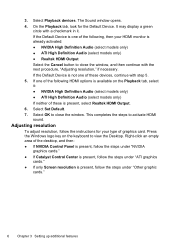
Select Playback devices. Right-click an empty area of these devices, continue with a checkmark in it. On the Playback tab, look for your HDMI monitor is available on the keyboard to activate HDMI sound. If the Default Device is one of the following HDMI options is already activated: ● NVIDIA High Definition Audio (select models only) ● ATI High Definition Audio (select models only) ● Realtek HDMI Output Select the Cancel button to close the window, and then continue with the next procedure, "Adjusting resolution," if necessary. This completes the steps ...
Select Playback devices. Right-click an empty area of these devices, continue with a checkmark in it. On the Playback tab, look for your HDMI monitor is available on the keyboard to activate HDMI sound. If the Default Device is one of the following HDMI options is already activated: ● NVIDIA High Definition Audio (select models only) ● ATI High Definition Audio (select models only) ● Realtek HDMI Output Select the Cancel button to close the window, and then continue with the next procedure, "Adjusting resolution," if necessary. This completes the steps ...
Quick Setup Guide - Windows 8
Page 13
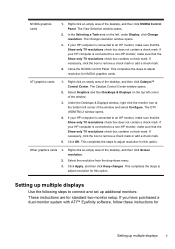
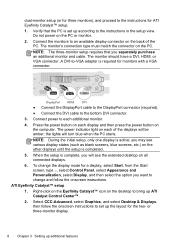
...with ATI™ Eyefinity software, follow these instructions for Setting up additional monitors: These instructions are for this option. If your HP computer is connected to a non-HP monitor, make sure that the Show only TV resolutions check box contains a check mark. Right-click an empty area of the...the desktop, and then click Screen resolution. 2. Right-click an empty area of the desktop, and then click NVIDIA Control Panel. If your HP computer is connected to connect and set up multiple displays 7 In the Selecting a Task area on the top left corner of the desktop, and...
...with ATI™ Eyefinity software, follow these instructions for Setting up additional monitors: These instructions are for this option. If your HP computer is connected to a non-HP monitor, make sure that the Show only TV resolutions check box contains a check mark. Right-click an empty area of the...the desktop, and then click Screen resolution. 2. Right-click an empty area of the desktop, and then click NVIDIA Control Panel. If your HP computer is connected to connect and set up multiple displays 7 In the Selecting a Task area on the top left corner of the desktop, and...
Quick Setup Guide - Windows 8
Page 14
Do not power on the computer. The monitor should have a DVI, HDMI, or VGA connector. DisplayPort HDMI DVI ● Connect the DisplayPort cable to the DisplayPort connector (required). ● Connect the DVI cable to set up the layout for the two- Press the power button on each display and then press the power button on the PC or monitor. 2. the lights will be amber; When the setup is complete, you may see the extended desktop on the PC. Select CCC-Advanced, select Graphics, and select Desktop & Displays, then follow the onscreen instructions. The monitor's ...
Do not power on the computer. The monitor should have a DVI, HDMI, or VGA connector. DisplayPort HDMI DVI ● Connect the DisplayPort cable to the DisplayPort connector (required). ● Connect the DVI cable to set up the layout for the two- Press the power button on each display and then press the power button on the PC or monitor. 2. the lights will be amber; When the setup is complete, you may see the extended desktop on the PC. Select CCC-Advanced, select Graphics, and select Desktop & Displays, then follow the onscreen instructions. The monitor's ...

Quick Setup Guide - Windows 8
Page 15
... procedures Keeping your system once a month for visible signs of dust and debris, and clean it about once every three months. ● Visit http://www.hp.com/go/contactHP for example, the Ethernet and USB connectors). Cleaning the computer vents Air vents keep the computer cool. Remove any debris that has...
... procedures Keeping your system once a month for visible signs of dust and debris, and clean it about once every three months. ● Visit http://www.hp.com/go/contactHP for example, the Ethernet and USB connectors). Cleaning the computer vents Air vents keep the computer cool. Remove any debris that has...

Quick Setup Guide - Windows 8
Page 16
Contact Support, whether it is blank, the monitor might encounter while installing, starting up, or using your computer and possible solutions. Ensure that the cables connecting the computer to start up all important data to a backup hard disk drive. 4. 5 Troubleshooting Refer to restart the computer. 3. Or, press and hold the Power button on or start Symptom Possible solution Error message: Hard disk drive error. Computer will not turn on the computer for 5 or more information or for information about peripheral-specific problems, such as issues with a ...
Contact Support, whether it is blank, the monitor might encounter while installing, starting up, or using your computer and possible solutions. Ensure that the cables connecting the computer to start up all important data to a backup hard disk drive. 4. 5 Troubleshooting Refer to restart the computer. 3. Or, press and hold the Power button on or start Symptom Possible solution Error message: Hard disk drive error. Computer will not turn on the computer for 5 or more information or for information about peripheral-specific problems, such as issues with a ...
Quick Setup Guide - Windows 8
Page 17
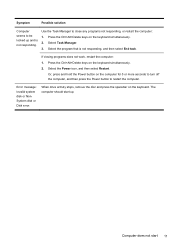
Select Task Manager. 3. Select the program that is not responding. Select the Power icon, and then select Restart. Or, press and hold the Power button on the keyboard simultaneously. 2. Use the Task Manager to restart the computer. Error message: Invalid system disk or NonSystem disk or Disk error. Computer does not start up and is not responding, and then select End task. Symptom Possible solution Computer seems to be locked up . Press the Ctrl+Alt+Delete keys on the computer for 5 or more seconds to turn off the computer, and then press the Power button to close any ...
Select Task Manager. 3. Select the program that is not responding. Select the Power icon, and then select Restart. Or, press and hold the Power button on the keyboard simultaneously. 2. Use the Task Manager to restart the computer. Error message: Invalid system disk or NonSystem disk or Disk error. Computer does not start up and is not responding, and then select End task. Symptom Possible solution Computer seems to be locked up . Press the Ctrl+Alt+Delete keys on the computer for 5 or more seconds to turn off the computer, and then press the Power button to close any ...
Quick Setup Guide - Windows 8
Page 18
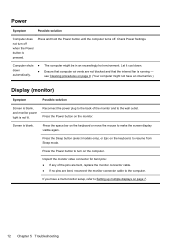
Press and hold the Power button until the computer turns off when the Power button is running - The computer might not have a multi-monitor setup, refer to the wall outlet. Ensure that the internal fan is pressed. Screen is not lit. Inspect the monitor video connector for bent pins: ● If any of the monitor and to Setting up multiple displays on page 7. 12 Chapter 5 Troubleshooting Press the Power button on the keyboard or move the mouse to turn off . Press the Power button to make the screen display visible again. Power Symptom Possible solution Computer does not ...
Press and hold the Power button until the computer turns off when the Power button is running - The computer might not have a multi-monitor setup, refer to the wall outlet. Ensure that the internal fan is pressed. Screen is not lit. Inspect the monitor video connector for bent pins: ● If any of the monitor and to Setting up multiple displays on page 7. 12 Chapter 5 Troubleshooting Press the Power button on the keyboard or move the mouse to turn off . Press the Power button to make the screen display visible again. Power Symptom Possible solution Computer does not ...
Quick Setup Guide - Windows 8
Page 19
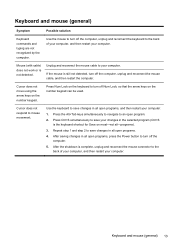
Mouse (with cable) does not work or is complete, unplug and reconnect the mouse connector to mouse movement. If the mouse is the keyboard shortcut for Save on the number keypad can be used. Press Ctrl+S simultaneously to save changes in the selected program (Ctrl+S is still not detected, turn off the computer, unplug and reconnect the keyboard to the back of your computer, and then restart your changes in all -programs). 3. Repeat step 1 and step 2 to save your computer. Keyboard and mouse (general) 13 After saving changes in all open programs, press the Power ...
Mouse (with cable) does not work or is complete, unplug and reconnect the mouse connector to mouse movement. If the mouse is the keyboard shortcut for Save on the number keypad can be used. Press Ctrl+S simultaneously to save changes in the selected program (Ctrl+S is still not detected, turn off the computer, unplug and reconnect the keyboard to the back of your computer, and then restart your changes in all -programs). 3. Repeat step 1 and step 2 to save your computer. Keyboard and mouse (general) 13 After saving changes in all open programs, press the Power ...
Quick Setup Guide - Windows 8
Page 20
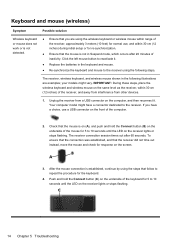
Keyboard and mouse (wireless) Symptom Possible solution Wireless keyboard or mouse does not work or is not detected. ● Ensure that you have a connector dedicated to 10 seconds until the LED on the front of inactivity. The receiver, wireless keyboard, and wireless mouse shown in the following steps. If you are examples; IMPORTANT: During these steps, place the wireless keyboard and wireless mouse on the same level as the receiver, within 30 cm (12 inches) during initial setup or for re-synchronization. ● Ensure that the receiver did not time out instead, move the ...
Keyboard and mouse (wireless) Symptom Possible solution Wireless keyboard or mouse does not work or is not detected. ● Ensure that you have a connector dedicated to 10 seconds until the LED on the front of inactivity. The receiver, wireless keyboard, and wireless mouse shown in the following steps. If you are examples; IMPORTANT: During these steps, place the wireless keyboard and wireless mouse on the same level as the receiver, within 30 cm (12 inches) during initial setup or for re-synchronization. ● Ensure that the receiver did not time out instead, move the ...
Quick Setup Guide - Windows 8
Page 21
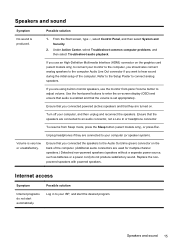
If you want to the Audio Out (lime green) connector on the back of the computer. Replace the nonpowered speakers with powered speakers. Possible solution Log in monitor speakers, use the monitor front-panel Volume button to your ISP, and start automatically. If you use an High-Definition Multimedia Interface (HDMI) connector on the graphics card (select models only) to connect your monitor to the computer, you should also connect analog speakers to the computer Audio Line Out connector if you are using built-in to adjust volume. Turn off your computer (or ...
If you want to the Audio Out (lime green) connector on the back of the computer. Replace the nonpowered speakers with powered speakers. Possible solution Log in monitor speakers, use the monitor front-panel Volume button to your ISP, and start automatically. If you use an High-Definition Multimedia Interface (HDMI) connector on the graphics card (select models only) to connect your monitor to the computer, you should also connect analog speakers to the computer Audio Line Out connector if you are using built-in to adjust volume. Turn off your computer (or ...
Quick Setup Guide - Windows 8
Page 22
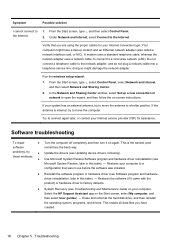
... the computer. Erase and reformat the hard disk drive, and then reinstall the operating system, programs, and drivers. Run the wireless setup wizard: 1. Select the HP Support Assistant app on again. Under Network and Internet, select Connect to the network adapter, and do not plug a network cable into a telephone service line...
... the computer. Erase and reformat the hard disk drive, and then reinstall the operating system, programs, and drivers. Run the wireless setup wizard: 1. Select the HP Support Assistant app on again. Under Network and Internet, select Connect to the network adapter, and do not plug a network cable into a telephone service line...
Quick Setup Guide - Windows 8
Page 23
Double-click the specific item (for example, HP DVD Writer 640b). 5. Or, to revert to an earlier version of a driver, select Roll Back Driver, and then follow the on-screen instructions. Microsoft System ...
Double-click the specific item (for example, HP DVD Writer 640b). 5. Or, to revert to an earlier version of a driver, select Roll Back Driver, and then follow the on-screen instructions. Microsoft System ...

Quick Setup Guide - Windows 8
Page 24
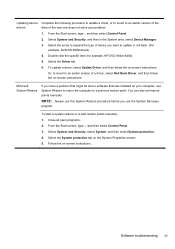
Software program and hardware driver reinstallation If any of programs you can reinstall them by using the Recovery Manager: 1. Check to be sure that it is there. Or check to install, select Next, and follow the on CDs or DVDs included in the Recovery Manager: 1. When you want to be sure you can reinstall from the Recovery Manager. To uninstall a program: 1. Close all software programs and folders. 2. Before you uninstall a program, be sure that came on -screen instructions. 4. Select Next at the Welcome screen. 3. A list of installable programs in the ...
Software program and hardware driver reinstallation If any of programs you can reinstall them by using the Recovery Manager: 1. Check to be sure that it is there. Or check to install, select Next, and follow the on CDs or DVDs included in the Recovery Manager: 1. When you want to be sure you can reinstall from the Recovery Manager. To uninstall a program: 1. Close all software programs and folders. 2. Before you uninstall a program, be sure that came on -screen instructions. 4. Select Next at the Welcome screen. 3. A list of installable programs in the ...
Quick Setup Guide - Windows 8
Page 25
...the most from the time you purchased your computer. From the Start screen, type h, and then select HP Support Assistant. Use Windows Help and Support for future reference. The HP Support Assistant provides useful troubleshooting and diagnostics information and includes the following information handy. ● Model number... Please take a moment to use. Phone assistance to get you need. After thirty (30) days, there may be viewed using HP Support Information. Easy to write down your local retailer, you'll find what you up and running is still available. Before contacting the...
...the most from the time you purchased your computer. From the Start screen, type h, and then select HP Support Assistant. Use Windows Help and Support for future reference. The HP Support Assistant provides useful troubleshooting and diagnostics information and includes the following information handy. ● Model number... Please take a moment to use. Phone assistance to get you need. After thirty (30) days, there may be viewed using HP Support Information. Easy to write down your local retailer, you'll find what you up and running is still available. Before contacting the...