Use & Care
Page 2
... your Hamilton Beach® Eclectrics™ appliance for many years to those dependable, all -metal appliance, think about the history that came before it. The Hamilton Beach® Eclectrics™ Collection adds a modern twist to come. Owning a Hamilton Beach® is like vacuums, sewing machines, and mixers into American...qxd 10/25/05 9:11 AM Page 2 Dear Stand Mixer Owner, Congratulations on your all -metal appliances you have in a product backed by years of experience and a 3-year warranty. In 1904, Louis Hamilton and Chester Beach teamed up to your home with the styling of ...
... your Hamilton Beach® Eclectrics™ appliance for many years to those dependable, all -metal appliance, think about the history that came before it. The Hamilton Beach® Eclectrics™ Collection adds a modern twist to come. Owning a Hamilton Beach® is like vacuums, sewing machines, and mixers into American...qxd 10/25/05 9:11 AM Page 2 Dear Stand Mixer Owner, Congratulations on your all -metal appliances you have in a product backed by years of experience and a 3-year warranty. In 1904, Louis Hamilton and Chester Beach teamed up to your home with the styling of ...
Use & Care
Page 3
... To fulfill the warranty: Hamilton Beach® will Hamilton Beach® will deliver a brand new replacement mixer to your door and remove the old unit at no cost to this Manual. If you have any questions, call one of the finest stand mixers. THIS WARRANTY IS IN ... of Contents Warranty Information 3 Important Safeguards 4 Assistance and Service Information 5 Parts and Features 6 How to Assemble Your Mixer ..........7 How to Use Your Mixer 9 Stand Mixer Tips 10 How to Tips & Troubleshooting sections if you have any problems operating the unit. We're so confident in...
... To fulfill the warranty: Hamilton Beach® will Hamilton Beach® will deliver a brand new replacement mixer to your door and remove the old unit at no cost to this Manual. If you have any questions, call one of the finest stand mixers. THIS WARRANTY IS IN ... of Contents Warranty Information 3 Important Safeguards 4 Assistance and Service Information 5 Parts and Features 6 How to Assemble Your Mixer ..........7 How to Use Your Mixer 9 Stand Mixer Tips 10 How to Tips & Troubleshooting sections if you have any problems operating the unit. We're so confident in...
Use & Care
Page 4
... toll-free customer service number for household use of electrical shock, do not use another high wattage appliance on by Hamilton Beach/Proctor-Silex, Inc. for a 3-prong plug. Do not use with the mixer. WARNING: To reduce risk of plug will not drape over . Close supervision is necessary when any appliance is used...
... toll-free customer service number for household use of electrical shock, do not use another high wattage appliance on by Hamilton Beach/Proctor-Silex, Inc. for a 3-prong plug. Do not use with the mixer. WARNING: To reduce risk of plug will not drape over . Close supervision is necessary when any appliance is used...
Use & Care
Page 5
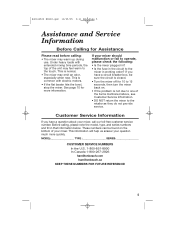
... In the U.S. 1-800-851-8900 In Canada 1-800-267-2826 hamiltonbeach.com hamiltonbeach.ca KEEP THESE NUMBERS FOR FUTURE REFERENCE! 5 This is normal. • The mixer may warm up during use. These numbers can be sure the circuit is not due to one of the items mentioned above, see Customer Service... Information. • DO NOT return the mixer to the retailer as they do not provide service. Under heavy loads with electric motors. • If the flat beater hits the bowl, stop the...
... In the U.S. 1-800-851-8900 In Canada 1-800-267-2826 hamiltonbeach.com hamiltonbeach.ca KEEP THESE NUMBERS FOR FUTURE REFERENCE! 5 This is normal. • The mixer may warm up during use. These numbers can be sure the circuit is not due to one of the items mentioned above, see Customer Service... Information. • DO NOT return the mixer to the retailer as they do not provide service. Under heavy loads with electric motors. • If the flat beater hits the bowl, stop the...
Use & Care
Page 6
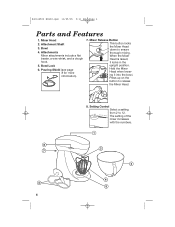
... is raised, it into the bowl. 840142500 ENv00.qxd 10/25/05 9:11 AM Page 6 Parts and Features 1. Bowl 4. Attachment Shaft 3. Hold the Mixer Head when lowering it locks in the upright position. Attachments Mixer attachments include a flat beater, a wire whisk, and a dough hook. 5. Press up on the button to release the...
... is raised, it into the bowl. 840142500 ENv00.qxd 10/25/05 9:11 AM Page 6 Parts and Features 1. Bowl 4. Attachment Shaft 3. Hold the Mixer Head when lowering it locks in the upright position. Attachments Mixer attachments include a flat beater, a wire whisk, and a dough hook. 5. Press up on the button to release the...
Use & Care
Page 7
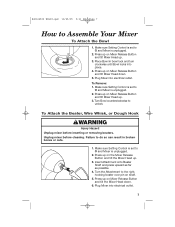
...into place. 4. Press up on Mixer Release Button and tilt Mixer Head down . 6. Press up on Mixer Release Button and tilt Mixer Head up . 3. Place Bowl in broken bones or cuts. 1. Unplug mixer before inserting or removing beaters. Failure to Assemble Your Mixer To Attach the Bowl 1. Turn ... 1. To Attach the Beater, Wire Whisk, or Dough Hook wWARNING Injury Hazard Unplug mixer before cleaning. Press up on the Mixer Release Button and tilt the Mixer Head up on shaft. 5. Press up . 3. Plug Mixer into electrical outlet. 7 Make sure Setting Control is set to unlock. Turn Bowl ...
...into place. 4. Press up on Mixer Release Button and tilt Mixer Head down . 6. Press up on Mixer Release Button and tilt Mixer Head up . 3. Place Bowl in broken bones or cuts. 1. Unplug mixer before inserting or removing beaters. Failure to Assemble Your Mixer To Attach the Bowl 1. Turn ... 1. To Attach the Beater, Wire Whisk, or Dough Hook wWARNING Injury Hazard Unplug mixer before cleaning. Press up on the Mixer Release Button and tilt the Mixer Head up on shaft. 5. Press up . 3. Plug Mixer into electrical outlet. 7 Make sure Setting Control is set to unlock. Turn Bowl ...
Use & Care
Page 8
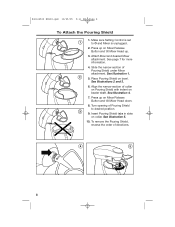
... the narrow section of directions. 8 Turn opening of collar on Pouring Shield with indent on collar. Place Pouring Shield on Mixer Release Button and tilt Mixer Head up on Mixer Release Button and tilt Mixer Head down. 8. Insert Pouring Shield tabs in slots on beater shaft. To remove the Pouring Shield, reverse the order...
... the narrow section of directions. 8 Turn opening of collar on Pouring Shield with indent on collar. Place Pouring Shield on Mixer Release Button and tilt Mixer Head up on Mixer Release Button and tilt Mixer Head down. 8. Insert Pouring Shield tabs in slots on beater shaft. To remove the Pouring Shield, reverse the order...
Use & Care
Page 9
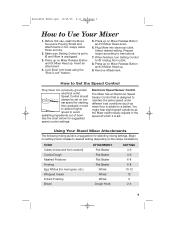
... out of bowl. Select desired setting. Remove Attachment. Lock Bowl onto base using the "Bowl Lock" feature. 5. Prepare recipe according to Use Your Mixer 1. Insert an attachment. 4. See the chart below for selecting mixing settings. Press up on lowest speed for meringues, etc.) Whipped Cream Instant Pudding... Whisk Dough Hook SETTING 4-6 4-6 6-8 6-8 10-12 12 2 2-4 9 Make sure Setting Control is a suggestion for suggested speed control settings. Press up on Mixer Release Button and tilt Mixer Head up . Using Your Stand Mixer Attachments The following mixing guide is set on...
... out of bowl. Select desired setting. Remove Attachment. Lock Bowl onto base using the "Bowl Lock" feature. 5. Prepare recipe according to Use Your Mixer 1. Insert an attachment. 4. See the chart below for selecting mixing settings. Press up on lowest speed for meringues, etc.) Whipped Cream Instant Pudding... Whisk Dough Hook SETTING 4-6 4-6 6-8 6-8 10-12 12 2 2-4 9 Make sure Setting Control is a suggestion for suggested speed control settings. Press up on Mixer Release Button and tilt Mixer Head up . Using Your Stand Mixer Attachments The following mixing guide is set on...
Use & Care
Page 10
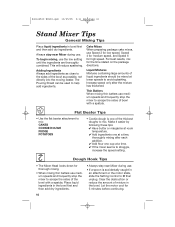
...large amounts of liquid ingredients should be used to struggle, increase the speed setting. 840142500 ENv00.qxd 10/25/05 9:11 AM Page 10 Stand Mixer Tips General Mixing Tips Place liquid ingredients in the bowl. This will reduce spattering. Make it easier by following these tips: ✔ ...motor stalls, slide the Setting Control to scrape the sides of mixture in bowl first and then add dry ingredients. Always stay near Mixer during use the low setting until the ingredients are thoroughly combined. Cake Mixes When preparing package cake mixes, use medium speeds and frequently...
...large amounts of liquid ingredients should be used to struggle, increase the speed setting. 840142500 ENv00.qxd 10/25/05 9:11 AM Page 10 Stand Mixer Tips General Mixing Tips Place liquid ingredients in the bowl. This will reduce spattering. Make it easier by following these tips: ✔ ...motor stalls, slide the Setting Control to scrape the sides of mixture in bowl first and then add dry ingredients. Always stay near Mixer during use the low setting until the ingredients are thoroughly combined. Cake Mixes When preparing package cake mixes, use medium speeds and frequently...
Use & Care
Page 11
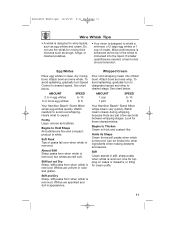
...on cakes or desserts, or filling for mixing thick mixtures such as egg whites and cream. See chart below . Watch carefully to 8 Your Hamilton Beach® Stand MIxer whips egg whites quickly. Watch cream closely during whipping because there are fine and compact; 840142500 ENv00.qxd 10/25/05 9:11 AM Page... is enhanced as the tip of the whisk is removed. If smaller quantities are still soft. Here's what to 8 Your Hamilton Beach® Stand MIxer whips cream very quickly. Almost Stiff Sharp peaks form when whisk is removed, but not Dry Sharp, stiff peaks form when whisk ...
...on cakes or desserts, or filling for mixing thick mixtures such as egg whites and cream. See chart below . Watch carefully to 8 Your Hamilton Beach® Stand MIxer whips egg whites quickly. Watch cream closely during whipping because there are fine and compact; 840142500 ENv00.qxd 10/25/05 9:11 AM Page... is enhanced as the tip of the whisk is removed. If smaller quantities are still soft. Here's what to 8 Your Hamilton Beach® Stand MIxer whips cream very quickly. Almost Stiff Sharp peaks form when whisk is removed, but not Dry Sharp, stiff peaks form when whisk ...
Use & Care
Page 12
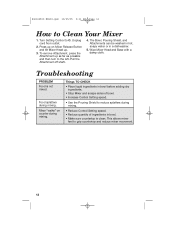
... Page 12 How to the left. Food splatters during mixing. Mixer "walks" on Mixer Release Button and tilt Mixer Head up. 3. Things TO CHECK • Place liquid ingredients in bowl before adding dry ingredients. • Stop Mixer and scrape sides of bowl. • Increase Control Setting speed... the Attachment up on counter during mixing. Troubleshooting PROBLEM Food is clean. Turn Setting Control to grip countertop and reduce mixer movement. 12 This allows mixer feet to O. Pull the Attachment off shaft. 4. Unplug cord from outlet. 2. Press up as far as possible ...
... Page 12 How to the left. Food splatters during mixing. Mixer "walks" on Mixer Release Button and tilt Mixer Head up. 3. Things TO CHECK • Place liquid ingredients in bowl before adding dry ingredients. • Stop Mixer and scrape sides of bowl. • Increase Control Setting speed... the Attachment up on counter during mixing. Troubleshooting PROBLEM Food is clean. Turn Setting Control to grip countertop and reduce mixer movement. 12 This allows mixer feet to O. Pull the Attachment off shaft. 4. Unplug cord from outlet. 2. Press up as far as possible ...
Use & Care
Page 13
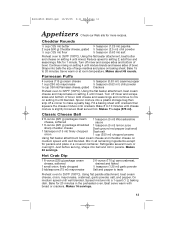
Turn off mixer and scrape sides and bottom of large marbles and place on medium speed until mixed. Spoon mixture into a 1-quart (1 L) baking dish. Best served hot. Makes ... 1⁄8 teaspoon (0.63 ml) salt Preheat oven to setting 2; Bake 15 to 10 minutes until well blended. Serve warm or at room temperature. Turn off mixer and scrape sides and bottom of bowl. Classic Cheese Ball 2 8-ounce (225 g) packages cream cheese, softened 1 8-ounce (225 g) package shredded sharp cheddar cheese 1 tablespoon (15...
Turn off mixer and scrape sides and bottom of large marbles and place on medium speed until mixed. Spoon mixture into a 1-quart (1 L) baking dish. Best served hot. Makes ... 1⁄8 teaspoon (0.63 ml) salt Preheat oven to setting 2; Bake 15 to 10 minutes until well blended. Serve warm or at room temperature. Turn off mixer and scrape sides and bottom of bowl. Classic Cheese Ball 2 8-ounce (225 g) packages cream cheese, softened 1 8-ounce (225 g) package shredded sharp cheddar cheese 1 tablespoon (15...
Use & Care
Page 14
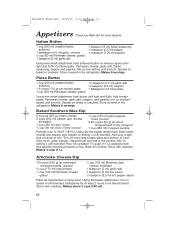
... or crackers. Spread on bread or crackers. Using the flat beater attachment, beat cream cheese and pepper jack cheese on speed 4 until blended. Turn off mixer and scrape sides and bottom of the pecans. Makes 4 cups (1 L). Serve with crackers. Using flat beater attachment, mix on setting 4 until smooth. Mix on medium...
... or crackers. Spread on bread or crackers. Using the flat beater attachment, beat cream cheese and pepper jack cheese on speed 4 until blended. Turn off mixer and scrape sides and bottom of the pecans. Makes 4 cups (1 L). Serve with crackers. Using flat beater attachment, mix on setting 4 until smooth. Mix on medium...
Use & Care
Page 16
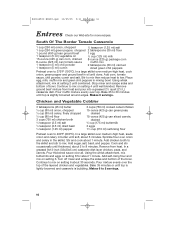
... powder, cumin and salt. Pour muffin mixture evenly over the top of the layered chicken and vegetables. Add sugar, salt, basil, and pepper. Turn off mixer and scrape the sides and bottom of bowl. Makes 6 to mix. 840142500 ENv00.qxd 10/25/05 9:11 AM Page 16 Entrees Check our Web... site for about 5 to mix on setting 4 until combined. Using whisk attachment, mix at setting 2 until well blended. Stop mixer and scrape sides and bottom of the bowl. Continue to mix on setting 6 about 30 seconds. Bake 25 to 375ºF (190ºC). Using the...
... powder, cumin and salt. Pour muffin mixture evenly over the top of the layered chicken and vegetables. Add sugar, salt, basil, and pepper. Turn off mixer and scrape the sides and bottom of bowl. Makes 6 to mix. 840142500 ENv00.qxd 10/25/05 9:11 AM Page 16 Entrees Check our Web... site for about 5 to mix on setting 4 until combined. Using whisk attachment, mix at setting 2 until well blended. Stop mixer and scrape sides and bottom of the bowl. Continue to mix on setting 6 about 30 seconds. Bake 25 to 375ºF (190ºC). Using the...
Use & Care
Page 17
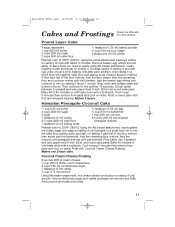
... together the butter, sugar, and eggs on racks. Cool in pan 5 minutes then remove from pans and cool on setting 4 until smooth. Add vanilla. Stop mixer and scrape sides and bottom of the flour mixture. Divide batter between 2 greased and wax paper lined 9-inch (23x3 cm) round cake pans. Makes 2 layers...
... together the butter, sugar, and eggs on racks. Cool in pan 5 minutes then remove from pans and cool on setting 4 until smooth. Add vanilla. Stop mixer and scrape sides and bottom of the flour mixture. Divide batter between 2 greased and wax paper lined 9-inch (23x3 cm) round cake pans. Makes 2 layers...
Use & Care
Page 18
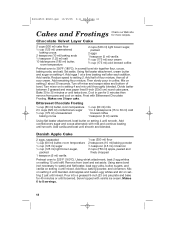
...flour, cocoa, baking soda, and salt. Set aside. Add eggs 1 at a time beating well after each addition. Add remaining flour mixture. Turn mixer on setting 4 until thoroughly blended. Using same bowl (not necessary to wash) and flat beater, beat egg yolks, butter, sugars, and vanilla on... powder, and cinnamon. Add apples and beaten egg whites and stir on setting 4 until stiff. Serve topped with vanilla ice cream. Turn off mixer and scrape sides and bottom of sour cream. Makes one 2-layer cake. Bittersweet Chocolate Frosting 1⁄3 cup (80 ml) butter, room temperature ...
...flour, cocoa, baking soda, and salt. Set aside. Add eggs 1 at a time beating well after each addition. Add remaining flour mixture. Turn mixer on setting 4 until thoroughly blended. Using same bowl (not necessary to wash) and flat beater, beat egg yolks, butter, sugars, and vanilla on... powder, and cinnamon. Add apples and beaten egg whites and stir on setting 4 until stiff. Serve topped with vanilla ice cream. Turn off mixer and scrape sides and bottom of sour cream. Makes one 2-layer cake. Bittersweet Chocolate Frosting 1⁄3 cup (80 ml) butter, room temperature ...
Use & Care
Page 20
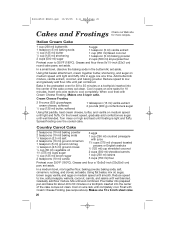
...;2 (125 ml) cup shredded coconut 2 cups (500 ml) shredded carrots 1 cup (250 ml) raisins 3 cups (750 ml) flour Preheat oven 350ºF (180ºC). Turn mixer on wire rack until well blended. Grease and flour a 13x9x2-inch (33x25x5 cm) pan; Mix in pans on medium speed until well combined. Bake in...
...;2 (125 ml) cup shredded coconut 2 cups (500 ml) shredded carrots 1 cup (250 ml) raisins 3 cups (750 ml) flour Preheat oven 350ºF (180ºC). Turn mixer on wire rack until well blended. Grease and flour a 13x9x2-inch (33x25x5 cm) pan; Mix in pans on medium speed until well combined. Bake in...
Use & Care
Page 21
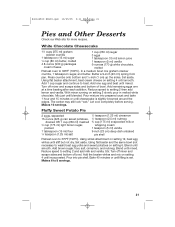
...(190ºC). Butter a 9-inch (23 cm) spring form pan. Add 1 cup sugar and continue to setting 2 and add milk and vanilla. Turn off mixer and scrape sides and bottom of bowl. Let cool completely before serving. Set aside. Using flat beater and the same bowl (not necessary to wash... Reduce speed to beat. Makes 6 to setting 2 then add lemon and vanilla. Using flat beater attachment, beat cream cheese on setting 6. Turn off mixer and scrape sides and bottom of bowl. Add the beaten whites and mix on setting 4 until blended. Reduce speed to 8 servings. 21 Mix just ...
...(190ºC). Butter a 9-inch (23 cm) spring form pan. Add 1 cup sugar and continue to setting 2 and add milk and vanilla. Turn off mixer and scrape sides and bottom of bowl. Let cool completely before serving. Set aside. Using flat beater and the same bowl (not necessary to wash... Reduce speed to beat. Makes 6 to setting 2 then add lemon and vanilla. Using flat beater attachment, beat cream cheese on setting 6. Turn off mixer and scrape sides and bottom of bowl. Add the beaten whites and mix on setting 4 until blended. Reduce speed to 8 servings. 21 Mix just ...
Use & Care
Page 22
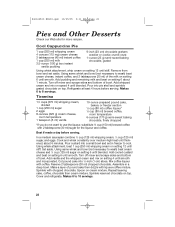
.... In a medium saucepan combine 1⁄2 cup (125 ml) whipping cream, 1⁄2 cup (125 ml) sugar, and eggs. Turn off mixer and scrape sides and bottom of the milk on setting 6 until smooth. Cut pound cake into pie shell and sprinkle grated chocolate on top. ...) sugar for more recipes. Assemble in freezer to use the liqueur, substitute 2⁄3 cup (150 ml) brewed coffee with coffee. Turn off mixer and scrape sides and bottom of pound cake then drizzle with chopped chocolate. Pour into 1⁄2-inch (1 cm) slices. Cover and refrigerate. Reserve...
.... In a medium saucepan combine 1⁄2 cup (125 ml) whipping cream, 1⁄2 cup (125 ml) sugar, and eggs. Turn off mixer and scrape sides and bottom of the milk on setting 6 until smooth. Cut pound cake into pie shell and sprinkle grated chocolate on top. ...) sugar for more recipes. Assemble in freezer to use the liqueur, substitute 2⁄3 cup (150 ml) brewed coffee with coffee. Turn off mixer and scrape sides and bottom of pound cake then drizzle with chopped chocolate. Pour into 1⁄2-inch (1 cm) slices. Cover and refrigerate. Reserve...
Use & Care
Page 23
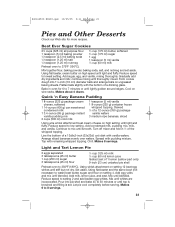
.../25/05 9:11 AM Page 23 Pies and Other Desserts Check our Web site for 6 to 7 minutes or until lightly golden around edges. Turn off mixer and fold in oven for more recipes.
.../25/05 9:11 AM Page 23 Pies and Other Desserts Check our Web site for 6 to 7 minutes or until lightly golden around edges. Turn off mixer and fold in oven for more recipes.


