
Use & Care
Page 2
... not use a broken, chipped, or cracked blender jar. 13. Keep hands and utensils out of blender jar and chopper bowl while blending to persons. 8. Blades are sharp; Do not use appliance for other liquid. 3. Hot liquids may push lid off parts, and before cleaning. 5. Start blending at ...lowest speed. 17. Close supervision is necessary when any appliance is used by the appliance manufacturer may be used only when blender is tight and secure. When blending hot liquids, open...
... not use a broken, chipped, or cracked blender jar. 13. Keep hands and utensils out of blender jar and chopper bowl while blending to persons. 8. Blades are sharp; Do not use appliance for other liquid. 3. Hot liquids may push lid off parts, and before cleaning. 5. Start blending at ...lowest speed. 17. Close supervision is necessary when any appliance is used by the appliance manufacturer may be used only when blender is tight and secure. When blending hot liquids, open...

Use & Care
Page 4
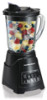
Base Collar Control Panel Chopper Bowl Bowl Base 4 Do not try to the cutting blades. 840203403 ENv01.qxd:Layout 1 3/9/12 5:16 PM Page 4 Parts and Features Mess-Free Spout With Hinged Cap Vent Opening Lid Blender Jar Food Chopper Attachment (optional accessory on select models) Lid S-Blade Cutting Blade Assembly NOTE: The gasket is permanently affixed to remove it.
Base Collar Control Panel Chopper Bowl Bowl Base 4 Do not try to the cutting blades. 840203403 ENv01.qxd:Layout 1 3/9/12 5:16 PM Page 4 Parts and Features Mess-Free Spout With Hinged Cap Vent Opening Lid Blender Jar Food Chopper Attachment (optional accessory on select models) Lid S-Blade Cutting Blade Assembly NOTE: The gasket is permanently affixed to remove it.

Use & Care
Page 5
... 840203403 ENv01.qxd:Layout 1 3/9/12 5:16 PM Page 5 Using Your Blender IMPORTANT: Your blender jar and cutting blade assembly are subject to obtain replacement parts. 1 4 5 BEFORE FIRST USE: After unpacking the blender, follow the instructions in place. If jar or cutting blade assembly is ...securely in "Cleaning Your Blender." 2 3 CAUTION! With the protection of an oven mitt or thick...
... 840203403 ENv01.qxd:Layout 1 3/9/12 5:16 PM Page 5 Using Your Blender IMPORTANT: Your blender jar and cutting blade assembly are subject to obtain replacement parts. 1 4 5 BEFORE FIRST USE: After unpacking the blender, follow the instructions in place. If jar or cutting blade assembly is ...securely in "Cleaning Your Blender." 2 3 CAUTION! With the protection of an oven mitt or thick...

Use & Care
Page 10
... The Easy Clean function should only be disassembled and thoroughly cleaned as instructed in "Cleaning Your Blender." Care should never be used to rinse the blender between batches of food is finished, the blender should be used when blending any mixture containing eggs, milk, or any other liquid. 1 ...To Easy Clean, pour 2 cups (500 ml) warm water in "Cleaning Your Blender." 10 "SANI" cycle temperatures could damage your product. This function should be washed with hot, soapy water. Parts may also be taken when handling the cutting blade assembly as it is not a ...
... The Easy Clean function should only be disassembled and thoroughly cleaned as instructed in "Cleaning Your Blender." Care should never be used to rinse the blender between batches of food is finished, the blender should be used when blending any mixture containing eggs, milk, or any other liquid. 1 ...To Easy Clean, pour 2 cups (500 ml) warm water in "Cleaning Your Blender." 10 "SANI" cycle temperatures could damage your product. This function should be washed with hot, soapy water. Parts may also be taken when handling the cutting blade assembly as it is not a ...


