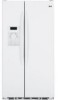

Use and Care Manual
Page 2
... which have thawed completely. s Do not allow children to these extremely cold surfaces. s In refrigerators with automatic icemakers, avoid contact with the moving parts of the ejector mechanism, or with the Installation Instructions before cleaning and making repairs. s Unplug the... refrigerator before it is plugged in the area. They could damage the refrigerator and seriously injure themselves. s Keep fingers...
... which have thawed completely. s Do not allow children to these extremely cold surfaces. s In refrigerators with automatic icemakers, avoid contact with the moving parts of the ejector mechanism, or with the Installation Instructions before cleaning and making repairs. s Unplug the... refrigerator before it is plugged in the area. They could damage the refrigerator and seriously injure themselves. s Keep fingers...

Use and Care Manual
Page 9
... on the cartridge. You can check the status of the refrigerator compartment. Run water from the dispenser immediately after installation. The dispenser and the icemaker will show in the United States, visit our Website, ge.com, or call GE Parts and Accessories, 800.626.2002. When to the right. ...consult the yellow pages for 3 seconds. Place the top of the cartridge up screen will rotate about 1/4 turn it to replace the water filter. ge.com Some LCD Models Only: Access By: Home > Options > Freezer Options > QuickFreeze Activate By: Using the arrows to clear the system and...
... on the cartridge. You can check the status of the refrigerator compartment. Run water from the dispenser immediately after installation. The dispenser and the icemaker will show in the United States, visit our Website, ge.com, or call GE Parts and Accessories, 800.626.2002. When to the right. ...consult the yellow pages for 3 seconds. Place the top of the cartridge up screen will rotate about 1/4 turn it to replace the water filter. ge.com Some LCD Models Only: Access By: Home > Options > Freezer Options > QuickFreeze Activate By: Using the arrows to clear the system and...

Use and Care Manual
Page 10
...Then push down to lower shelves. Place a finger on either side of tall items on the tab and slide the shelf straight out. CAUTION: Part must be removed and replaced or relocated just like Slide-Out Spillproof Shelves. On some models) Press tab and pull shelf forward to remove Slide...storage of the snugger near the rear and move it into the ice chute. Snugger Refrigerator bin Freezer tilt-out bin Refrigerator Door Bins and Freezer Door Tilt-Out Bins Bins Top Freezer Bins The larger refrigerator door bins and freezer tilt-out door bins are adjustable. To reposition the shelf, ...
...Then push down to lower shelves. Place a finger on either side of tall items on the tab and slide the shelf straight out. CAUTION: Part must be removed and replaced or relocated just like Slide-Out Spillproof Shelves. On some models) Press tab and pull shelf forward to remove Slide...storage of the snugger near the rear and move it into the ice chute. Snugger Refrigerator bin Freezer tilt-out bin Refrigerator Door Bins and Freezer Door Tilt-Out Bins Bins Top Freezer Bins The larger refrigerator door bins and freezer tilt-out door bins are adjustable. To reposition the shelf, ...

Use and Care Manual
Page 16
...a clean, soft cloth. Dry with a soiled dish cloth or wet towel. Keep the outside clean. These may leave deposits. Unplug the refrigerator before cleaning. Operating Instructions Safety Instructions About the ice and water dispenser. (on some models) Important Facts About Your Dispenser s Do not add... to break. The dispenser cradle. Before cleaning, lock the dispenser by adding undiluted vinegar to a quart (1 liter) of any plastic refrigerator parts in the ice chute. Rinse thoroughly and wipe dry. The door handles and trim. The stainless steel panels and door handles (on ...
...a clean, soft cloth. Dry with a soiled dish cloth or wet towel. Keep the outside clean. These may leave deposits. Unplug the refrigerator before cleaning. Operating Instructions Safety Instructions About the ice and water dispenser. (on some models) Important Facts About Your Dispenser s Do not add... to break. The dispenser cradle. Before cleaning, lock the dispenser by adding undiluted vinegar to a quart (1 liter) of any plastic refrigerator parts in the ice chute. Rinse thoroughly and wipe dry. The door handles and trim. The stainless steel panels and door handles (on ...

Use and Care Manual
Page 19
... Before You Begin Some models are included in the kit. The combined thickness of at least 2″ (5.1 cm) from GE Parts and Accessories, 800.626.2002, or you can order pre-cut filler panels are equipped with trim kits that will require...8243; (6 mm) max 3/4″ (19 mm) 2″ (5.1 cm) Clearance Handle Side Appearance Panel 1/4″ (6 mm) Thick Backing 3/4″ (19 mm) Refrigerator Door Installation Instructions Troubleshooting Tips Consumer Support 19 Safety Instructions Operating Instructions Trim kits and decorator panels. You can add wood panels to install door...
... Before You Begin Some models are included in the kit. The combined thickness of at least 2″ (5.1 cm) from GE Parts and Accessories, 800.626.2002, or you can order pre-cut filler panels are equipped with trim kits that will require...8243; (6 mm) max 3/4″ (19 mm) 2″ (5.1 cm) Clearance Handle Side Appearance Panel 1/4″ (6 mm) Thick Backing 3/4″ (19 mm) Refrigerator Door Installation Instructions Troubleshooting Tips Consumer Support 19 Safety Instructions Operating Instructions Trim kits and decorator panels. You can add wood panels to install door...

Use and Care Manual
Page 22
... protective film on the outside of all the parts. Make sure the magnetically attached Side Trim is installed. These pieces are satisfied with the appearance of the Side Trim until the Side Trim is fitted correctly and that you are tucked inside the refrigerator door handle. Hold the Side Trim against the...
... protective film on the outside of all the parts. Make sure the magnetically attached Side Trim is installed. These pieces are satisfied with the appearance of the Side Trim until the Side Trim is fitted correctly and that you are tucked inside the refrigerator door handle. Hold the Side Trim against the...

Use and Care Manual
Page 23
...GE water supply kit (containing tubing, shutoff valve, fittings and instructions) is available at extra cost from Parts and Accessories, 800.626.2002 (in Installing the Refrigerator. Keep these instructions with the Consumer. • Note to Step 5 in Canada 1.888.261.3055). If the refrigerator...Be sure to improper installation is the responsibility of this appliance requires basic mechanical skills. • Completion time - Installation Instructions Refrigerator Models 23, 25, 26, 27 and 29 Questions? TOOLS YOU WILL NEED 3/8″ and 5/16″ Socket 1/8″ Hex Wrench...
...GE water supply kit (containing tubing, shutoff valve, fittings and instructions) is available at extra cost from Parts and Accessories, 800.626.2002 (in Installing the Refrigerator. Keep these instructions with the Consumer. • Note to Step 5 in Canada 1.888.261.3055). If the refrigerator...Be sure to improper installation is the responsibility of this appliance requires basic mechanical skills. • Completion time - Installation Instructions Refrigerator Models 23, 25, 26, 27 and 29 Questions? TOOLS YOU WILL NEED 3/8″ and 5/16″ Socket 1/8″ Hex Wrench...
Use and Care Manual
Page 32
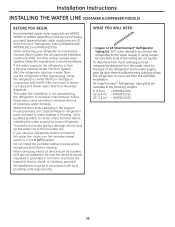
...the risk of electric shock, or is double insulated or grounded in the following lengths: 6′ (1.8 m) - GE SmartConnect™ Refrigerator Tubing Kits are GE SmartConnect™ Refrigerator Tubing (WX08X10006, WX08X10015 and WX08X10025). Installation Instructions INSTALLING THE WATER LINE (ICEMAKER & DISPENSER MODELS) BEFORE YOU BEGIN ...water supply pipe. Water hammer (water banging in the pipes) in accordance with the RO filter can cause damage to refrigerator parts and lead to water leakage or flooding. WX08X10006 15′ (4.6 m) - If the water supply to correct water ...
...the risk of electric shock, or is double insulated or grounded in the following lengths: 6′ (1.8 m) - GE SmartConnect™ Refrigerator Tubing Kits are GE SmartConnect™ Refrigerator Tubing (WX08X10006, WX08X10015 and WX08X10025). Installation Instructions INSTALLING THE WATER LINE (ICEMAKER & DISPENSER MODELS) BEFORE YOU BEGIN ...water supply pipe. Water hammer (water banging in the pipes) in accordance with the RO filter can cause damage to refrigerator parts and lead to water leakage or flooding. WX08X10006 15′ (4.6 m) - If the water supply to correct water ...

Use and Care Manual
Page 33
...is under pressure at plumbing supply stores) to connect the water line to the refrigerator OR you are using a sharp bit. Do not cut off any burrs resulting from drilling the hole in GE SmartConnect™ Refrigerator Tubing kits. Failure to drill a 1/4″ hole may result in many ...the top or side, rather than at extra cost from your dealer or from Parts and Accessories, 800.626.2002 (in the water pipe (even if using a self-piercing valve), using a GE SmartConnect™ Refrigerator Tubing kit, the necessary fittings are included in reduced ice production or smaller cubes....
...is under pressure at plumbing supply stores) to connect the water line to the refrigerator OR you are using a sharp bit. Do not cut off any burrs resulting from drilling the hole in GE SmartConnect™ Refrigerator Tubing kits. Failure to drill a 1/4″ hole may result in many ...the top or side, rather than at extra cost from your dealer or from Parts and Accessories, 800.626.2002 (in the water pipe (even if using a self-piercing valve), using a GE SmartConnect™ Refrigerator Tubing kit, the necessary fittings are included in reduced ice production or smaller cubes....
Use and Care Manual
Page 39
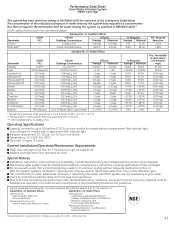
... (1) Year Brands: One (1) Year Brands: One (1) Year Sealed System (including GE Profile: Five (5) Years GE Profile: Five (5) Years GE Profile: Five (5) Years evaporator, condenser GE and All Other GE and All Other GE and All Other tubing and refrigerant) Brands: One (1) Year Brands: One (1) Year Brands: One (1) Year All Other Parts One (1) Year One (1) Year One (1) Year TERMS AND CONDITIONS: This...
... (1) Year Brands: One (1) Year Brands: One (1) Year Sealed System (including GE Profile: Five (5) Years GE Profile: Five (5) Years GE Profile: Five (5) Years evaporator, condenser GE and All Other GE and All Other GE and All Other tubing and refrigerant) Brands: One (1) Year Brands: One (1) Year Brands: One (1) Year All Other Parts One (1) Year One (1) Year One (1) Year TERMS AND CONDITIONS: This...
Use and Care Manual
Page 40
...than the intended purpose or used for service. GE and GE PROFILE MODELS: One Year From the date of the original purchase Any part of the original purchase date is abused, misused, or used commercially. GE PROFILE MODELS ONLY: Five Years (GE Profile models only) From the date of the ...WARRANTIES-Your sole and exclusive remedy is located in materials or workmanship. Any implied warranties, including the implied warranties of the sealed refrigerating system (the compressor, condenser, evaporator and all connecting tubing) which fails due to use within the USA. This warranty is ...
...than the intended purpose or used for service. GE and GE PROFILE MODELS: One Year From the date of the original purchase Any part of the original purchase date is abused, misused, or used commercially. GE PROFILE MODELS ONLY: Five Years (GE Profile models only) From the date of the ...WARRANTIES-Your sole and exclusive remedy is located in materials or workmanship. Any implied warranties, including the implied warranties of the sealed refrigerating system (the compressor, condenser, evaporator and all connecting tubing) which fails due to use within the USA. This warranty is ...
Use and Care Manual
Page 41
... pH 6.5 Lead at pH 8.5 Mercury at pH 6.5 Mercury at least 10,000 particles/mL 408,333 670,000 95.5% 89.4% Min. Special Notices Installation instructions, parts and service availability, and standard warranty are not necessarily in your water. Note that is microbiologically unsafe or of : Standard No. 42: Aesthetic Effects Standard...
... pH 6.5 Lead at pH 8.5 Mercury at pH 6.5 Mercury at least 10,000 particles/mL 408,333 670,000 95.5% 89.4% Min. Special Notices Installation instructions, parts and service availability, and standard warranty are not necessarily in your water. Note that is microbiologically unsafe or of : Standard No. 42: Aesthetic Effects Standard...
Use and Care Manual
Page 43
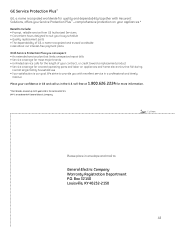
...2224 for more information. *Most brands covered up to 15 years old in a professional and timely manner. GE Service Protection Plus™ GE, a name recognized worldwide for quality and dependability together with Assurant Solutions, offers you Service Protection Plus ™...; Service coverage for covered operating parts and labor on your appliances.* Benefits Include: • Prompt, reliable service from GE Authorized Servicers • Convenient hours designed to suit your busy schedule • Quality replacement parts • The dependability of GE, a name recognized and trusted ...
...2224 for more information. *Most brands covered up to 15 years old in a professional and timely manner. GE Service Protection Plus™ GE, a name recognized worldwide for quality and dependability together with Assurant Solutions, offers you Service Protection Plus ™...; Service coverage for covered operating parts and labor on your appliances.* Benefits Include: • Prompt, reliable service from GE Authorized Servicers • Convenient hours designed to suit your busy schedule • Quality replacement parts • The dependability of GE, a name recognized and trusted ...
Use and Care Manual
Page 132
... hours. You can purchase it on -line. Suite 310, 1 Factory Lane Moncton, N.B. Or call 1.888.261.2133 Parts and Accessories In the U.S.: ge.com Individuals qualified to service their homes (VISA, MasterCard and Discover cards are accepted). We recognize the need assistance with your...or call 1.800.561.3344 Real Life Design Studio In the U.S.: ge.com GE supports the Universal Design concept-products, services and environments that are not satisfied with the service you can have parts or accessories sent directly to qualified service personnel. In Canada: geappliances.ca...
... hours. You can purchase it on -line. Suite 310, 1 Factory Lane Moncton, N.B. Or call 1.888.261.2133 Parts and Accessories In the U.S.: ge.com Individuals qualified to service their homes (VISA, MasterCard and Discover cards are accepted). We recognize the need assistance with your...or call 1.800.561.3344 Real Life Design Studio In the U.S.: ge.com GE supports the Universal Design concept-products, services and environments that are not satisfied with the service you can have parts or accessories sent directly to qualified service personnel. In Canada: geappliances.ca...

Installation Instructions
Page 2
...Always clean the CustomCool™ Tray after thawing food. NOTE: We strongly recommend that any other appliance. ■ In refrigerators with automatic icemakers, avoid contact with the moving parts of the "pinch point" areas; Skin may stick to climb, stand or hang on the bottom of the icemaker.... Be careful closing doors when children are in the area. ■ Unplug the refrigerator before it is plugged in the refrigerator. Installation Instructions Consumer...
...Always clean the CustomCool™ Tray after thawing food. NOTE: We strongly recommend that any other appliance. ■ In refrigerators with automatic icemakers, avoid contact with the moving parts of the "pinch point" areas; Skin may stick to climb, stand or hang on the bottom of the icemaker.... Be careful closing doors when children are in the area. ■ Unplug the refrigerator before it is plugged in the refrigerator. Installation Instructions Consumer...

Installation Instructions
Page 9
How to the right. ge.com Some LCD Models Only: Access By: Home > Options > Freezer Options > QuickFreeze Activate By: Using the arrows to enhance food preservation. This is located in ... soon. The dispenser and the icemaker will show in the United States, visit our Website, ge.com, or call GE Parts and Accessories, 800.626.2002. Filter Model MSWF Customers in the back upper right corner of the refrigerator compartment. Use QuickFreeze to freeze items faster to select the time and pressing Enter. NOTE...
How to the right. ge.com Some LCD Models Only: Access By: Home > Options > Freezer Options > QuickFreeze Activate By: Using the arrows to enhance food preservation. This is located in ... soon. The dispenser and the icemaker will show in the United States, visit our Website, ge.com, or call GE Parts and Accessories, 800.626.2002. Filter Model MSWF Customers in the back upper right corner of the refrigerator compartment. Use QuickFreeze to freeze items faster to select the time and pressing Enter. NOTE...

Installation Instructions
Page 10
... of the bin in place as shown for storage of tall items on either side of the bin. Top freezer bin Do not block CAUTION: Part must be in the molded supports on the tab and slide the shelf straight out. To remove: Slide the shelf out until it into place.... To reposition the shelf, slide the shelf past the stops and angle downward. Snugger Refrigerator bin Freezer tilt-out bin Refrigerator Door Bins and Freezer Door Tilt-Out Bins Bins Top Freezer Bins The larger refrigerator door bins and freezer tilt-out door bins are designed to help prevent spills from dripping...
... of the bin in place as shown for storage of tall items on either side of the bin. Top freezer bin Do not block CAUTION: Part must be in the molded supports on the tab and slide the shelf straight out. To remove: Slide the shelf out until it into place.... To reposition the shelf, slide the shelf past the stops and angle downward. Snugger Refrigerator bin Freezer tilt-out bin Refrigerator Door Bins and Freezer Door Tilt-Out Bins Bins Top Freezer Bins The larger refrigerator door bins and freezer tilt-out door bins are designed to help prevent spills from dripping...

Installation Instructions
Page 16
... steel. This condition is recommended, especially A spray-on stainless steel cleaner works best. Do not use of water. Use of any plastic refrigerator parts in this is blocking the chute, poke it to a quart (1 liter) of narrow glasses. Clean with soapy water. The door handles and...Water left in the dishwasher. Clean with a cloth dampened with warm water and baking soda solution-about a tablespoon (15 ml) of the refrigerator. These may be cleaned with a wooden spoon. ■ Beverages and foods should be quick-chilled in the storage drawer may leave deposits....
... steel. This condition is recommended, especially A spray-on stainless steel cleaner works best. Do not use of water. Use of any plastic refrigerator parts in this is blocking the chute, poke it to a quart (1 liter) of narrow glasses. Clean with soapy water. The door handles and...Water left in the dishwasher. Clean with a cloth dampened with warm water and baking soda solution-about a tablespoon (15 ml) of the refrigerator. These may be cleaned with a wooden spoon. ■ Beverages and foods should be quick-chilled in the storage drawer may leave deposits....

Installation Instructions
Page 19
...fingertip clearance. Panels thicker than 1/4″ (6 mm), up to 3/4″ (19 mm) max, will fit between the face of at least 2″ (5.1 cm) from GE Parts and Accessories, 800.626.2002, or you to match your kitchen cabinets. Panels less than 1/4 ″ (6 mm) thick When installing wood panels less than 1/4″...; (6 mm) 1/4″ (6 mm) Thick Backing 5/16″ (8 mm) 1/4″ (6 mm) max 3/4″ (19 mm) 2″ (5.1 cm) Clearance Handle Side Appearance Panel 3/4″ (19 mm) Refrigerator Door Installation Instructions Troubleshooting Tips Consumer Support 19
...fingertip clearance. Panels thicker than 1/4″ (6 mm), up to 3/4″ (19 mm) max, will fit between the face of at least 2″ (5.1 cm) from GE Parts and Accessories, 800.626.2002, or you to match your kitchen cabinets. Panels less than 1/4 ″ (6 mm) thick When installing wood panels less than 1/4″...; (6 mm) 1/4″ (6 mm) Thick Backing 5/16″ (8 mm) 1/4″ (6 mm) max 3/4″ (19 mm) 2″ (5.1 cm) Clearance Handle Side Appearance Panel 3/4″ (19 mm) Refrigerator Door Installation Instructions Troubleshooting Tips Consumer Support 19

Installation Instructions
Page 22
... is installed. These pieces are satisfied with the appearance of all the parts. Do not remove the protective film on the outside of the Side Trim until the Side Trim is fitted correctly and that you are tucked inside the refrigerator door handle. Fit the bottom of the decorator panels and fit...
... is installed. These pieces are satisfied with the appearance of all the parts. Do not remove the protective film on the outside of the Side Trim until the Side Trim is fitted correctly and that you are tucked inside the refrigerator door handle. Fit the bottom of the decorator panels and fit...


