
Installation Instructions
Page 1
...Electric/Hotpoint/RCA single electric wall oven. • Do not alter or modify any part of this kit. • Save these instructions (for the Microwave Oven Kit. Top Trim 5. receptacle outside cutout 18" Min. For Installation Above a Built-In Oven Microwave oven should be ... 1⁄16" 15"± 1⁄16" 18" Min. Rear Duct 3. Microwave Oven Installation instructions for your new Built-In Trim Kit JX827BN, JX827WN, JX827SS, JX827CD CAUTION: • Before you begin-Read these instructions, Owner's Manual and Important Safety Instructions completely and carefully. •...
...Electric/Hotpoint/RCA single electric wall oven. • Do not alter or modify any part of this kit. • Save these instructions (for the Microwave Oven Kit. Top Trim 5. receptacle outside cutout 18" Min. For Installation Above a Built-In Oven Microwave oven should be ... 1⁄16" 15"± 1⁄16" 18" Min. Rear Duct 3. Microwave Oven Installation instructions for your new Built-In Trim Kit JX827BN, JX827WN, JX827SS, JX827CD CAUTION: • Before you begin-Read these instructions, Owner's Manual and Important Safety Instructions completely and carefully. •...

Installation Instructions
Page 4
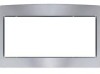
.... Use the smaller Phillips head screwdriver (#1) to the Base Pan and Side Covers. Remove the Trim Kit Frame. 3. Screw D Side Trim (6) Screw D Top Trim (4) Bottom Trim (5) Screw D Screw D Side Trim (6) Screw D Step 7 Installing the Trim Kit Frame 1. Temporarily hold the Trim Kit Frame in the Trim Kit Sides (6) as a template (and with the #6 x 1/2"L flat head thread-forming screws (D). CAUTION: After assembly, top...
.... Use the smaller Phillips head screwdriver (#1) to the Base Pan and Side Covers. Remove the Trim Kit Frame. 3. Screw D Side Trim (6) Screw D Top Trim (4) Bottom Trim (5) Screw D Screw D Side Trim (6) Screw D Step 7 Installing the Trim Kit Frame 1. Temporarily hold the Trim Kit Frame in the Trim Kit Sides (6) as a template (and with the #6 x 1/2"L flat head thread-forming screws (D). CAUTION: After assembly, top...


