
Quick Specs
Page 2
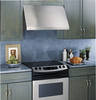
Stainless steel Specification Revised 7/09 220956 JV966D - GJEVP9r3of5il/e9™6356"DDesigner Hood Features and Benefits • 36" Cooktop • 600 CFM Rating • 4-Speed Fan Control • Dual Halogen Lighting (Off/High/Night) • Dishwasher Safe Filter Cleaning • Hidden Controls Profile • 7 Sones Rating • 7" Round Duct Size (Vertical Only) • Model JV966DSS -
Stainless steel Specification Revised 7/09 220956 JV966D - GJEVP9r3of5il/e9™6356"DDesigner Hood Features and Benefits • 36" Cooktop • 600 CFM Rating • 4-Speed Fan Control • Dual Halogen Lighting (Off/High/Night) • Dishwasher Safe Filter Cleaning • Hidden Controls Profile • 7 Sones Rating • 7" Round Duct Size (Vertical Only) • Model JV966DSS -
Use and Care Manual
Page 1
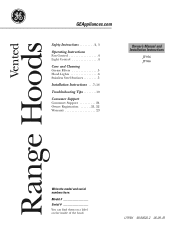
Vented Range Hoods GEAppliances.com Safety Instructions 2, 3 Operating Instructions Fan Control 4 Light Control 4 Care and Cleaning Grease Filters 5 Hood Lights 6 Stainless Steel Surfaces 5 Installation Instructions . . .7-18 Troubleshooting Tips 19 Consumer Support Consumer Support 24 Owner Registration 21, 22 Warranty 23 Owner's Manual and Installation Instructions JV936 JV966 Write the model and serial numbers here: Model Serial You can find them on a label on the inside of the hood. LI1P4H 49-80520-2 06-09 JR
Vented Range Hoods GEAppliances.com Safety Instructions 2, 3 Operating Instructions Fan Control 4 Light Control 4 Care and Cleaning Grease Filters 5 Hood Lights 6 Stainless Steel Surfaces 5 Installation Instructions . . .7-18 Troubleshooting Tips 19 Consumer Support Consumer Support 24 Owner Registration 21, 22 Warranty 23 Owner's Manual and Installation Instructions JV936 JV966 Write the model and serial numbers here: Model Serial You can find them on a label on the inside of the hood. LI1P4H 49-80520-2 06-09 JR
Use and Care Manual
Page 3
.... C. C. When cutting or drilling into wall or ceiling, do not damage electrical wiring and other servicing should not be referred to accumulate on fan or filter. Grease should be allowed to a qualified technician. Use proper pan size. Installation work and electrical wiring must always be done by the National Fire Protection...
.... C. C. When cutting or drilling into wall or ceiling, do not damage electrical wiring and other servicing should not be referred to accumulate on fan or filter. Grease should be allowed to a qualified technician. Use proper pan size. Installation work and electrical wiring must always be done by the National Fire Protection...

Use and Care Manual
Page 5
...on the cooktop. Don't use abrasives or oven cleaners. Follow the cleaner instructions for cleaning the stainless steel surface. For this reason, the filters must ALWAYS be in place when the hood is off and all surfaces are cool before replacing. Slide it up , forward and out. ... Center 800.626.2002 GEAppliances.com 5 Rinse, shake and let them around in the direction of the vent hood. To replace: Hold the filter at the bottom with the handle. Light brushing can be cleaned once a month, or as needed. To inquire about purchasing stainless steel appliance cleaner...
...on the cooktop. Don't use abrasives or oven cleaners. Follow the cleaner instructions for cleaning the stainless steel surface. For this reason, the filters must ALWAYS be in place when the hood is off and all surfaces are cool before replacing. Slide it up , forward and out. ... Center 800.626.2002 GEAppliances.com 5 Rinse, shake and let them around in the direction of the vent hood. To replace: Hold the filter at the bottom with the handle. Light brushing can be cleaned once a month, or as needed. To inquire about purchasing stainless steel appliance cleaner...

Use and Care Manual
Page 12
... cover accessory. 8 ft. Installation Instructions PARTS PROVIDED Locate the hardware accessory box packed with the hood and check contents. 2 Aluminum Grease Filters Screws, wall fasteners, washers Duct Transition with Damper Filter Support DUCT COVER REQUIREMENTS We recommend that the vent hood and decorative duct cover (if used for duct cover use. •...
... cover accessory. 8 ft. Installation Instructions PARTS PROVIDED Locate the hardware accessory box packed with the hood and check contents. 2 Aluminum Grease Filters Screws, wall fasteners, washers Duct Transition with Damper Filter Support DUCT COVER REQUIREMENTS We recommend that the vent hood and decorative duct cover (if used for duct cover use. •...

Use and Care Manual
Page 17
... Bracket D Use UL Listed Wire Nuts White Black • Secure the support to the hood with the 2 small Phillips screws provided. 10 INSTALL FILTER SUPPORT • Tip filter support into the rear of the hood. • Insert support tabs into junction box and replace cover. IMPORTANT: Hold the connector so the two...
... Bracket D Use UL Listed Wire Nuts White Black • Secure the support to the hood with the 2 small Phillips screws provided. 10 INSTALL FILTER SUPPORT • Tip filter support into the rear of the hood. • Insert support tabs into junction box and replace cover. IMPORTANT: Hold the connector so the two...

Use and Care Manual
Page 18
Installation Instructions 11 INSTALL FILTERS • Remove protective film covering the filters. • Insert the filter into the "C" clips mounted to the top of the vertical front panel. • Tap the filter against one side to test all controls. "C" Clip Filters Filter Support • To remove the filters, grasp the handle, push the filter up and pull forward. 18 Junction Box 12 FINALIZE INSTALLATION • Refer to the operating instructions to align with outside opening. • Pull the filter down into the lower slots at the bottom of the filter support.
Installation Instructions 11 INSTALL FILTERS • Remove protective film covering the filters. • Insert the filter into the "C" clips mounted to the top of the vertical front panel. • Tap the filter against one side to test all controls. "C" Clip Filters Filter Support • To remove the filters, grasp the handle, push the filter up and pull forward. 18 Junction Box 12 FINALIZE INSTALLATION • Refer to the operating instructions to align with outside opening. • Pull the filter down into the lower slots at the bottom of the filter support.
Use and Care Manual
Page 19
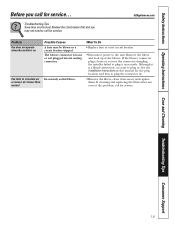
...location and how to plug the connector in . The blower connector is easy to call for service... Troubleshooting Tips Save time and money! Excessively soiled filters. Although it is on Fan fails to the unit. What To Do • Replace fuse or reset circuit breaker. •Disconnect power to ... air or moves air slower than normal Possible Causes A fuse may not need to plug in . •Remove the filters, clean if necessary and replace them. Remove the filters and look up at the blower. If the blower connector plug is loose or you see the connector dangling, the installer...
...location and how to plug the connector in . The blower connector is easy to call for service... Troubleshooting Tips Save time and money! Excessively soiled filters. Although it is on Fan fails to the unit. What To Do • Replace fuse or reset circuit breaker. •Disconnect power to ... air or moves air slower than normal Possible Causes A fuse may not need to plug in . •Remove the filters, clean if necessary and replace them. Remove the filters and look up at the blower. If the blower connector plug is loose or you see the connector dangling, the installer...
