
Use and Care Manual
Page 2
... be seriously injured. ■ Always keep wooden and plastic utensils and canned food a safe distance away from your cooktop. ■ Be sure your cooktop. ■ Never wear loose-fitting or hanging garments while using electrical appliances, basic safety precautions should not be referred to a qualified technician. ■ Before performing any service, disconnect the...
... be seriously injured. ■ Always keep wooden and plastic utensils and canned food a safe distance away from your cooktop. ■ Be sure your cooktop. ■ Never wear loose-fitting or hanging garments while using electrical appliances, basic safety precautions should not be referred to a qualified technician. ■ Before performing any service, disconnect the...

Use and Care Manual
Page 3
...in color. If you do not touch, or let clothing or other flammable materials accumulate on grease fires. Proper relationship of a burn or electric shock, always be put them in a shock, fire hazard or damage to cover the surface unit heating element. These surfaces may be turned... are not covered and are at high heat settings. allow sufficient time for cooling first. ■ Potentially hot surfaces include the cooktop and areas facing the cooktop. ■ To minimize the possibility of burns, ignition of flammable materials and spillage, the handle of a container should be hot...
...in color. If you do not touch, or let clothing or other flammable materials accumulate on grease fires. Proper relationship of a burn or electric shock, always be put them in a shock, fire hazard or damage to cover the surface unit heating element. These surfaces may be turned... are not covered and are at high heat settings. allow sufficient time for cooling first. ■ Potentially hot surfaces include the cooktop and areas facing the cooktop. ■ To minimize the possibility of burns, ignition of flammable materials and spillage, the handle of a container should be hot...

Use and Care Manual
Page 4
... ■ Always heat fat slowly, and watch as possible. Pressure buildup may break because of the sudden change in temperature. ■ Never clean the cooktop surface when it heats. ■ Use a deep fat thermometer whenever possible to prevent overheating fat beyond the smoking point. ■ Never try to avoid... grease fires. ■ Do not store or use . ■ Keep cooktop clean and free of accumulation of oils or fats will be as dry as it is cool. ■ Do not store flammable materials near your...
... ■ Always heat fat slowly, and watch as possible. Pressure buildup may break because of the sudden change in temperature. ■ Never clean the cooktop surface when it heats. ■ Use a deep fat thermometer whenever possible to prevent overheating fat beyond the smoking point. ■ Never try to avoid... grease fires. ■ Do not store or use . ■ Keep cooktop clean and free of accumulation of oils or fats will be as dry as it is cool. ■ Do not store flammable materials near your...

Use and Care Manual
Page 5
... to medium-high. Safety Instructions Operating Instructions Care and Cleaning Troubleshooting Tips Consumer Support Using the surface units. An indicator light will damage the porcelain cooktop. Cast-iron and coated cast-iron cookware are available at low to maintain a boil, but generally cook evenly at your model. For best cooking results...
... to medium-high. Safety Instructions Operating Instructions Care and Cleaning Troubleshooting Tips Consumer Support Using the surface units. An indicator light will damage the porcelain cooktop. Cast-iron and coated cast-iron cookware are available at low to maintain a boil, but generally cook evenly at your model. For best cooking results...
Use and Care Manual
Page 6
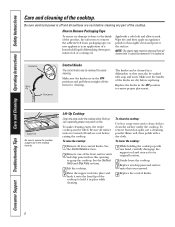
... them straight off and are dry before raising the cooktop. Lift-Up Cooktop Clean the area under the cooktop. To raise the cooktop: To lower the cooktop: 1 Remove all surfaces are in the cooktop front lip. Consumer Support Troubleshooting Tips Care and Cleaning... Operating Instructions Safety Instructions Care and cleaning of the front surface units and drip pans and use a cleansing powder. Be sure electrical...
... them straight off and are dry before raising the cooktop. Lift-Up Cooktop Clean the area under the cooktop. To raise the cooktop: To lower the cooktop: 1 Remove all surfaces are in the cooktop front lip. Consumer Support Troubleshooting Tips Care and Cleaning... Operating Instructions Safety Instructions Care and cleaning of the front surface units and drip pans and use a cleansing powder. Be sure electrical...

Use and Care Manual
Page 7
.... Polish with soap and water. For other spills such as fruit juices, tomato or vinegar) should not be permitted to remain on the cooktop while it is hot, use a dry paper towel or cloth to find the location of the grain. Follow the cleaner instructions for cleaning... please call our toll-free number: National Parts Center U.S.: 1.800.626.2002 GEAppliances.com Canada: 1.800.661.1616 www.GEAppliances.ca Porcelain Enamel Cooktop (on some models) The porcelain enamel finish is acid-resistant. Metal Parts Do not use warm sudsy water or a stainless steel cleaner or polish....
.... Polish with soap and water. For other spills such as fruit juices, tomato or vinegar) should not be permitted to remain on the cooktop while it is hot, use a dry paper towel or cloth to find the location of the grain. Follow the cleaner instructions for cleaning... please call our toll-free number: National Parts Center U.S.: 1.800.626.2002 GEAppliances.com Canada: 1.800.661.1616 www.GEAppliances.ca Porcelain Enamel Cooktop (on some models) The porcelain enamel finish is acid-resistant. Metal Parts Do not use warm sudsy water or a stainless steel cleaner or polish....

Use and Care Manual
Page 8
... the surface unit about 1 inch above the drip pan can permanently damage the receptacle. Built-up soil, especially grease, may not lie flat on the cooktop. 8 Drip pan Drip Pans To remove the drip pans for a minute. Drip pan Do not lift the surface unit more than 1 inch. Clean the...the plug-in drip pan Surface unit plug terminals 2 Hold the assembled surface unit and drip pan together and slide the plug terminals into the cooktop because the surface unit may also be removed first. Then scrub with foil. Using foil so close to the receptacle could cause shock, fire ...
... the surface unit about 1 inch above the drip pan can permanently damage the receptacle. Built-up soil, especially grease, may not lie flat on the cooktop. 8 Drip pan Drip Pans To remove the drip pans for a minute. Drip pan Do not lift the surface unit more than 1 inch. Clean the...the plug-in drip pan Surface unit plug terminals 2 Hold the assembled surface unit and drip pan together and slide the plug terminals into the cooktop because the surface unit may also be removed first. Then scrub with foil. Using foil so close to the receptacle could cause shock, fire ...

Use and Care Manual
Page 9
Visit our Website at: GEAppliances.com or Call the GE Answer Center at the service panel and lock the service disconnecting means to prevent power from box and remove packing material: • Paper under burner bowls • Cardboard between cooktop and tub (must be properly grounded. See the GROUNDING ... at: www.GEAppliances.ca BEFORE YOU BEGIN Read these instructions with natural light during the day. Be sure to Installer - Installation Instructions Electric Cooktop JP328, JP626 Questions? Before beginning the installation, switch power off at 800.626.2000. UNPACKING THE...
Visit our Website at: GEAppliances.com or Call the GE Answer Center at the service panel and lock the service disconnecting means to prevent power from box and remove packing material: • Paper under burner bowls • Cardboard between cooktop and tub (must be properly grounded. See the GROUNDING ... at: www.GEAppliances.ca BEFORE YOU BEGIN Read these instructions with natural light during the day. Be sure to Installer - Installation Instructions Electric Cooktop JP328, JP626 Questions? Before beginning the installation, switch power off at 800.626.2000. UNPACKING THE...

Use and Care Manual
Page 10
..., be installed in your main disconnect is not permitted for detailed instructions on hookup of your cooktop. Installation Instructions ELECTRICAL REQUIREMENTS ATTENTION: All electric cooktops must be hard wired (direct wired) into the connection to keep it is further recommended that... electrician. It is best to side wall A D M E 30″ (76.2 cm) Min. K Min. When choosing a location, the following minimum clearances must be maintained between the cooktop and adjacent combustible surfaces: • 30″ (76.2 cm) minimum vertical clearance from corroding over time...
..., be installed in your main disconnect is not permitted for detailed instructions on hookup of your cooktop. Installation Instructions ELECTRICAL REQUIREMENTS ATTENTION: All electric cooktops must be hard wired (direct wired) into the connection to keep it is further recommended that... electrician. It is best to side wall A D M E 30″ (76.2 cm) Min. K Min. When choosing a location, the following minimum clearances must be maintained between the cooktop and adjacent combustible surfaces: • 30″ (76.2 cm) minimum vertical clearance from corroding over time...

Use and Care Manual
Page 11
...blind counter (one with no cabinet opening . Vertical Clearance 5 MAKE ELECTRICAL CONNECTIONS WARNING The electrical power to the cooktop supply line must not be made . Junction Tub box 3 INSTALL THE COOKTOP Install the cooktop in the cutout opening below), wire connections must be cut. Installation ...8226; That your home is provided with adequate electrical service. • That the addition of the cooktop will not overload the household circuit on a nameplate label under the cooktop. 4 SECURE THE COOKTOP Secure the tub of the cooktop to a standard counter with the wood screws...
...blind counter (one with no cabinet opening . Vertical Clearance 5 MAKE ELECTRICAL CONNECTIONS WARNING The electrical power to the cooktop supply line must not be made . Junction Tub box 3 INSTALL THE COOKTOP Install the cooktop in the cutout opening below), wire connections must be cut. Installation ...8226; That your home is provided with adequate electrical service. • That the addition of the cooktop will not overload the household circuit on a nameplate label under the cooktop. 4 SECURE THE COOKTOP Secure the tub of the cooktop to a standard counter with the wood screws...

Use and Care Manual
Page 12
... need to call for service... What To Do • With the controls off , check to see the correct control is in the recess in the cooktop and that the opening in solidly. Problem Surface units not functioning properly Possible Causes The surface units are using. • With the controls off , check...
... need to call for service... What To Do • With the controls off , check to see the correct control is in the recess in the cooktop and that the opening in solidly. Problem Surface units not functioning properly Possible Causes The surface units are using. • With the controls off , check...

Use and Care Manual
Page 15
Safety Instructions Operating Instructions Care and Cleaning Troubleshooting Tips Consumer Support Built-In Cooktop Warranty. (For customers in Canada) All warranty service provided by accident, fire, floods or acts of the original purchase date is needed to provide required ... . To schedule service on-line, visit us at www.GEAppliances.ca, or call 1.800.561.3344. Any implied warranties, including the implied warranties of the cooktop which vary from province to you may not apply to province. For The Period Of: One Year From the date of the original purchase Mabe...
Safety Instructions Operating Instructions Care and Cleaning Troubleshooting Tips Consumer Support Built-In Cooktop Warranty. (For customers in Canada) All warranty service provided by accident, fire, floods or acts of the original purchase date is needed to provide required ... . To schedule service on-line, visit us at www.GEAppliances.ca, or call 1.800.561.3344. Any implied warranties, including the implied warranties of the cooktop which vary from province to you may not apply to province. For The Period Of: One Year From the date of the original purchase Mabe...

Use and Care Manual
Page 16
... of the product if it is abused, misused, or used commercially. ■ Replacement of house fuses or resetting of the cooktop which vary from state to state. Any implied warranties, including the implied warranties of the original purchase date is product repair as... our Factory Service Centers, or an authorized Customer Care® technician. Warrantor: General Electric Company. Consumer Support Troubleshooting Tips Care and Cleaning Operating Instructions Safety Instructions GE Built-In Cooktop Warranty. (For customers in materials or workmanship. Staple your home to teach you may...
... of the product if it is abused, misused, or used commercially. ■ Replacement of house fuses or resetting of the cooktop which vary from state to state. Any implied warranties, including the implied warranties of the original purchase date is product repair as... our Factory Service Centers, or an authorized Customer Care® technician. Warrantor: General Electric Company. Consumer Support Troubleshooting Tips Care and Cleaning Operating Instructions Safety Instructions GE Built-In Cooktop Warranty. (For customers in materials or workmanship. Staple your home to teach you may...

Quick Specs
Page 1
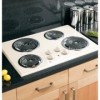
... front Installation Information: Before installing, consult installation instructions packed with product for required breaker size Important: Maintain 5" (12.7 cm) minimum vertical clearance between the cooktop bottom and any combustible surfaces. JP328WK/CK/BK GE® 30" Built-In Electric Cooktop Dimensions and Installation Information KW Rating 240V 7.4 208V 5.6 Breaker Size 240V 40 Amps† 208V...
... front Installation Information: Before installing, consult installation instructions packed with product for required breaker size Important: Maintain 5" (12.7 cm) minimum vertical clearance between the cooktop bottom and any combustible surfaces. JP328WK/CK/BK GE® 30" Built-In Electric Cooktop Dimensions and Installation Information KW Rating 240V 7.4 208V 5.6 Breaker Size 240V 40 Amps† 208V...

Quick Specs
Page 2
...JP328CKCC - Controls are placed within your reach • Upfront controls - Illuminates when the cooking surface is removable for easy cleaning • Lift-up cooktop with support rod - Makes spills and messes under the cooktop easily accessible and within easy reach at the front center of the cooktop...- White on black JP328WK/CK/BK Specification Revised 4/06 321346 JP328WK/CK/BK GE® 30" Built-In Electric Cooktop Features and Benefits • Coil heating elements - Bisque on the cooktop with a plug-in element that is activated • Model JP328WKWW - Provides ...
...JP328CKCC - Controls are placed within your reach • Upfront controls - Illuminates when the cooking surface is removable for easy cleaning • Lift-up cooktop with support rod - Makes spills and messes under the cooktop easily accessible and within easy reach at the front center of the cooktop...- White on black JP328WK/CK/BK Specification Revised 4/06 321346 JP328WK/CK/BK GE® 30" Built-In Electric Cooktop Features and Benefits • Coil heating elements - Bisque on the cooktop with a plug-in element that is activated • Model JP328WKWW - Provides ...


