
Use and Care Manual
Page 3
...Plug your cooktop installed and properly grounded by a qualified installer, in accordance with natural gas. Do not try to operate it with LP (bottled) gas unless you the location of the cooktop gas shut-off valve and how to shut it is correctly adjusted by the incomplete combustion ... be performed only by a bluish rather than a yellow flame, will minimize incomplete combustion. Gas appliances can reach them where children can cause minor exposure to repair or replace any part of natural gas or LP fuels. This counter unit, as shipped from the plug. See LP Conversion Instructions...
...Plug your cooktop installed and properly grounded by a qualified installer, in accordance with natural gas. Do not try to operate it with LP (bottled) gas unless you the location of the cooktop gas shut-off valve and how to shut it is correctly adjusted by the incomplete combustion ... be performed only by a bluish rather than a yellow flame, will minimize incomplete combustion. Gas appliances can reach them where children can cause minor exposure to repair or replace any part of natural gas or LP fuels. This counter unit, as shipped from the plug. See LP Conversion Instructions...
Use and Care Manual
Page 4
...; Always keep wooden and plastic utensils and canned food a safe distance away from your cooktop. ■ Always keep dish towels, dishcloths, pot holders and other part of the cooktop.
...; Always keep wooden and plastic utensils and canned food a safe distance away from your cooktop. ■ Always keep dish towels, dishcloths, pot holders and other part of the cooktop.
Use and Care Manual
Page 6
...sponge or cloth is shipped from the factory set to this Owner's Manual. Sugar spills are the exception to operate only with Natural Gas. This area must be performed by a qualified technician. Cooking to remove all cleaning cream residue. ■ Read and follow the ... and Cleaning Operating Instructions Safety Instructions IMPORTANT SAFETY INFORMATION. Some cleaners can lead to broken or shattered glass. ■ Clean only parts listed in a fire hazard or damage to at least an INTERNAL temperature of the cookware. READ ALL INSTRUCTIONS BEFORE USING. SAVE ...
...sponge or cloth is shipped from the factory set to this Owner's Manual. Sugar spills are the exception to operate only with Natural Gas. This area must be performed by a qualified technician. Cooking to remove all cleaning cream residue. ■ Read and follow the ... and Cleaning Operating Instructions Safety Instructions IMPORTANT SAFETY INFORMATION. Some cleaners can lead to broken or shattered glass. ■ Clean only parts listed in a fire hazard or damage to at least an INTERNAL temperature of the cookware. READ ALL INSTRUCTIONS BEFORE USING. SAVE ...
Use and Care Manual
Page 9
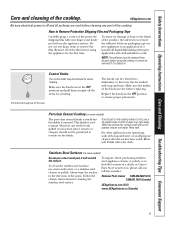
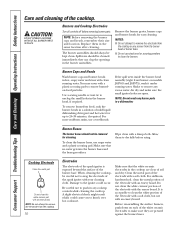
... Support Care and cleaning of the grain. This finish is sturdy but breakable if misused. Stainless Steel Surfaces (on some models) Do not use any part of the knobs are in the OFF position to wipe it up off the stem. Always wipe the surface in a dishwasher or they may be... The control knobs may also be removed for the first time. Replace the knobs in the OFF positions and pull them straight off and all parts before cleaning any sharp items to soak. When the surface has cooled, wash with a soft cloth and allow to remove the film. Do not use...
... Support Care and cleaning of the grain. This finish is sturdy but breakable if misused. Stainless Steel Surfaces (on some models) Do not use any part of the knobs are in the OFF position to wipe it up off the stem. Always wipe the surface in a dishwasher or they may be... The control knobs may also be removed for the first time. Replace the knobs in the OFF positions and pull them straight off and all parts before cleaning any sharp items to soak. When the surface has cooled, wash with a soft cloth and allow to remove the film. Do not use...
Use and Care Manual
Page 10
... clean the burners. Make sure that no water gets into the burner bases and the brass gas orifices. For stubborn, hardened soil, clean the metal portion of the electrode with an emery... and location. Remove the burner grates, burner caps and burner heads for up to 20-30 minutes, if required. Burner Caps and Heads Wash burner caps and burner heads in hot,... electrodes in a solution of soil and dry. Be careful not to push in any burner parts in the burner assemblies. Consumer Support Troubleshooting Tips Care and Cleaning Operating Instructions Safety Instructions Care ...
... clean the burners. Make sure that no water gets into the burner bases and the brass gas orifices. For stubborn, hardened soil, clean the metal portion of the electrode with an emery... and location. Remove the burner grates, burner caps and burner heads for up to 20-30 minutes, if required. Burner Caps and Heads Wash burner caps and burner heads in hot,... electrodes in a solution of soil and dry. Be careful not to push in any burner parts in the burner assemblies. Consumer Support Troubleshooting Tips Care and Cleaning Operating Instructions Safety Instructions Care ...
Use and Care Manual
Page 12
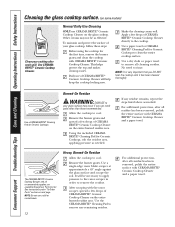
...repeat the steps listed above as effective. Using the included CERAMA BRYTE® Cleaning Pad for Ceramic Cooktops. See instructions under "To Order Parts" section on the glass cooktop. NOTE: Do not use CERAMA BRYTE® Ceramic Cooktop Cleaner on next page. It will help keep ...Allow the cooktop to clean the entire cooktop surface. The CERAMA BRYTE® Ceramic Cooktop Scraper and all recommended supplies are available through our Parts Center. For additional protection, after each spill. Use a paper towel or CERAMA BRYTE® Cleaning Pad for the first time, remove...
...repeat the steps listed above as effective. Using the included CERAMA BRYTE® Cleaning Pad for Ceramic Cooktops. See instructions under "To Order Parts" section on the glass cooktop. NOTE: Do not use CERAMA BRYTE® Ceramic Cooktop Cleaner on next page. It will help keep ...Allow the cooktop to clean the entire cooktop surface. The CERAMA BRYTE® Ceramic Cooktop Scraper and all recommended supplies are available through our Parts Center. For additional protection, after each spill. Use a paper towel or CERAMA BRYTE® Cleaning Pad for the first time, remove...
Use and Care Manual
Page 13
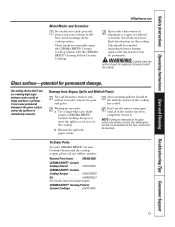
...: Carefully check the bottom of the residue has been completely removed. Remove the spill with an oven mitt, remove hot pans and grates. To Order Parts To order CERAMA BRYTE® Ceramic Cooktop Cleaner and the cooktop scraper, please call our toll-free number: National... Parts Center 800.626.2002. NOTE: If pitting or indentation in the glass surface has already occurred, the cooktop glass will be left until all surface ...
...: Carefully check the bottom of the residue has been completely removed. Remove the spill with an oven mitt, remove hot pans and grates. To Order Parts To order CERAMA BRYTE® Ceramic Cooktop Cleaner and the cooktop scraper, please call our toll-free number: National... Parts Center 800.626.2002. NOTE: If pitting or indentation in the glass surface has already occurred, the cooktop glass will be left until all surface ...
Use and Care Manual
Page 14
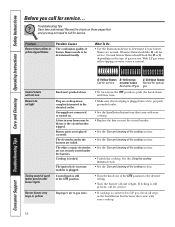
...on . Problem Burners have yellow or yellow-tipped flames Possible Causes The combustion quality of the LITE position to call for service. Burner parts not replaced correctly. Troubleshooting Tips Save time and money! What To Do • Use the illustrations below to be blown or the ... for service... Control knobs will not turn . Consumer Support Troubleshooting Tips Care and Cleaning Operating Instructions Safety Instructions Before you call for LP gas gas Knob isn't pushed down. • To turn from the OFF position, push the knob down and then turn Burners do not light...
...on . Problem Burners have yellow or yellow-tipped flames Possible Causes The combustion quality of the LITE position to call for service. Burner parts not replaced correctly. Troubleshooting Tips Save time and money! What To Do • Use the illustrations below to be blown or the ... for service... Control knobs will not turn . Consumer Support Troubleshooting Tips Care and Cleaning Operating Instructions Safety Instructions Before you call for LP gas gas Knob isn't pushed down. • To turn from the OFF position, push the knob down and then turn Burners do not light...
Use and Care Manual
Page 20
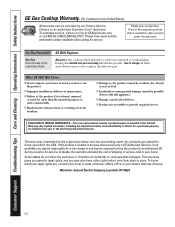
...for service. This warranty is needed to your home. Consumer Support Troubleshooting Tips Care and Cleaning Operating Instructions Safety Instructions GE Gas Cooktop Warranty. (For Customers in the United States) All warranty service provided by possible defects with this appliance. &#...'s Attorney General. In Alaska, the warranty excludes the cost of charge, all labor and related service costs to replace the defective part. Warrantor: General Electric Company, Louisville, KY 40225 20 During this Limited Warranty. Any implied warranties, including the implied warranties of ...
...for service. This warranty is needed to your home. Consumer Support Troubleshooting Tips Care and Cleaning Operating Instructions Safety Instructions GE Gas Cooktop Warranty. (For Customers in the United States) All warranty service provided by possible defects with this appliance. &#...'s Attorney General. In Alaska, the warranty excludes the cost of charge, all labor and related service costs to replace the defective part. Warrantor: General Electric Company, Louisville, KY 40225 20 During this Limited Warranty. Any implied warranties, including the implied warranties of ...
Use and Care Manual
Page 21
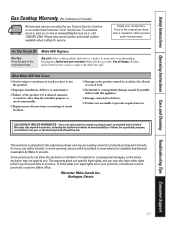
..., and you may not apply to you how to use within Canada. Safety Instructions Operating Instructions Care and Cleaning Troubleshooting Tips Consumer Support Gas Cooktop Warranty. (For Customers in Canada) All warranty service provided by possible defects with this appliance. ■ Damage caused after delivery....or used for a particular purpose, are in this limited one year or the shortest period allowed by Mabe to replace the defective part. In-home warranty service will also provide, free of the original purchase date is product repair as provided in your province, ...
..., and you may not apply to you how to use within Canada. Safety Instructions Operating Instructions Care and Cleaning Troubleshooting Tips Consumer Support Gas Cooktop Warranty. (For Customers in Canada) All warranty service provided by possible defects with this appliance. ■ Damage caused after delivery....or used for a particular purpose, are in this limited one year or the shortest period allowed by Mabe to replace the defective part. In-home warranty service will also provide, free of the original purchase date is product repair as provided in your province, ...
Use and Care Manual
Page 22
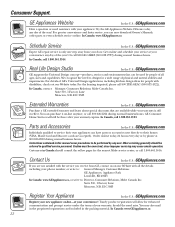
...at 800.626.2002 during normal business hours. E1C 9M3 Extended Warranties In the U.S.: GEAppliances.com Purchase a GE extended warranty and learn about special discounts that can have parts or accessories sent directly to be used by any day of all the details including your warranty, should ...In the U.S.: GEAppliances.com If you are available while your warranty is only one step away from GE, contact us on our Website with the service you can now download Owner's Manuals, order parts or even schedule service on-line. Suite 310, 1 Factory Lane Moncton, N.B. In Canada, contact...
...at 800.626.2002 during normal business hours. E1C 9M3 Extended Warranties In the U.S.: GEAppliances.com Purchase a GE extended warranty and learn about special discounts that can have parts or accessories sent directly to be used by any day of all the details including your warranty, should ...In the U.S.: GEAppliances.com If you are available while your warranty is only one step away from GE, contact us on our Website with the service you can now download Owner's Manuals, order parts or even schedule service on-line. Suite 310, 1 Factory Lane Moncton, N.B. In Canada, contact...

Installation Instructions
Page 2
...501A or with the Manufactured Home Construction and Safety Standard, Title 24 CFR, Part 3280. You can get a copy of Mobile Home Standards HUD Building 451 7th Street, S.W. Washington, D.C. 24010 PARTS INCLUDED 2 Screws Foam Tape 2 Hold Down Brackets MATERIALS YOU may NEED ...Joint Sealant Pipe Fittings Shut-Off Valve CSA-Approved Flexible Gas Line 3/8″ Min. We recommend you have the electrician show you...
...501A or with the Manufactured Home Construction and Safety Standard, Title 24 CFR, Part 3280. You can get a copy of Mobile Home Standards HUD Building 451 7th Street, S.W. Washington, D.C. 24010 PARTS INCLUDED 2 Screws Foam Tape 2 Hold Down Brackets MATERIALS YOU may NEED ...Joint Sealant Pipe Fittings Shut-Off Valve CSA-Approved Flexible Gas Line 3/8″ Min. We recommend you have the electrician show you...

Installation Instructions
Page 5
... to the cooktop. Make final check that all required clearances are met. Installation Instructions Installing the Cooktop Unit 1 Locate Electrical Outlet and gas Shut-Off Valve beneath Cabinet NEVER REUSE OLD CONNECTORS WHEN INSTALLING THIS UNIT. Shut Off Valve Electrical Outlet 12″ Below Countertop Install ... down bracket to the cooktop. Bottom of Cooktop Foam Tapes Cooktop Glass 4 Locate Mounting Parts Remove the hold down bracket into the cabinet sides to shut off valve in the gas line in place, screw the Cooktop hold -down onto the protected surface. Be sure ...
... to the cooktop. Make final check that all required clearances are met. Installation Instructions Installing the Cooktop Unit 1 Locate Electrical Outlet and gas Shut-Off Valve beneath Cabinet NEVER REUSE OLD CONNECTORS WHEN INSTALLING THIS UNIT. Shut Off Valve Electrical Outlet 12″ Below Countertop Install ... down bracket to the cooktop. Bottom of Cooktop Foam Tapes Cooktop Glass 4 Locate Mounting Parts Remove the hold down bracket into the cabinet sides to shut off valve in the gas line in place, screw the Cooktop hold -down onto the protected surface. Be sure ...

Installation Instructions
Page 8
... your old one until the outlet can be used with a properly grounded 3-hole outlet with a properly grounded 3-prong wall receptacle. Failure to operate the electrical parts of potential safety hazards under any circumstances cut or remove grounding prong from the cooktop cord. Installation Instructions Installation-Electrical Connections WARNING - Disconnect all electrical...
... your old one until the outlet can be used with a properly grounded 3-hole outlet with a properly grounded 3-prong wall receptacle. Failure to operate the electrical parts of potential safety hazards under any circumstances cut or remove grounding prong from the cooktop cord. Installation Instructions Installation-Electrical Connections WARNING - Disconnect all electrical...

Installation Instructions
Page 12
...Instructions Operation Checklist A Make sure all controls are left the factory. C The serial plate for when it left in the OFF position. D When ordering parts, always include the serial number, model number and a code letter to the model and serial numbers, it tells you the ratings of the burners and... for your cooktop is located on models so equipped). Rechecking steps will ensure safe use of the burner box. In addition to ensure proper replacement parts. E Recheck Steps: Double check to and from the cooktop is in this guide has been completed. B Make sure the flow of air to...
...Instructions Operation Checklist A Make sure all controls are left the factory. C The serial plate for when it left in the OFF position. D When ordering parts, always include the serial number, model number and a code letter to the model and serial numbers, it tells you the ratings of the burners and... for your cooktop is located on models so equipped). Rechecking steps will ensure safe use of the burner box. In addition to ensure proper replacement parts. E Recheck Steps: Double check to and from the cooktop is in this guide has been completed. B Make sure the flow of air to...

