
Quick Specs
Page 1
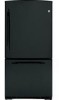
Ft. Bottom-Freezer Door Refrigerator Dimensions and Installation Information (in inches) Overall Dimensions Height to top of hinge (in.) A 66-1/2 Height to top of case (in.) B 65-3/4 Case depth without ....) Top (in.) 1/8 A 1 Back (in .) G Width with fresh food door open 90° inc. Listed by Underwriters Laboratories TCX22 QSART As an Energy Star® partner, GE has determined that this product meets the Energy Star guidelines for energy efficiency. GBSC0HBX GE® ENERGY STAR® 20.3 Cu.
Ft. Bottom-Freezer Door Refrigerator Dimensions and Installation Information (in inches) Overall Dimensions Height to top of hinge (in.) A 66-1/2 Height to top of case (in.) B 65-3/4 Case depth without ....) Top (in.) 1/8 A 1 Back (in .) G Width with fresh food door open 90° inc. Listed by Underwriters Laboratories TCX22 QSART As an Energy Star® partner, GE has determined that this product meets the Energy Star guidelines for energy efficiency. GBSC0HBX GE® ENERGY STAR® 20.3 Cu.

Quick Specs
Page 2
...8226; Model GBSC0HBXWW - Bisque on white • Model GBSC0HBXCC - Ft. Bottom-Freezer Door Refrigerator Features and Benefits • Crown Doors with GE Reveal™ Lighting - Cast a natural-looking glow throughout the refrigerator • Snack Pan - Condenser coils are encased, so they don... - Provides configuration options for ideal food storage • Gallon Door Bins - Specification Created 5/08 310656 GBSC0HBX GE® ENERGY STAR® 20.3 Cu. Conveniently stores re-wrapped meats, cheeses and other snacks • Adjustable Glass Shelves - White on bisque...
...8226; Model GBSC0HBXWW - Bisque on white • Model GBSC0HBXCC - Ft. Bottom-Freezer Door Refrigerator Features and Benefits • Crown Doors with GE Reveal™ Lighting - Cast a natural-looking glow throughout the refrigerator • Snack Pan - Condenser coils are encased, so they don... - Provides configuration options for ideal food storage • Gallon Door Bins - Specification Created 5/08 310656 GBSC0HBX GE® ENERGY STAR® 20.3 Cu. Conveniently stores re-wrapped meats, cheeses and other snacks • Adjustable Glass Shelves - White on bisque...
Owners Manual
Page 1
... the top of California Water Treatment Device Certificate 42 Warranty for Canadian Customers 40 Warranty for U.S. Bottom Freezer Refrigerators GEAppliances.com Safety Instructions 2, 3 Operating Instructions Automatic Icemaker 10 Care and Cleaning 11, 12 Controls 4 Crispers and Pans...19 Installing the Water Line 28-30 Preparing to Install the Refrigerator 14 Removing and Replacing the Doors (Double Door Refrigerator Models only 25-27 Removing and Replacing the Freezer Drawer 20, 21 Reversing the Door Swing (Single Door Refrigerator Models only 22-25 Troubleshooting Tips . . . . ...
... the top of California Water Treatment Device Certificate 42 Warranty for Canadian Customers 40 Warranty for U.S. Bottom Freezer Refrigerators GEAppliances.com Safety Instructions 2, 3 Operating Instructions Automatic Icemaker 10 Care and Cleaning 11, 12 Controls 4 Crispers and Pans...19 Installing the Water Line 28-30 Preparing to Install the Refrigerator 14 Removing and Replacing the Doors (Double Door Refrigerator Models only 25-27 Removing and Replacing the Freezer Drawer 20, 21 Reversing the Door Swing (Single Door Refrigerator Models only 22-25 Troubleshooting Tips . . . . ...

Owners Manual
Page 2
... it is absolutely necessary that releases the cubes. Before You Throw Away Your Old Refrigerator or Freezer: ■ Take off the doors. ■ Leave the shelves in the freezer compartment when hands are getting rid of an old refrigeration product, check with the Installation Instructions before cleaning and making repairs. If you are damp...
... it is absolutely necessary that releases the cubes. Before You Throw Away Your Old Refrigerator or Freezer: ■ Take off the doors. ■ Leave the shelves in the freezer compartment when hands are getting rid of an old refrigeration product, check with the Installation Instructions before cleaning and making repairs. If you are damp...

Owners Manual
Page 3
... make sure the outlet is equipped with a 3-prong (grounding) plug which could cause a fire hazard from overheated wires. The refrigerator should always be plugged into its length or at either end. USE OF ADAPTER PLUGS Adapter plugs are not permitted in Canada.... SAVE THESE INSTRUCTIONS Installation Instructions Troubleshooting Tips Consumer Support 3 Where a standard 2-prong wall outlet is encountered, it is your refrigerator by a qualified electrician to have become frayed or otherwise damaged. Have the wall outlet and circuit checked by pulling on the power...
... make sure the outlet is equipped with a 3-prong (grounding) plug which could cause a fire hazard from overheated wires. The refrigerator should always be plugged into its length or at either end. USE OF ADAPTER PLUGS Adapter plugs are not permitted in Canada.... SAVE THESE INSTRUCTIONS Installation Instructions Troubleshooting Tips Consumer Support 3 Where a standard 2-prong wall outlet is encountered, it is your refrigerator by a qualified electrician to have become frayed or otherwise damaged. Have the wall outlet and circuit checked by pulling on the power...
Owners Manual
Page 4
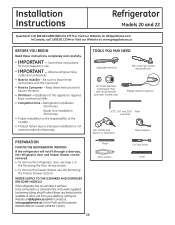
... reach the temperature you have set. Several adjustments may be required. Allow 24 hours for the refrigerator control knob stops cooling in both the refrigerator and freezer compartments, but does not shut off electrical power to stabilize. Adjust the controls one increment at 5. Setting ...either or both controls to 0 for digital and 0 for the temperature to the refrigerator. 4 Consumer Support Troubleshooting Tips...
... reach the temperature you have set. Several adjustments may be required. Allow 24 hours for the refrigerator control knob stops cooling in both the refrigerator and freezer compartments, but does not shut off electrical power to stabilize. Adjust the controls one increment at 5. Setting ...either or both controls to 0 for digital and 0 for the temperature to the refrigerator. 4 Consumer Support Troubleshooting Tips...

Owners Manual
Page 5
...filter cartridges in Canada should consult the yellow pages for the nearest Mabe Service Center. Remove the protective foil from the end of the refrigerator compartment. Open the cartridge cover by slowly rotating it stops. Use caution when removing. The grip on the end of the cartridge ...When to the icemaker decreases, or every six months. Filter Model GSWF Customers in the United States, visit our Website, GEAppliances.com, or call GE Parts and Accessories, 800.626.2002. CAUTION: If air has been trapped in the system, the filter cartridge may drip down . Safety Instructions...
...filter cartridges in Canada should consult the yellow pages for the nearest Mabe Service Center. Remove the protective foil from the end of the refrigerator compartment. Open the cartridge cover by slowly rotating it stops. Use caution when removing. The grip on the end of the cartridge ...When to the icemaker decreases, or every six months. Filter Model GSWF Customers in the United States, visit our Website, GEAppliances.com, or call GE Parts and Accessories, 800.626.2002. CAUTION: If air has been trapped in the system, the filter cartridge may drip down . Safety Instructions...

Owners Manual
Page 6
Refrigerator Compartment To remove: Remove all features are adjustable. Installation Instructions Consumer Support Troubleshooting Tips 6 Lift the shelf up , insert the ...To replace: While tilting the shelf up at the back of the shelf locks into place. Lower the front of the shelf until the bottom of the shelf in a slot on some models) To remove: Lift the shelf straight up at the front. It will lock in ...the shelves and bins. Not all items from the shelf. Tilt the shelf up ; To replace: Engage the shelf in the refrigerator compartment are on the door and push down.
Refrigerator Compartment To remove: Remove all features are adjustable. Installation Instructions Consumer Support Troubleshooting Tips 6 Lift the shelf up , insert the ...To replace: While tilting the shelf up at the back of the shelf locks into place. Lower the front of the shelf until the bottom of the shelf in a slot on some models) To remove: Lift the shelf straight up at the front. It will lock in ...the shelves and bins. Not all items from the shelf. Tilt the shelf up ; To replace: Engage the shelf in the refrigerator compartment are on the door and push down.

Owners Manual
Page 10
...) position if the water supply is normal for your refrigerator did not come already equipped with water. A newly installed refrigerator may take 12 to 24 hours to begin making ice cubes. You will turn green when the freezer light switch is made to the icemaker, set the power... approximately 100-130 cubes in a 24-hour period, depending on freezer compartment temperature, room temperature, number of ice. When the refrigerator has been connected to the water supply, set the power switch in or when the freezer door is not used frequently, old ice cubes will produce seven cubes...
...) position if the water supply is normal for your refrigerator did not come already equipped with water. A newly installed refrigerator may take 12 to 24 hours to begin making ice cubes. You will turn green when the freezer light switch is made to the icemaker, set the power... approximately 100-130 cubes in a 24-hour period, depending on freezer compartment temperature, room temperature, number of ice. When the refrigerator has been connected to the water supply, set the power switch in or when the freezer door is not used frequently, old ice cubes will produce seven cubes...

Owners Manual
Page 11
... Consumer Support 11 Safety Instructions Operating Instructions Care and cleaning of shape. Clean with a cloth dampened with a soiled dish cloth or wet towel. Unplug the refrigerator before cleaning. Use an appliance wax polish on the door handles and trim. Handle glass shelves carefully. The stainless steel panels and door handles. Rinse... (on the stainless steel. A spray-on stainless steel cleaner works best. Avoid cleaning cold glass shelves with a clean, soft cloth. Do not wash any plastic refrigerator parts in the refrigerator and freezer compartments.
... Consumer Support 11 Safety Instructions Operating Instructions Care and cleaning of shape. Clean with a cloth dampened with a soiled dish cloth or wet towel. Unplug the refrigerator before cleaning. Use an appliance wax polish on the door handles and trim. Handle glass shelves carefully. The stainless steel panels and door handles. Rinse... (on the stainless steel. A spray-on stainless steel cleaner works best. Avoid cleaning cold glass shelves with a clean, soft cloth. Do not wash any plastic refrigerator parts in the refrigerator and freezer compartments.

Owners Manual
Page 12
... qualified servicer drain the water supply system (on some models) to prevent serious property damage due to the floor covering or refrigerator. When pushing the refrigerator back, make sure you don't roll over the power cord or icemaker supply line (on some models). Lower the leveling ...and drawers by pushing it to position by taping them securely in damage to flooding. Raise the leveling legs located at the bottom front of the refrigerator. If the temperature can be damaged, particularly cushioned coverings and those with a baking soda solution of one tablespoon (15 ml...
... qualified servicer drain the water supply system (on some models) to prevent serious property damage due to the floor covering or refrigerator. When pushing the refrigerator back, make sure you don't roll over the power cord or icemaker supply line (on some models). Lower the leveling ...and drawers by pushing it to position by taping them securely in damage to flooding. Raise the leveling legs located at the bottom front of the refrigerator. If the temperature can be damaged, particularly cushioned coverings and those with a baking soda solution of one tablespoon (15 ml...

Owners Manual
Page 13
...Instructions Operating Instructions Replacing the light bulbs. The bulb is located at the front of the freezer inside a light shield. Unplug the refrigerator. Appearance may vary Freezer Light CAUTION: Light bulbs may be hot. Turning the control to the 0ff position does ...not remove power to the light circuit. GEAppliances.com Refrigerator Lights CAUTION: Light bulbs may be ordered from GE Parts and Accessories, 800.626.2002. Plug the refrigerator...
...Instructions Operating Instructions Replacing the light bulbs. The bulb is located at the front of the freezer inside a light shield. Unplug the refrigerator. Appearance may vary Freezer Light CAUTION: Light bulbs may be hot. Turning the control to the 0ff position does ...not remove power to the light circuit. GEAppliances.com Refrigerator Lights CAUTION: Light bulbs may be ordered from GE Parts and Accessories, 800.626.2002. Plug the refrigerator...
Owners Manual
Page 14
...the Warranty. Pencil Wire Cutters 1/4" Nut Driver Level 14 Save these instructions for local inspector's use. • IMPORTANT - A GE water supply kit (containing tubing, shutoff valve, fittings and instructions) is the responsibility of this appliance requires basic mechanical skills. •...Website at GEAppliances.com (in the Reversing the Door Swing section. • To remove the freezer drawer, see the Removing the Freezer Drawer section. Refrigerator Installation 20 minutes Water Line Installation 30 minutes • Proper installation is available at extra cost from ...
...the Warranty. Pencil Wire Cutters 1/4" Nut Driver Level 14 Save these instructions for local inspector's use. • IMPORTANT - A GE water supply kit (containing tubing, shutoff valve, fittings and instructions) is the responsibility of this appliance requires basic mechanical skills. •...Website at GEAppliances.com (in the Reversing the Door Swing section. • To remove the freezer drawer, see the Removing the Freezer Drawer section. Refrigerator Installation 20 minutes Water Line Installation 30 minutes • Proper installation is available at extra cost from ...

Owners Manual
Page 15
.... See Installing the Water Line section. G Reinstall the bottom freezer drawer or door. Place the refrigerator on the hand truck with Step A. • If it is required for ease of the cap. D Move refrigerator to the refrigerator, be safely moved indoors. NOTES: • Before making...the two screws on some models) • IMPORTANT NOTE: This refrigerator is in the water line near the refrigerator. Lift off and remove top cap. Refer to connect the filter. If using GE SmartConnect™ Refrigerator Tubing Kit, you will need an additional tube (WX08X10002) to Steps...
.... See Installing the Water Line section. G Reinstall the bottom freezer drawer or door. Place the refrigerator on the hand truck with Step A. • If it is required for ease of the cap. D Move refrigerator to the refrigerator, be safely moved indoors. NOTES: • Before making...the two screws on some models) • IMPORTANT NOTE: This refrigerator is in the water line near the refrigerator. Lift off and remove top cap. Refer to connect the filter. If using GE SmartConnect™ Refrigerator Tubing Kit, you will need an additional tube (WX08X10002) to Steps...

Owners Manual
Page 16
...copper tubing, place a compression nut and ferrule (sleeve) onto the end of the refrigerator should be set to the O (off) position. If you are using the GE SmartConnect™ tubing, the nuts are using GE SmartConnect™ tubing, insert the molded end of the tubing into the clamp provided ...to lower it. C Fasten the tubing into the refrigerator connection, at the front corners of the tubing coming ...
...copper tubing, place a compression nut and ferrule (sleeve) onto the end of the refrigerator should be set to the O (off) position. If you are using the GE SmartConnect™ tubing, the nuts are using GE SmartConnect™ tubing, insert the molded end of the tubing into the clamp provided ...to lower it. C Fasten the tubing into the refrigerator connection, at the front corners of the tubing coming ...

Owners Manual
Page 18
NOTE: For Double Door models follow the same procedure on the bottom of handle A Mounting fasteners (appearance may vary) 9 ATTACH THE FREEZER DOOR HANDLE Stainless steel and plastic handles: A Attach the handle firmly to the mounting fasteners and tighten the set screws with ...Plastic handle: A Attach the handle to the handle mounting fasteners and tighten the set screws on the opposite door. Installation Instructions INSTALLING THE REFRIGERATOR (cont.) 8 ATTACH THE FRESH FOOD DOOR HANDLE Stainless steel handle: A Attach the handle to the handle mounting fasteners by aligning the ...
NOTE: For Double Door models follow the same procedure on the bottom of handle A Mounting fasteners (appearance may vary) 9 ATTACH THE FREEZER DOOR HANDLE Stainless steel and plastic handles: A Attach the handle firmly to the mounting fasteners and tighten the set screws with ...Plastic handle: A Attach the handle to the handle mounting fasteners and tighten the set screws on the opposite door. Installation Instructions INSTALLING THE REFRIGERATOR (cont.) 8 ATTACH THE FRESH FOOD DOOR HANDLE Stainless steel handle: A Attach the handle to the handle mounting fasteners by aligning the ...

Owners Manual
Page 19
... operation and cleaning. Installation Instructions 10 LEVEL THE REFRIGERATOR The leveling legs have 2 purposes: 1) Leveling legs adjust so the refrigerator is firmly positioned on ) position. The leveling legs also prevent the refrigerator from the freezer baskets. C Replace the base grille by removing ...it reaches its operating temperature of 15°F (-9°C) or below. See About the freezer section for instructions. B Turn the leveling legs clockwise to raise the refrigerator, counterclockwise to the recommended setting. Power switch NOTE: In lower water pressure conditions, ...
... operation and cleaning. Installation Instructions 10 LEVEL THE REFRIGERATOR The leveling legs have 2 purposes: 1) Leveling legs adjust so the refrigerator is firmly positioned on ) position. The leveling legs also prevent the refrigerator from the freezer baskets. C Replace the base grille by removing ...it reaches its operating temperature of 15°F (-9°C) or below. See About the freezer section for instructions. B Turn the leveling legs clockwise to raise the refrigerator, counterclockwise to the recommended setting. Power switch NOTE: In lower water pressure conditions, ...

Owners Manual
Page 20
... to fit through a doorway, the base grille can be removed. D Push the rail assemblies back into locking position. Screw 20 B The freezer basket rests on a non-scratching surface. Rail Assembly Drawer Assembly 3 REMOVE THE BASE GRILLE (if needed , to separate the...A Remove the base grille by removing the screws. Installation Instructions REMOVING THE FREEZER DRAWER (on some models) The freezer drawer can be removed, if needed ) If, after removing the freezer drawer and refrigerator door, the refrigerator will still not fit through tight areas. C Set the drawer front on ...
... to fit through a doorway, the base grille can be removed. D Push the rail assemblies back into locking position. Screw 20 B The freezer basket rests on a non-scratching surface. Rail Assembly Drawer Assembly 3 REMOVE THE BASE GRILLE (if needed , to separate the...A Remove the base grille by removing the screws. Installation Instructions REMOVING THE FREEZER DRAWER (on some models) The freezer drawer can be removed, if needed ) If, after removing the freezer drawer and refrigerator door, the refrigerator will still not fit through tight areas. C Set the drawer front on ...

Owners Manual
Page 22
... DOOR SWING (Single Door Refrigerator Models only) IMPORTANT NOTES When...on the hinge pin or inside door hinge pin hole located in the bottom of the refrigerator door by carefully prying it up with the inside the socket. D ... door thimble from the cabinet. NOTE: A replacement logo badge is completed. Unplug the refrigerator from the socket in the hinge kit. C Using a 5/16" socket ratchet/driver,... instructions and reverse all door shelves, including the dairy compartment . 1 REMOVE THE REFRIGERATOR DOOR A Tape the door shut with masking tape. Then lift the hinge straight ...
... DOOR SWING (Single Door Refrigerator Models only) IMPORTANT NOTES When...on the hinge pin or inside door hinge pin hole located in the bottom of the refrigerator door by carefully prying it up with the inside the socket. D ... door thimble from the cabinet. NOTE: A replacement logo badge is completed. Unplug the refrigerator from the socket in the hinge kit. C Using a 5/16" socket ratchet/driver,... instructions and reverse all door shelves, including the dairy compartment . 1 REMOVE THE REFRIGERATOR DOOR A Tape the door shut with masking tape. Then lift the hinge straight ...

Owners Manual
Page 24
...hinge pin and nut in the opposite hole on the hinge bracket with leveling leg. 6 TRANSFER REFRIGERATOR AND FREEZER DOOR STOPS A Remove the door stop on the right side of the bottom of the door. C Install the door stop with leveling leg on the left side of ... instructions. 8 REHANG FREEZER DOOR A Lower the freezer door onto the bottom hinge pin. B Straighten the door and line it extends through the hinge bracket and into the freezer door. 24 C Install the center hinge pin with the center hinge bracket. A Bottom of Door (Right Side) Bottom of the refrigerator. B Using a ...
...hinge pin and nut in the opposite hole on the hinge bracket with leveling leg. 6 TRANSFER REFRIGERATOR AND FREEZER DOOR STOPS A Remove the door stop on the right side of the bottom of the door. C Install the door stop with leveling leg on the left side of ... instructions. 8 REHANG FREEZER DOOR A Lower the freezer door onto the bottom hinge pin. B Straighten the door and line it extends through the hinge bracket and into the freezer door. 24 C Install the center hinge pin with the center hinge bracket. A Bottom of Door (Right Side) Bottom of the refrigerator. B Using a ...


