Use and Care Manual
Page 1
Dryers GEAppliances.com Safety Instructions 2-5 Operating Instructions Control Panels 6-9 Cycle Options 10, 11 Dryer Features 11 Reversing the Door Swing . . . .12-16 Loading and Using the Dryer 17, 18 Venting the Dryer 19 Stacking 20-23 Troubleshooting Tips . . . .24-26 Consumer Support Warranty 27 Consumer Support 28 Owner's Manual DBVH520 DCVH640 DCVH680 DHDVH68 GFDN100 GFDN110 Write the model and serial numbers here: Model Serial They are on the label on the front of the dryer behind the door. 364B7130P001 49-90393-2 03/11/10 GE
Dryers GEAppliances.com Safety Instructions 2-5 Operating Instructions Control Panels 6-9 Cycle Options 10, 11 Dryer Features 11 Reversing the Door Swing . . . .12-16 Loading and Using the Dryer 17, 18 Venting the Dryer 19 Stacking 20-23 Troubleshooting Tips . . . .24-26 Consumer Support Warranty 27 Consumer Support 28 Owner's Manual DBVH520 DCVH640 DCVH680 DHDVH68 GFDN100 GFDN110 Write the model and serial numbers here: Model Serial They are on the label on the front of the dryer behind the door. 364B7130P001 49-90393-2 03/11/10 GE
Use and Care Manual
Page 2
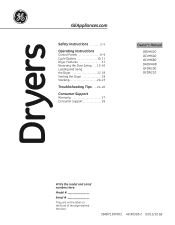
...and soot, caused primarily by the incomplete combustion of this manual must be performed by properly venting the dryer to light a match, or cigarette, or turn on any gas or electrical appliance. 2 Do not touch any electrical switch; do not use gasoline or other flammable vapors and...Do not store or use any other reproductive harm and requires businesses to warn customers of fire or explosion, electric shock, or to such substances. Properly adjusted dryers will minimize incomplete combustion. Troubleshooting Tips Consumer Support 2 WHAT TO DO IF yOu SMEll GAS: 1 Do not...
...and soot, caused primarily by the incomplete combustion of this manual must be performed by properly venting the dryer to light a match, or cigarette, or turn on any gas or electrical appliance. 2 Do not touch any electrical switch; do not use gasoline or other flammable vapors and...Do not store or use any other reproductive harm and requires businesses to warn customers of fire or explosion, electric shock, or to such substances. Properly adjusted dryers will minimize incomplete combustion. Troubleshooting Tips Consumer Support 2 WHAT TO DO IF yOu SMEll GAS: 1 Do not...
Use and Care Manual
Page 5
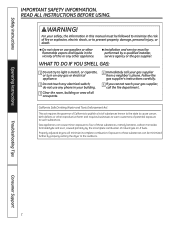
...your hand in the vicinity of this appliance or attempt any servicing unless specifically recommended in your laundered fabrics or reduce the static electricity in them by use either a fabric softener in the wash cycle, according to the manufacturer's instructions for which the manufacturer ... n Do not tamper with an automatic electric ignition and does not have the skills to damage. n The interior of those products, or try a dryer-added product for those products and are not covered under the warranty to this Owner's Manual or in published user-repair instructions that ...
...your hand in the vicinity of this appliance or attempt any servicing unless specifically recommended in your laundered fabrics or reduce the static electricity in them by use either a fabric softener in the wash cycle, according to the manufacturer's instructions for which the manufacturer ... n Do not tamper with an automatic electric ignition and does not have the skills to damage. n The interior of those products, or try a dryer-added product for those products and are not covered under the warranty to this Owner's Manual or in published user-repair instructions that ...
Installation Instructions
Page 1
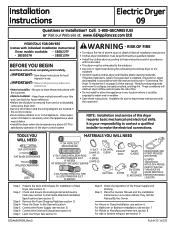
... to Installer - IDENTIFY THE PLUG TYPE AS PER THE HOUSE RECEPTACLE BEFORE PURCHASING LINE CORD. Step 7 Level Your Dryer (see section 3). Step 9 Place the Owners Manual and the Installation Instructions in the appliance. Installation Instructions Electric Dryer 09 Questions or Installation? Call: 1-800-GECARES (US) or Visit our Web site at: www.GEAppliances.com...
... to Installer - IDENTIFY THE PLUG TYPE AS PER THE HOUSE RECEPTACLE BEFORE PURCHASING LINE CORD. Step 7 Level Your Dryer (see section 3). Step 9 Place the Owners Manual and the Installation Instructions in the appliance. Installation Instructions Electric Dryer 09 Questions or Installation? Call: 1-800-GECARES (US) or Visit our Web site at: www.GEAppliances.com...
Installation Instructions
Page 4
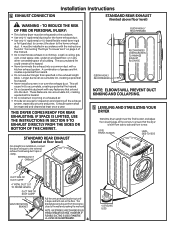
... 4" rigid metal ducting for inspection and cleaning of this manual. • Do not terminate exhaust in a chimney, a wall, a ceiling, gas vent, crawl space, attic, under an enclosed floor, or in any fasteners that the dryer is level from moving too close to the home exhaust ...in accordance with a kitchen exhaust system. ELBOW HIGHLY RECOMMENDED NOTE: ELBOWS WILL PREVENT DUCT KINKING AND COLLAPSING. 5 LEVELING AND STABILIZING YOUR DRYER Stand the dryer upright near the final location and adjust the 4 leveling legs, at least once a year. NOTE: WE STRONGLY RECOMMEND SOLID METAL EXHAUST...
... 4" rigid metal ducting for inspection and cleaning of this manual. • Do not terminate exhaust in a chimney, a wall, a ceiling, gas vent, crawl space, attic, under an enclosed floor, or in any fasteners that the dryer is level from moving too close to the home exhaust ...in accordance with a kitchen exhaust system. ELBOW HIGHLY RECOMMENDED NOTE: ELBOWS WILL PREVENT DUCT KINKING AND COLLAPSING. 5 LEVELING AND STABILIZING YOUR DRYER Stand the dryer upright near the final location and adjust the 4 leveling legs, at least once a year. NOTE: WE STRONGLY RECOMMEND SOLID METAL EXHAUST...

Installation Instructions
Page 11
...outer door to the uppermost screw hole. Using a putty knife or any other flat tool, remove the 5 plastic screw caps located on the dryer where the door will be installed on the opposite side. 22. Installation Instructions 20. then reinstall both on the partially fastened screw. For ...on the opposite side. 11 SERVICING WARNING - To ease this step, the hinge has keyholes that allow a partially fastened screw to Owner's Manual for servicing phone numbers. 11 WIRING ERRORS CAN CAUSE IMPROPER AND DANGEROUS OPERATION AFTER SERVICING/INSTALLATION. REINSTALL DOOR ASSEMBLY 23.
...outer door to the uppermost screw hole. Using a putty knife or any other flat tool, remove the 5 plastic screw caps located on the dryer where the door will be installed on the opposite side. 22. Installation Instructions 20. then reinstall both on the partially fastened screw. For ...on the opposite side. 11 SERVICING WARNING - To ease this step, the hinge has keyholes that allow a partially fastened screw to Owner's Manual for servicing phone numbers. 11 WIRING ERRORS CAN CAUSE IMPROPER AND DANGEROUS OPERATION AFTER SERVICING/INSTALLATION. REINSTALL DOOR ASSEMBLY 23.


