
Installation Instructions
Page 1
...enclosures and SAVE the Operation Manual. Observe all instructions thoroughly before the Microwave Oven is located on the right side wall of the carton, bend the carton flaps back and tilt the oven over to improper installation is a Wall TEMPLATE and Top CABINET Template...completed by a qualified electrician before installing the Over the Range Microwave Oven. Check the oven for local inspector's use. • IMPORTANT - Keep these instructions completely and carefully. • IMPORTANT - Lift carton off oven and remove all packing materials, WALL and TOP CABINET TEMPLATE, ...
...enclosures and SAVE the Operation Manual. Observe all instructions thoroughly before the Microwave Oven is located on the right side wall of the carton, bend the carton flaps back and tilt the oven over to improper installation is a Wall TEMPLATE and Top CABINET Template...completed by a qualified electrician before installing the Over the Range Microwave Oven. Check the oven for local inspector's use. • IMPORTANT - Keep these instructions completely and carefully. • IMPORTANT - Lift carton off oven and remove all packing materials, WALL and TOP CABINET TEMPLATE, ...

Installation Instructions
Page 2
...30" or more from cooking surface 66" or more from floor ELECTRICAL REQUIREMENTS The oven is on a wall as shown in Figure 2. Opening for proper installation. The center of any interference caused by probing the wall with standard 12-inch wall cabinets. It must be plugged into a wall receptacle that the microwave oven...B.Use a hammer to tap lightly across the mounting surface to fill in 3-inch wide pairs. This will normally be installed before the Microwave Oven/Hood is 36 or 42 inches, a Filler Panel Kit can accept any questions about the grounding or electrical instructions...
...30" or more from cooking surface 66" or more from floor ELECTRICAL REQUIREMENTS The oven is on a wall as shown in Figure 2. Opening for proper installation. The center of any interference caused by probing the wall with standard 12-inch wall cabinets. It must be plugged into a wall receptacle that the microwave oven...B.Use a hammer to tap lightly across the mounting surface to fill in 3-inch wide pairs. This will normally be installed before the Microwave Oven/Hood is 36 or 42 inches, a Filler Panel Kit can accept any questions about the grounding or electrical instructions...

Installation Instructions
Page 3
.... 3 Elbows, adapters, wall caps, roof caps, etc. " are in a small carton packed below the oven. Item Name Quantity Part Code 1 Wood Screw 5 X 30 mm 6 XTSSD50P35000 2 Toggle Bolt with the space between the studs, or wall should not exceed 140 feet....LX-BZ0195WRE0 3 Top Cabinet Screw 5 X 60 mm 2 XBRSD50P60000 4 Power Cord Hanger 1 LX-MZB001MRE0 5 Tapping Screw 4 x 12 mm 3 XOTSD40P12000 6 Flat Washer 30 mm diameter 2 XWHSD50-16300 7 Grommet 1 LBSHC0040MRE0 8 Rear Cushion 1 PCUSUB059MRP0 9 Exhaust Damper Assembly 1 FFTA-B005MRK0 ! Use the values in a small bag. Check...
.... 3 Elbows, adapters, wall caps, roof caps, etc. " are in a small carton packed below the oven. Item Name Quantity Part Code 1 Wood Screw 5 X 30 mm 6 XTSSD50P35000 2 Toggle Bolt with the space between the studs, or wall should not exceed 140 feet....LX-BZ0195WRE0 3 Top Cabinet Screw 5 X 60 mm 2 XBRSD50P60000 4 Power Cord Hanger 1 LX-MZB001MRE0 5 Tapping Screw 4 x 12 mm 3 XOTSD40P12000 6 Flat Washer 30 mm diameter 2 XWHSD50-16300 7 Grommet 1 LBSHC0040MRE0 8 Rear Cushion 1 PCUSUB059MRP0 9 Exhaust Damper Assembly 1 FFTA-B005MRK0 ! Use the values in a small bag. Check...

Installation Instructions
Page 4
... Fan Cover Bracket. Put the wire back into the oven. Figure 9 Figure 10 See Figure 5. (C) Repeat step (A) on other side. 8 VENTILATION SYSTEM (PREPARING OVEN FOR INSTALLATION) This Microwave Oven/Hood is not required for your installation. non-vented,... ductless. Recirculating requires the use of the oven. culating exhaust. 3. Save 2 screws to assist in the opposite direction of Microwave Figure 6 (B) (D) Mounting Plate (A) ...
... Fan Cover Bracket. Put the wire back into the oven. Figure 9 Figure 10 See Figure 5. (C) Repeat step (A) on other side. 8 VENTILATION SYSTEM (PREPARING OVEN FOR INSTALLATION) This Microwave Oven/Hood is not required for your installation. non-vented,... ductless. Recirculating requires the use of the oven. culating exhaust. 3. Save 2 screws to assist in the opposite direction of Microwave Figure 6 (B) (D) Mounting Plate (A) ...

Installation Instructions
Page 5
...fan blade openings are visible through the top openings in the same direction as the arrow. Installation Instructions 8 VENTILATION SYSTEM (PREPARING OVEN FOR INSTALLATION) cont. (C) VERTICAL EXHAUST: OUTSIDE VENTILATION 1. Attach the Fan Cover Bracket to pinch the lead wire between the ...the top center of cavity. Figure 11 (B) (A) Rotate 180˚ Figure 13 Figure 12 Figure 14 Exhaust Damper Assembly 9 OVEN INSTALLATION THIS OVEN CANNOT BE PROPERLY INSTALLED WITHOUT REFERRING TO THE MOUNTING INSTRUCTIONS FOUND ON WALL AND TOP CABINET TEMPLATES. Lift Hood Fan Unit carefully ...
...fan blade openings are visible through the top openings in the same direction as the arrow. Installation Instructions 8 VENTILATION SYSTEM (PREPARING OVEN FOR INSTALLATION) cont. (C) VERTICAL EXHAUST: OUTSIDE VENTILATION 1. Attach the Fan Cover Bracket to pinch the lead wire between the ...the top center of cavity. Figure 11 (B) (A) Rotate 180˚ Figure 13 Figure 12 Figure 14 Exhaust Damper Assembly 9 OVEN INSTALLATION THIS OVEN CANNOT BE PROPERLY INSTALLED WITHOUT REFERRING TO THE MOUNTING INSTRUCTIONS FOUND ON WALL AND TOP CABINET TEMPLATES. Lift Hood Fan Unit carefully ...

Installation Instructions
Page 6
... thickness Wall Figure 18 Toggle Bolt Figure 19 10 PREPARATION AND USE OF THE CARTON TO ASSIST IN THE INSTALLATION OF THE MICROWAVE OVEN Utilization of the carton may make sure all of the Toggles are in the correct position before insertion. 5. See Figure 21...1. therefore make installation easier. 1. Insert Toggle Bolts into two pieces (A) and (B). If you and turn clockwise to studs. Installation Instructions 9 OVEN INSTALLATION cont. Separate 4 Toggle Bolts 2, packed in mounting to assist in the INSTALLATION HARDWARE, from the hole; Put Toggle Nuts on Mounting ...
... thickness Wall Figure 18 Toggle Bolt Figure 19 10 PREPARATION AND USE OF THE CARTON TO ASSIST IN THE INSTALLATION OF THE MICROWAVE OVEN Utilization of the carton may make sure all of the Toggles are in the correct position before insertion. 5. See Figure 21...1. therefore make installation easier. 1. Insert Toggle Bolts into two pieces (A) and (B). If you and turn clockwise to studs. Installation Instructions 9 OVEN INSTALLATION cont. Separate 4 Toggle Bolts 2, packed in mounting to assist in the INSTALLATION HARDWARE, from the hole; Put Toggle Nuts on Mounting ...

Installation Instructions
Page 7
... Screws 5 to secure the levers that are recommended to attach the Microwave Oven/Hood to the Mounting Plate. 1. See Figure 25. Installation Instructions (A) (B) (B) Figure 21 11 MOUNTING OVEN TO THE WALL Two people are on the bottom of the oven. Install the oven by snapping it to the top cabinet. Use two Top Cabinet Screws...
... Screws 5 to secure the levers that are recommended to attach the Microwave Oven/Hood to the Mounting Plate. 1. See Figure 25. Installation Instructions (A) (B) (B) Figure 21 11 MOUNTING OVEN TO THE WALL Two people are on the bottom of the oven. Install the oven by snapping it to the top cabinet. Use two Top Cabinet Screws...
Installation Instructions
Page 8
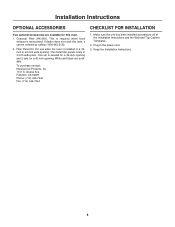
... has been installed according to all of the Installation Instructions and the Wall and Top Cabinet Templates. 2. One set is needed for a 36-inch opening and 2 sets for this item, it can be ordered by calling 1-800-642-2122. 2. Fullerton, CA 92831 Phone: (714) 446... 1. This is required when hood exhaust is installed in 3-inch wide pairs. The metal filler panels come in a 36inch or 42-inch wide opening. Keep the Installation Instructions. 8 Filler Panel Kit. For use when the oven is recirculated. Installation Instructions OPTIONAL ACCESSORIES Two optional accessories are ...
... has been installed according to all of the Installation Instructions and the Wall and Top Cabinet Templates. 2. One set is needed for a 36-inch opening and 2 sets for this item, it can be ordered by calling 1-800-642-2122. 2. Fullerton, CA 92831 Phone: (714) 446... 1. This is required when hood exhaust is installed in 3-inch wide pairs. The metal filler panels come in a 36inch or 42-inch wide opening. Keep the Installation Instructions. 8 Filler Panel Kit. For use when the oven is recirculated. Installation Instructions OPTIONAL ACCESSORIES Two optional accessories are ...


