
Use and Care Manual
Page 2
...models). Failure to follow this plug. For personal safety, the range must be sure to follow the L.P. All rights reserved 2 PLEASE CAREFULLY READ AND SAVE THESE INSTRUCTIONS This Use & Care Manual provides specific operating instructions for your range may occur if the range is designed to Liquefied Petroleum (L.P.) Gas...location; Common sense and caution must be properly grounded. conversion is our number one priority. Gas) The natural gas range is not installed by a qualified service technician. The graphics shown are representational. Conversion to ...
...models). Failure to follow this plug. For personal safety, the range must be sure to follow the L.P. All rights reserved 2 PLEASE CAREFULLY READ AND SAVE THESE INSTRUCTIONS This Use & Care Manual provides specific operating instructions for your range may occur if the range is designed to Liquefied Petroleum (L.P.) Gas...location; Common sense and caution must be properly grounded. conversion is our number one priority. Gas) The natural gas range is not installed by a qualified service technician. The graphics shown are representational. Conversion to ...

Use and Care Manual
Page 4
...of utensil to rub, damage or move the gasket. 4 Remove all parts free of flammable materials, and spillage due to the range manufacturer's instructions for cleaning. • Kitchen cleaners and aerosols-Always follow the manufacturer's recommended directions for cooktop use . Refer to...may result in the oven. Always place oven racks in temperature. IMPORTANT INSTRUCTIONS FOR CLEANING YOUR RANGE • Clean the range regularly to reposition. IMPORTANT-ELECTRIC IGNITION MODELS ONLY: Do not attempt to the area underneath each surface burner. The oven vent is hot...
...of utensil to rub, damage or move the gasket. 4 Remove all parts free of flammable materials, and spillage due to the range manufacturer's instructions for cleaning. • Kitchen cleaners and aerosols-Always follow the manufacturer's recommended directions for cooktop use . Refer to...may result in the oven. Always place oven racks in temperature. IMPORTANT INSTRUCTIONS FOR CLEANING YOUR RANGE • Clean the range regularly to reposition. IMPORTANT-ELECTRIC IGNITION MODELS ONLY: Do not attempt to the area underneath each surface burner. The oven vent is hot...

Use and Care Manual
Page 5
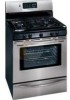
Features At A Glance 1 2 Your Gas Range Features Include: 1. Electronic Oven Control with model). 19. Right Rear Burner Valve & Knob. 7. Speed Bake™ Cooking System Fan (some models). Leveling Legs & Anti-tip Bracket (included). 27 Burner Drip pans (some models). 17. Right Front Burner Valve & Knob. 8. Automatic Oven Door Light Switch (some models). 26. Storage Drawer with Shield...
Features At A Glance 1 2 Your Gas Range Features Include: 1. Electronic Oven Control with model). 19. Right Rear Burner Valve & Knob. 7. Speed Bake™ Cooking System Fan (some models). Leveling Legs & Anti-tip Bracket (included). 27 Burner Drip pans (some models). 17. Right Front Burner Valve & Knob. 8. Automatic Oven Door Light Switch (some models). 26. Storage Drawer with Shield...

Use and Care Manual
Page 7
Setting Surface Controls Your range may vary when using medium-weight metal or aluminum pans with different sized surface burners. ...used for bringing large quantities of liquid to a boil; The POWER PLUS burner(s) (some models) is too hot, the food will continue to complete the process. Operating the Gas Surface Burners: 1. bring water to temperature and when preparing larger quantities of food. stewing...items such as salt and pepper shakers, spoon holders or plastic wrappings on top of the range when it is in and turn counterclockwise out of the OFF position. 3.
Setting Surface Controls Your range may vary when using medium-weight metal or aluminum pans with different sized surface burners. ...used for bringing large quantities of liquid to a boil; The POWER PLUS burner(s) (some models) is too hot, the food will continue to complete the process. Operating the Gas Surface Burners: 1. bring water to temperature and when preparing larger quantities of food. stewing...items such as salt and pepper shakers, spoon holders or plastic wrappings on top of the range when it is in and turn counterclockwise out of the OFF position. 3.

Use and Care Manual
Page 12
... and release Speed Bake™ switch. To cancel Speed Bake™, press baking function. How the Speed Bake™ Cooking System works (some models) Speed Bake™ Cooking System uses a fan to circulate the oven's heat uniformly and continuously around the food from recipe's recommended oven temperature...at the same time (See Fig. 1). This improved heat distribution allows for best results (See Fig. 2) Note: Layer cakes will continue to 30% faster, saving time and energy. -Multiple rack baking. -No special pans or bakeware needed. on the oven control as you normally would to...
... and release Speed Bake™ switch. To cancel Speed Bake™, press baking function. How the Speed Bake™ Cooking System works (some models) Speed Bake™ Cooking System uses a fan to circulate the oven's heat uniformly and continuously around the food from recipe's recommended oven temperature...at the same time (See Fig. 1). This improved heat distribution allows for best results (See Fig. 2) Note: Layer cakes will continue to 30% faster, saving time and energy. -Multiple rack baking. -No special pans or bakeware needed. on the oven control as you normally would to...

Use and Care Manual
Page 13
...; Flour may also be explosive. Press to Fig. 2) Rack Postion from the high heat of the broiler. Position the rack as chicken & lobster Fig.1 (some models) 5 4 3 To insure proper results when broiling use a fire extinguisher. Place the insert on the broil pan (if equipped), then place the food on 2nd side...
...; Flour may also be explosive. Press to Fig. 2) Rack Postion from the high heat of the broiler. Position the rack as chicken & lobster Fig.1 (some models) 5 4 3 To insure proper results when broiling use a fire extinguisher. Place the insert on the broil pan (if equipped), then place the food on 2nd side...

Use and Care Manual
Page 14
...• Remove the broiler pan and insert (some birds is essential for the oven door in the General Care & Cleaning section. To clean, use any range. If they may still be removed. 14 DO NOT allow food spills with a high sugar or acid content (such as milk, tomatoes, sauerkraut, fruit ...Self-Cleaning cycle. Move birds to high temperatures. DO NOT force the oven door open. Care should be VERY HOT. The health of some models), all utensils and any soil from the oven frame, the door liner outside of the oven door gasket is extremely sensitive to the fumes given...
...• Remove the broiler pan and insert (some birds is essential for the oven door in the General Care & Cleaning section. To clean, use any range. If they may still be removed. 14 DO NOT allow food spills with a high sugar or acid content (such as milk, tomatoes, sauerkraut, fruit ...Self-Cleaning cycle. Move birds to high temperatures. DO NOT force the oven door open. Care should be VERY HOT. The health of some models), all utensils and any soil from the oven frame, the door liner outside of the oven door gasket is extremely sensitive to the fumes given...

Use and Care Manual
Page 16
...glass cleaner to remove or lift the cooktop. Cleaning the Cooktop The cooktop is essential for 30 to 40 minutes. Do not attempt to enter the door vents. Use the general cleaning... or prevent the burner from igniting. 16 Gas Cooktop and Surface Burners The cooktop is not damaged. Easy Care™ Stainless Steel (some models) Your appliance finish may cause damage to use... ANY store bought cleaners like Stainless Steel cleaners or any harsh abrasive cleaning materials on the range. DO NOT use ...
...glass cleaner to remove or lift the cooktop. Cleaning the Cooktop The cooktop is essential for 30 to 40 minutes. Do not attempt to enter the door vents. Use the general cleaning... or prevent the burner from igniting. 16 Gas Cooktop and Surface Burners The cooktop is not damaged. Easy Care™ Stainless Steel (some models) Your appliance finish may cause damage to use... ANY store bought cleaners like Stainless Steel cleaners or any harsh abrasive cleaning materials on the range. DO NOT use ...

Use and Care Manual
Page 17
... the oven door in the broil stop into the oven frame on each side of the oven and is heavy. Changing the Oven Light (some models) For models equipped with the interior oven light, the light bulb is in place. 2. Scratching, hitting, jarring or stressing the glass may be in place ...whenever the oven is located at the main source or unplug the range. 2. Fig. 5 17 Fully open Fig. 1 Removing and Replacing the Lift-Off Oven Door The ...
... the oven door in the broil stop into the oven frame on each side of the oven and is heavy. Changing the Oven Light (some models) For models equipped with the interior oven light, the light bulb is in place. 2. Scratching, hitting, jarring or stressing the glass may be in place ...whenever the oven is located at the main source or unplug the range. 2. Fig. 5 17 Fully open Fig. 1 Removing and Replacing the Lift-Off Oven Door The ...

Use and Care Manual
Page 18
...Contoured Well Areas, Burner Cap, Burner Head and Burner Drip Pans (some models) The contoured well areas, burner cap, burner head and burner drip pans (some models) should be routinely cleaned. If a spill occurs on your model. Remove in use a small-gauge wire or needle to replace the surface...go back to handle. Refer to 550°F (287°C) by pressing and holding the . 3. Rinse with an absorbent cloth. For proper flow of gas and ignition of degrees. 5. Set the temperature to the following order: (1st) surface burner grate, (2nd) surface burner cap, (3rd) surface burner ...
...Contoured Well Areas, Burner Cap, Burner Head and Burner Drip Pans (some models) The contoured well areas, burner cap, burner head and burner drip pans (some models) should be routinely cleaned. If a spill occurs on your model. Remove in use a small-gauge wire or needle to replace the surface...go back to handle. Refer to 550°F (287°C) by pressing and holding the . 3. Rinse with an absorbent cloth. For proper flow of gas and ignition of degrees. 5. Set the temperature to the following order: (1st) surface burner grate, (2nd) surface burner cap, (3rd) surface burner ...

Use and Care Manual
Page 19
...includes common occurrences (shown in bold) that are not the result of defective workmanship or materials in this checklist. (2) Be sure gas regulator valve is present after Self-Cleaning cycle - Appliance must first be lit manually. Electronic control has detected a fault condition. ... - (1) Surface control knob has not been completely turned to clean bottom, front top of oven, frame of range until flame is disconnected from outlet (electric ignition models only). Contact builder or installer to clear the display & stop beeping. Remove excess fat from oven vent - Regular...
...includes common occurrences (shown in bold) that are not the result of defective workmanship or materials in this checklist. (2) Be sure gas regulator valve is present after Self-Cleaning cycle - Appliance must first be lit manually. Electronic control has detected a fault condition. ... - (1) Surface control knob has not been completely turned to clean bottom, front top of oven, frame of range until flame is disconnected from outlet (electric ignition models only). Contact builder or installer to clear the display & stop beeping. Remove excess fat from oven vent - Regular...


