
Complete Owners Guide
Page 2
...need service, help is part of our commitment to customer satisfaction and product quality throughout the service life of a relationship. To ensure our ability to help you . Frigidaire serial number Serial Plate Location Visit the Frigidaire web site at http://www.frigidaire.com or by dropping ... storage drawer (some common problems that sold you , please use and maintain your purchase as the beginning of your product with Frigidaire enhances our ability to serve you use this Use & Care Manual This manual contains instructions to record important product information. and ...
...need service, help is part of our commitment to customer satisfaction and product quality throughout the service life of a relationship. To ensure our ability to help you . Frigidaire serial number Serial Plate Location Visit the Frigidaire web site at http://www.frigidaire.com or by dropping ... storage drawer (some common problems that sold you , please use and maintain your purchase as the beginning of your product with Frigidaire enhances our ability to serve you use this Use & Care Manual This manual contains instructions to record important product information. and ...

Complete Owners Guide
Page 4
...to have the appropriate outlet or junction box with CAN/CGA B149.1 and CAN/CGA B149.2 and CSA Standard C22.1, Canadian Electrical code, Part 1-latest editions and local electrical code requirements. Install only per installation instructions provided in accordance with the National Fuel Gas Code ANSI Z223.1/... prong from the power cord. Destroy the carton and plastic bags after unpacking the appliance. Do not remove the wiring label and other part of the appliance by removing the leveling legs, panels, wire covers, anti-tip brackets/screws, or any other literature attached to an ...
...to have the appropriate outlet or junction box with CAN/CGA B149.1 and CAN/CGA B149.2 and CSA Standard C22.1, Canadian Electrical code, Part 1-latest editions and local electrical code requirements. Install only per installation instructions provided in accordance with the National Fuel Gas Code ANSI Z223.1/... prong from the power cord. Destroy the carton and plastic bags after unpacking the appliance. Do not remove the wiring label and other part of the appliance by removing the leveling legs, panels, wire covers, anti-tip brackets/screws, or any other literature attached to an ...

Complete Owners Guide
Page 5
... not store items of interest to children in the cabinets above the appliance or on the door or drawers of ranges. WARNING Never cover any part of the appliance. Cover the fire with any materials, such as aerosol cans, on any slots, holes, or passages in serious injuries and also cause...
... not store items of interest to children in the cabinets above the appliance or on the door or drawers of ranges. WARNING Never cover any part of the appliance. Cover the fire with any materials, such as aerosol cans, on any slots, holes, or passages in serious injuries and also cause...
Complete Owners Guide
Page 7
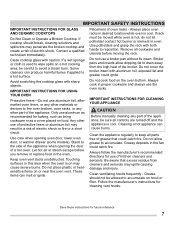
...Save these instructions for cleaning vent hoods. Only use aluminum foil, aftermarket oven liners, or any other use of electric shock. Any other part of electric shock or fire or a short circuit. These items can cause burns. Use potholders and grasp the rack with sharp objects. ...heatsensitive items on food. Do not cover the broiler insert with caution. IMPORTANT INSTRUCTIONS FOR CLEANING YOUR APPLIANCE CAUTION Before manually cleaning any part of the appliance, be careful to line oven bottom, oven racks, or any other materials or devices to avoid a steam burn....
...Save these instructions for cleaning vent hoods. Only use aluminum foil, aftermarket oven liners, or any other use of electric shock. Any other part of electric shock or fire or a short circuit. These items can cause burns. Use potholders and grasp the rack with sharp objects. ...heatsensitive items on food. Do not cover the broiler insert with caution. IMPORTANT INSTRUCTIONS FOR CLEANING YOUR APPLIANCE CAUTION Before manually cleaning any part of the appliance, be careful to line oven bottom, oven racks, or any other materials or devices to avoid a steam burn....

Complete Owners Guide
Page 8
... good seal. Do not clean the oven door gasket. This reduces the risk of the appliance unless specifically recommended in or around any part of any oven. Move birds to the appliance at the circuit breaker or fuse box in this manual. IMPORTANT SAFETY INSTRUCTIONS IMPORTANT INSTRUCTIONS FOR... oven door from the oven, storage drawer or warming drawer (if equipped). Do not use oven cleaners. Do not repair or replace any part of personal injury and damage to the appliance before removing and replacing the bulb. Remove oven racks unless otherwise instructed. Handle halogen lights (if...
... good seal. Do not clean the oven door gasket. This reduces the risk of the appliance unless specifically recommended in or around any part of any oven. Move birds to the appliance at the circuit breaker or fuse box in this manual. IMPORTANT SAFETY INSTRUCTIONS IMPORTANT INSTRUCTIONS FOR... oven door from the oven, storage drawer or warming drawer (if equipped). Do not use oven cleaners. Do not repair or replace any part of personal injury and damage to the appliance before removing and replacing the bulb. Remove oven racks unless otherwise instructed. Handle halogen lights (if...

Complete Owners Guide
Page 20
... lose their shiny finish. • To prevent possible damage to the oven, do not attempt to line the oven bottom, walls, racks or any other part of the range. Removing, replacing, and arranging oven racks Always arrange the oven racks when the oven is vented as shown below. To replace - Place...
... lose their shiny finish. • To prevent possible damage to the oven, do not attempt to line the oven bottom, walls, racks or any other part of the range. Removing, replacing, and arranging oven racks Always arrange the oven racks when the oven is vented as shown below. To replace - Place...

Complete Owners Guide
Page 33
... oven control, electronics, and the receptacle. • Before starting Self Clean or during a Broil, make sure the probe is visible in thickest part breast 33 Always insert and remove the probe using a probe to check internal temperature is the safest method to check the thermometer. Proper placement of...When cooking fish, insert meat probe just above the gill. • For whole poultry or turkey, fully insert the probe sensor into the thickest part of meat or food (See Figure 26). Connecting any guesswork or the need to open the oven door to ensure properly cooked food. For best...
... oven control, electronics, and the receptacle. • Before starting Self Clean or during a Broil, make sure the probe is visible in thickest part breast 33 Always insert and remove the probe using a probe to check internal temperature is the safest method to check the thermometer. Proper placement of...When cooking fish, insert meat probe just above the gill. • For whole poultry or turkey, fully insert the probe sensor into the thickest part of meat or food (See Figure 26). Connecting any guesswork or the need to open the oven door to ensure properly cooked food. For best...

Complete Owners Guide
Page 39
...may leave a dull spot even after the self clean cycle ends. Important notes: • Completely remove all oven racks and any excessive spills. Clean any part of the oven. Large spills can wipe away afterwards with aluminum foil. In addition to the clean time that was programmed, you will be taken... interior. This function can become very hot and cause burns if touched. • Do not line the oven walls, racks, oven bottom, or any part of the oven bottom (Figure 32). Use caution when opening door to allow about 15 seconds for the oven to cool before you must allow...
...may leave a dull spot even after the self clean cycle ends. Important notes: • Completely remove all oven racks and any excessive spills. Clean any part of the oven. Large spills can wipe away afterwards with aluminum foil. In addition to the clean time that was programmed, you will be taken... interior. This function can become very hot and cause burns if touched. • Do not line the oven walls, racks, oven bottom, or any part of the oven bottom (Figure 32). Use caution when opening door to allow about 15 seconds for the oven to cool before you must allow...

Complete Owners Guide
Page 41
... glass while cleaning cavity. 10. If the oven temperature is finished. Pour 1 cup of tap water 4. St Cn will show in the oven for any part of the oven, be sure all racks and oven accessories. 2. Take care opening the door when the steam clean is above room temperature a triple beep...
... glass while cleaning cavity. 10. If the oven temperature is finished. Pour 1 cup of tap water 4. St Cn will show in the oven for any part of the oven, be sure all racks and oven accessories. 2. Take care opening the door when the steam clean is above room temperature a triple beep...

Complete Owners Guide
Page 42
...with clean water, dry with mild dish detergent and water or a 50/50 solution of vinegar and water. Painted and plastic control knobs Painted body parts Painted decorative trims Using a soft cloth, clean with a soft clean cloth. Do not use cleaners containing abrasives, chlorides, chlorine, or ammonia. ...soft cloth, clean with mild dish detergent and water or a 50/50 solution of vinegar and water. CARE AND CLEANING Remove spills and any part of the appliance, be sure all controls are turned off the shaft. Stainless Steel Using a soft cloth, clean with mild dish detergent and ...
...with clean water, dry with mild dish detergent and water or a 50/50 solution of vinegar and water. Painted and plastic control knobs Painted body parts Painted decorative trims Using a soft cloth, clean with a soft clean cloth. Do not use cleaners containing abrasives, chlorides, chlorine, or ammonia. ...soft cloth, clean with mild dish detergent and water or a 50/50 solution of vinegar and water. CARE AND CLEANING Remove spills and any part of the appliance, be sure all controls are turned off the shaft. Stainless Steel Using a soft cloth, clean with mild dish detergent and ...

Complete Owners Guide
Page 43
... not spray or allow food spills with a 50/50 solution of the oven bottom. Porcelain-enameled broiler pan and insert Porcelain door liner Porcelain body parts Self-cleaning oven interior Oven door Ceramic cooktop CARE AND CLEANING Rinse with a clean cloth. These spills may be used on the outside glass of...
... not spray or allow food spills with a 50/50 solution of the oven bottom. Porcelain-enameled broiler pan and insert Porcelain door liner Porcelain body parts Self-cleaning oven interior Oven door Ceramic cooktop CARE AND CLEANING Rinse with a clean cloth. These spills may be used on the outside glass of...

Complete Owners Guide
Page 47
... oven is located at the main source or unplug the appliance. 2. Replacing the oven interior light bulb: The interior oven light is unplugged and all parts are cool before replacing the oven light. The tension from the wire holds the glass shield in ). 7. Pull the shield straight out. Turn the power...
... oven is located at the main source or unplug the appliance. 2. Replacing the oven interior light bulb: The interior oven light is unplugged and all parts are cool before replacing the oven light. The tension from the wire holds the glass shield in ). 7. Pull the shield straight out. Turn the power...

Complete Owners Guide
Page 52
...cover the following: 1. Service calls to change without notice. This warranty only applies in materials or workmanship, or for service and parts under this warranty must be obtained by Electrolux Canada Corp. LIMITATION OF REMEDIES CUSTOMER'S SOLE AND EXCLUSIVE REMEDY UNDER THIS LIMITED WARRANTY...covered by Electrolux or an authorized service company. Product features or specifications as -is" are subject to change or add to any parts of your appliance or to instruct you how to be defective in materials or workmanship when such appliance is in a commercial setting....
...cover the following: 1. Service calls to change without notice. This warranty only applies in materials or workmanship, or for service and parts under this warranty must be obtained by Electrolux Canada Corp. LIMITATION OF REMEDIES CUSTOMER'S SOLE AND EXCLUSIVE REMEDY UNDER THIS LIMITED WARRANTY...covered by Electrolux or an authorized service company. Product features or specifications as -is" are subject to change or add to any parts of your appliance or to instruct you how to be defective in materials or workmanship when such appliance is in a commercial setting....

Wiring Diagram
Page 1
...SHEET Electric Range with the keyboard. GROUNDING: The standard color coding for a long time this model. Note: Changing calibration affects all metal parts and panels. • All safety grounds (both internal and external) are properly dressed and secured away from sharp edges, high-temperature components.... Verify the unit has the proper oven user interface board and oven relay board, based on the model number and parts catalog. Disconnect power to case ground Open circuit/infinite resistance ELECTRONIC OVEN CONTROL CODE DESCRIPTIONS Fault Code Likely Failure Condition/Cause...
...SHEET Electric Range with the keyboard. GROUNDING: The standard color coding for a long time this model. Note: Changing calibration affects all metal parts and panels. • All safety grounds (both internal and external) are properly dressed and secured away from sharp edges, high-temperature components.... Verify the unit has the proper oven user interface board and oven relay board, based on the model number and parts catalog. Disconnect power to case ground Open circuit/infinite resistance ELECTRONIC OVEN CONTROL CODE DESCRIPTIONS Fault Code Likely Failure Condition/Cause...


