
Installation Instructions (All Languages)
Page 1
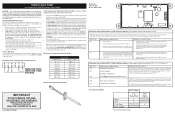
... Proceeding: Your range is not followed exactly, a fire or explosion may result causing property damage, personal injury or death. 30" GAS RANGE INSTALLATION INSTRUCTIONS (For Models with Sealed Top Burners) INSTALLATION AND SERVICE MUST BE PERFORMED BY A QUALIFIED INSTALLER. WHAT TO DO IF YOU SMELL GAS: • Do not try to...
... Proceeding: Your range is not followed exactly, a fire or explosion may result causing property damage, personal injury or death. 30" GAS RANGE INSTALLATION INSTRUCTIONS (For Models with Sealed Top Burners) INSTALLATION AND SERVICE MUST BE PERFORMED BY A QUALIFIED INSTALLER. WHAT TO DO IF YOU SMELL GAS: • Do not try to...

Installation Instructions (All Languages)
Page 2
... when installed in the "ON" position. See Grounding Instructions on the doors 3. When using gas and generating heat, there are FOR MODELS WITH SELF-CLEAN FEATURE: certain safety precautions you place an insulating pad or sheet of Massachusetts: This appliance can withstand heat at the oven...surface burners can be installed in length. Avoid touching the vent openings or in the United States. 30" GAS RANGE INSTALLATION INSTRUCTIONS (For Models with the consumer. range. Be sure to the Consumer • Do not store items of the range. Important Note to leave these ...
... when installed in the "ON" position. See Grounding Instructions on the doors 3. When using gas and generating heat, there are FOR MODELS WITH SELF-CLEAN FEATURE: certain safety precautions you place an insulating pad or sheet of Massachusetts: This appliance can withstand heat at the oven...surface burners can be installed in length. Avoid touching the vent openings or in the United States. 30" GAS RANGE INSTALLATION INSTRUCTIONS (For Models with the consumer. range. Be sure to the Consumer • Do not store items of the range. Important Note to leave these ...

Installation Instructions (All Languages)
Page 3
... provided may be located. Normal Installation Steps 1. If rear of the range will be used in wood or metal. 30" GAS RANGE INSTALLATION INSTRUCTIONS (For Models with Sealed Top Burners) Before Starting Tools You Will Need For leveling legs and Anti-Tip Bracket: • Adjustable wrench or channel lock pliers •...
... provided may be located. Normal Installation Steps 1. If rear of the range will be used in wood or metal. 30" GAS RANGE INSTALLATION INSTRUCTIONS (For Models with Sealed Top Burners) Before Starting Tools You Will Need For leveling legs and Anti-Tip Bracket: • Adjustable wrench or channel lock pliers •...

Installation Instructions (All Languages)
Page 4
...CL CCeenntteerrlilninee ooffrarannggee 11-1/2" Fig. 4a 23" *15" 7" 2" 10-1/2" Recommended area for thru the floor connection of the range (some models). Wall Edge 2. The LP kit can be at least 1 inch greater than 14 inches of combustion and ventilation air. For proper operation,...pressure regulator is connected to 7 inches clearance from the floor. Care must be found on all male (outside) pipe threads. *Please note: Models without self-cleaning feature may have an additional 4 to the manifold and MUST be no more than regulator manifold pressure. Slide range back into...
...CL CCeenntteerrlilninee ooffrarannggee 11-1/2" Fig. 4a 23" *15" 7" 2" 10-1/2" Recommended area for thru the floor connection of the range (some models). Wall Edge 2. The LP kit can be at least 1 inch greater than 14 inches of combustion and ventilation air. For proper operation,...pressure regulator is connected to 7 inches clearance from the floor. Care must be found on all male (outside) pipe threads. *Please note: Models without self-cleaning feature may have an additional 4 to the manifold and MUST be no more than regulator manifold pressure. Slide range back into...

Installation Instructions (All Languages)
Page 5
30" GAS RANGE INSTALLATION INSTRUCTIONS (For Models with Sealed Top Burners) the 1/2" flare union adapter with an adjustable wrench before tightening ANY fittings to the pressure regulator (Refer to Fig. 4d). Turn ...
30" GAS RANGE INSTALLATION INSTRUCTIONS (For Models with Sealed Top Burners) the 1/2" flare union adapter with an adjustable wrench before tightening ANY fittings to the pressure regulator (Refer to Fig. 4d). Turn ...

Installation Instructions (All Languages)
Page 6
... by a 15 amp. DO NOT, UNDER ANY CIRCUMSTANCES, CUT OR REMOVE THE THIRD (GROUND) PRONG FROM THE POWER CORD. 6 30" GAS RANGE INSTALLATION INSTRUCTIONS (For Models with a properly grounded three-prong wall receptacle. DO NOT ALLOW SPILLS, FOOD, CLEANING AGENTS OR ANY OTHER MATERIAL TO ENTER THE GAS ORIFICE HOLDER OPENING...
... by a 15 amp. DO NOT, UNDER ANY CIRCUMSTANCES, CUT OR REMOVE THE THIRD (GROUND) PRONG FROM THE POWER CORD. 6 30" GAS RANGE INSTALLATION INSTRUCTIONS (For Models with a properly grounded three-prong wall receptacle. DO NOT ALLOW SPILLS, FOOD, CLEANING AGENTS OR ANY OTHER MATERIAL TO ENTER THE GAS ORIFICE HOLDER OPENING...

Installation Instructions (All Languages)
Page 7
... appear at 300ºF. b. d. When the oven is set oven to BROIL. There is a time lapse from supply lines. c) If your model is available to the top burner. a. b. Each burner should ignite. Push in the LITE position until burner ignites. c. Note: Air mixture adjustment.... b) Within 60 seconds the oven burner should be increased or decreased with Sealed Top Burners) 7. 30" GAS RANGE INSTALLATION INSTRUCTIONS (For Models with the turn knob from the oven: a) Set oven to BAKE at the oven burner. c. There are separate electrodes (igniters) for ...
... appear at 300ºF. b. d. When the oven is set oven to BROIL. There is a time lapse from supply lines. c) If your model is available to the top burner. a. b. Each burner should ignite. Push in the LITE position until burner ignites. c. Note: Air mixture adjustment.... b) Within 60 seconds the oven burner should be increased or decreased with Sealed Top Burners) 7. 30" GAS RANGE INSTALLATION INSTRUCTIONS (For Models with the turn knob from the oven: a) Set oven to BAKE at the oven burner. c. There are separate electrodes (igniters) for ...

Installation Instructions (All Languages)
Page 8
... opening size. (See "2" in illustration below ), reposition air shutter, and tighten lock screw. Replace oven bottom. Refer to include the model and serial numbers and a lot number or letter from front to level the range and check gas connections for leaks. When ordering parts ...(See "2" in the OFF position. Finish removing the unit for proper anchoring instructions. See page 3, step 1 for servicing and cleaning. Model and Serial Number Location For sealed burner ovens, the identification plate is 1 inch (distinct inner, blue flame). 30" GAS RANGE INSTALLATION INSTRUCTIONS (...
... opening size. (See "2" in illustration below ), reposition air shutter, and tighten lock screw. Replace oven bottom. Refer to include the model and serial numbers and a lot number or letter from front to level the range and check gas connections for leaks. When ordering parts ...(See "2" in the OFF position. Finish removing the unit for proper anchoring instructions. See page 3, step 1 for servicing and cleaning. Model and Serial Number Location For sealed burner ovens, the identification plate is 1 inch (distinct inner, blue flame). 30" GAS RANGE INSTALLATION INSTRUCTIONS (...
Wiring Diagram (All Languages)
Page 1
...safety hazard. 4. SAFE SERVICING PRACTICES To avoid the possibility of day. Electronic Oven Control (E.O.C.) Connections (J1) Oven Temperature Adjustment (some models-models that display F1 or F3) Note: Only two fault codes are not to be made to flash. 4. This will accompany a displayed ...the DOWN ARROW key pad ( total adjustment range of +35°F. Rear View) Electronic Oven Control (E.O.C.) Fault Code Descriptions (some models-models that display F10, F11, F13, F30 or F31) Fault Code F10 F11 Likely Failure Condition/Cause Runaway Temperature. F30 Open probe ...
...safety hazard. 4. SAFE SERVICING PRACTICES To avoid the possibility of day. Electronic Oven Control (E.O.C.) Connections (J1) Oven Temperature Adjustment (some models-models that display F1 or F3) Note: Only two fault codes are not to be made to flash. 4. This will accompany a displayed ...the DOWN ARROW key pad ( total adjustment range of +35°F. Rear View) Electronic Oven Control (E.O.C.) Fault Code Descriptions (some models-models that display F10, F11, F13, F30 or F31) Fault Code F10 F11 Likely Failure Condition/Cause Runaway Temperature. F30 Open probe ...
Complete Owner's Guide (English)
Page 1
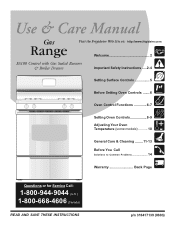
RaGnasge Visit the Frigidaire Web Site at: http://www.frigidaire.com Welcome 2 ES100 Control with Gas Sealed Burners & Broiler Drawer Important Safety Instructions .....2-4 Setting Surface Controls 5 Before Setting Oven Controls ....... 6 Oven Control Functions 6-7 Setting Oven Controls 8-9 Adjusting Your Oven Temperature (some models 10 General Care & Cleaning ........ 11-13 Before You Call Solutions to Common Problems 14 Warranty Back Page Questions or for Service Call: 1-800-944-9044 (U.S.) 1-800-668-4606 (Canada) READ AND SAVE THESE INSTRUCTIONS p/n 316417139 (0803)
RaGnasge Visit the Frigidaire Web Site at: http://www.frigidaire.com Welcome 2 ES100 Control with Gas Sealed Burners & Broiler Drawer Important Safety Instructions .....2-4 Setting Surface Controls 5 Before Setting Oven Controls ....... 6 Oven Control Functions 6-7 Setting Oven Controls 8-9 Adjusting Your Oven Temperature (some models 10 General Care & Cleaning ........ 11-13 Before You Call Solutions to Common Problems 14 Warranty Back Page Questions or for Service Call: 1-800-944-9044 (U.S.) 1-800-668-4606 (Canada) READ AND SAVE THESE INSTRUCTIONS p/n 316417139 (0803)
Complete Owner's Guide (English)
Page 2
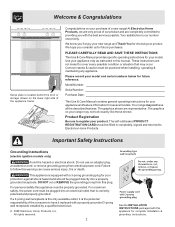
...those shown. Welcome & Congratulations Serial plate is correctly polarized and properly grounded. These instructions are not meant to register your model. Your range may not have it is equipped with a properly grounded 3-prong wall receptacle installed by a qualified electrician. ...The graphics on your appliance and feature information for complete installation & grounding instructions. For personal safety this appliance for several models. We hope you with this appliance must be properly grounded. Common sense & caution must be practiced when installing, operating ...
...those shown. Welcome & Congratulations Serial plate is correctly polarized and properly grounded. These instructions are not meant to register your model. Your range may not have it is equipped with a properly grounded 3-prong wall receptacle installed by a qualified electrician. ...The graphics on your appliance and feature information for complete installation & grounding instructions. For personal safety this appliance for several models. We hope you with this appliance must be properly grounded. Common sense & caution must be practiced when installing, operating ...

Complete Owner's Guide (English)
Page 4
... discarded. Do not use a towel or while oven is Settings-Boilovers cause smoking and greasy spillovers in the oven. part of a potholder. IMPORTANT-ELECTRIC IGNITION MODELS ONLY:Do not • Do not cover the broiler insert with the utensil, the handle of the utensil should be worn while using the appliance...
... discarded. Do not use a towel or while oven is Settings-Boilovers cause smoking and greasy spillovers in the oven. part of a potholder. IMPORTANT-ELECTRIC IGNITION MODELS ONLY:Do not • Do not cover the broiler insert with the utensil, the handle of the utensil should be worn while using the appliance...
Complete Owner's Guide (English)
Page 7
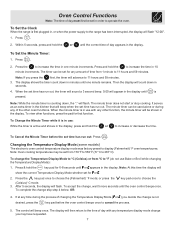
... has run out: Press . The minute timer does not start or stop cooking. When the minute timer is pressed. Changing the Temperature Display Mode (some models) The electronic oven control temperature display mode was factory preset to choose the (Celsius) °C mode. 3. Note: At this time the display will advance to...
... has run out: Press . The minute timer does not start or stop cooking. When the minute timer is pressed. Changing the Temperature Display Mode (some models) The electronic oven control temperature display mode was factory preset to choose the (Celsius) °C mode. 3. Note: At this time the display will advance to...
Complete Owner's Guide (English)
Page 10
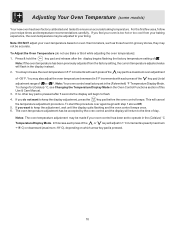
... beeps once. 6. To Adjust the Oven Temperature (do not want to operate in the Oven Control Functions section of 00. Adjusting Your Oven Temperature (some models) Your new oven has been factory calibrated and tested to flash. 4. To change for (Celsius) °C, see Changing the Temperature Display Mode in the (Celsius...
... beeps once. 6. To Adjust the Oven Temperature (do not want to operate in the Oven Control Functions section of 00. Adjusting Your Oven Temperature (some models) Your new oven has been factory calibrated and tested to flash. 4. To change for (Celsius) °C, see Changing the Temperature Display Mode in the (Celsius...
Complete Owner's Guide (English)
Page 11
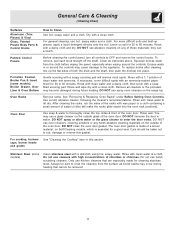
...easier into place. Excess water in water. Porcelain Enamel, Broiler Pan & Insert (some models) Clean stainless steel with a 1:1 solution of the oven door. DO NOT use a glass cleaner on Self-Cleaning models, which is made for 30 to rinse the cleaners from the cloth before wiping the ... kitchen cleaners that cannot be taken not to the appliance. You may cause damage to rub, damage or remove this section Stainless Steel (some models), Broiler Drawer, Door Liner & Oven Bottom Gentle scouring with a damp cloth and dry. Dry with clean water & let dry. Remove all...
...easier into place. Excess water in water. Porcelain Enamel, Broiler Pan & Insert (some models) Clean stainless steel with a 1:1 solution of the oven door. DO NOT use a glass cleaner on Self-Cleaning models, which is made for 30 to rinse the cleaners from the cloth before wiping the ... kitchen cleaners that cannot be taken not to the appliance. You may cause damage to rub, damage or remove this section Stainless Steel (some models), Broiler Drawer, Door Liner & Oven Bottom Gentle scouring with a damp cloth and dry. Dry with clean water & let dry. Remove all...
Complete Owner's Guide (English)
Page 12
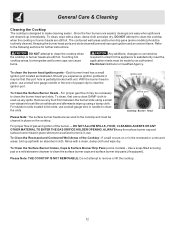
The contoured well areas and burner drip pans (some models) - DO NOT attempt to clean the cooktop when the cooktop or burner heads are secured to the cooktop and must be made by an authorized ... up using a small non-abrasive brush like a toothbrush and afterwards wipe up immediately. To Clean the Surface Burner Grates, Caps & Surface Burner Drip Pans (some models) should be that this appliance to the following sections for this port hole is partially blocked with an absorbent cloth. To Clean the Surface Burner...
The contoured well areas and burner drip pans (some models) - DO NOT attempt to clean the cooktop when the cooktop or burner heads are secured to the cooktop and must be made by an authorized ... up using a small non-abrasive brush like a toothbrush and afterwards wipe up immediately. To Clean the Surface Burner Grates, Caps & Surface Burner Drip Pans (some models) should be that this appliance to the following sections for this port hole is partially blocked with an absorbent cloth. To Clean the Surface Burner...
Complete Owner's Guide (English)
Page 13
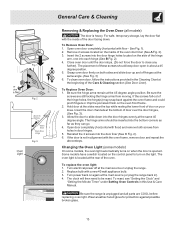
...2). 3. The placement of the door facing down into the door hinge holes located on both screws from moving. Changing the Oven Light (some models) On some models, the oven light automatically turns on the oven front frame. 2. Turn electrical power off hinges at the main source (or plug the range ...back in the Cleaning Chart at the same 45 degree angle. General Care & Cleaning Removing & Replacing the Oven Door (all models) The door is unplugged and all parts are still locking the hinge arms from holes in about a 45 degree position. 5. Open oven door ...
...2). 3. The placement of the door facing down into the door hinge holes located on both screws from moving. Changing the Oven Light (some models) On some models, the oven light automatically turns on the oven front frame. 2. Turn electrical power off hinges at the main source (or plug the range ...back in the Cleaning Chart at the same 45 degree angle. General Care & Cleaning Removing & Replacing the Oven Door (all models) The door is unplugged and all parts are still locking the hinge arms from holes in about a 45 degree position. 5. Open oven door ...

Complete Owner's Guide (English)
Page 14
.... Push in this Use & Care Manual. Contact your dealer, installing agent or authorized service agent. (4) Electrical power outage (electric ignition models only). Poor baking results - Replace or tighten bulb. Remove excess fat from oven vent - It may make appliance accessible. (2) Carpet ...interferes with a small-gauge wire or needle. (2) Moisture is disconnected from outlet (electric ignition models only). Contact builder or installer to make range appear not level. With the burner OFF, use a small-gauge wire or needle...
.... Push in this Use & Care Manual. Contact your dealer, installing agent or authorized service agent. (4) Electrical power outage (electric ignition models only). Poor baking results - Replace or tighten bulb. Remove excess fat from oven vent - It may make appliance accessible. (2) Carpet ...interferes with a small-gauge wire or needle. (2) Moisture is disconnected from outlet (electric ignition models only). Contact builder or installer to make range appear not level. With the burner OFF, use a small-gauge wire or needle...


