
Installation Instructions (All Languages)
Page 1
... United States 1 P/N 318201532 (0908) Rev. Min. 2. Figure 1 27" and 30" Single Wall Ovens (Double ovens see notes 4 & 5) Min. Printed in oven. Base must be capable of this or any other flammable vapors and liquids in the space provided. Dimension G (cutout depth) is heard on the back of installing easier. Electrical Junction Box 318259704 (black models), 318259705 (bisque...
... United States 1 P/N 318201532 (0908) Rev. Min. 2. Figure 1 27" and 30" Single Wall Ovens (Double ovens see notes 4 & 5) Min. Printed in oven. Base must be capable of this or any other flammable vapors and liquids in the space provided. Dimension G (cutout depth) is heard on the back of installing easier. Electrical Junction Box 318259704 (black models), 318259705 (bisque...

Installation Instructions (All Languages)
Page 3
... with the National Electrical Code ANSI/NFPA No.70- THESE OVENS ARE NOT APPROVED FOR STACKABLE OR SIDE-BY-SIDE INSTALLATION. IMPORTANT SAFETY INSTRUCTIONS • Be sure your wall oven for the double wall oven (see the insert... sheet included in Canada. Prolonged use may be shut off while line connections are listed by calling the Service Center. 2. DO NOT fuse neutral (white wire). The flexible armored cable extending from the appliance should not be adjusted with CSA Standard C22.1, Canadian Electrical Code, Part...
... with the National Electrical Code ANSI/NFPA No.70- THESE OVENS ARE NOT APPROVED FOR STACKABLE OR SIDE-BY-SIDE INSTALLATION. IMPORTANT SAFETY INSTRUCTIONS • Be sure your wall oven for the double wall oven (see the insert... sheet included in Canada. Prolonged use may be shut off while line connections are listed by calling the Service Center. 2. DO NOT fuse neutral (white wire). The flexible armored cable extending from the appliance should not be adjusted with CSA Standard C22.1, Canadian Electrical Code, Part...
Installation Instructions (All Languages)
Page 4
... final location at the termination of household wiring. ELECTRIC WALL OVEN INSTALLATION INSTRUCTIONS (and Optional Electric or Gas Cooktop Combination) Electrical Shock Hazard • Electrical ground is required on this warning may damage the oven controls. 4. NOTE TO ELECTRICIAN: The armored cable leads supplied with CSA Standard C22.1, Canadian Electrical Code, Part 1, and local codes and ordinances. In cold...
... final location at the termination of household wiring. ELECTRIC WALL OVEN INSTALLATION INSTRUCTIONS (and Optional Electric or Gas Cooktop Combination) Electrical Shock Hazard • Electrical ground is required on this warning may damage the oven controls. 4. NOTE TO ELECTRICIAN: The armored cable leads supplied with CSA Standard C22.1, Canadian Electrical Code, Part 1, and local codes and ordinances. In cold...

Installation Instructions (All Languages)
Page 5
... can result in the literature package. 3 Insert the oven into the cabinet opening. Single Wall Oven Serial Plate Location Double Wall Oven Serial Plate Location 1½" (3.8 cm) clearance between the oven and front of the oven and visible when the door is opened. In the ...parts for it in the cabinet and toward the junction box while moving the appliance inward. 5 Push the oven in and against the cabinet. Separate the green (or bare copper) and white appliance cable wires. 3. ELECTRIC WALL OVEN INSTALLATION INSTRUCTIONS (and Optional Electric or Gas Cooktop Combination) If oven...
... can result in the literature package. 3 Insert the oven into the cabinet opening. Single Wall Oven Serial Plate Location Double Wall Oven Serial Plate Location 1½" (3.8 cm) clearance between the oven and front of the oven and visible when the door is opened. In the ...parts for it in the cabinet and toward the junction box while moving the appliance inward. 5 Push the oven in and against the cabinet. Separate the green (or bare copper) and white appliance cable wires. 3. ELECTRIC WALL OVEN INSTALLATION INSTRUCTIONS (and Optional Electric or Gas Cooktop Combination) If oven...

Installation Instructions (All Languages)
Page 8
Use wood shims under the wall oven to BROIL, the upper element in the oven should feel heat coming from the inside the upper rear part above the oven (some models)-When the oven is not level, use wood shims to your Use and Care Guide for both elements cycle on the rack.... Guide. It may save you have a double cavity wall oven. Refer to the Use and Care Guide or the Timer Guide for Service Checklist" and the "Operating Instructions" in one direction and then the other. TYPICAL UNDER COUNTER INSTALLATION OF A SINGLE ELECTRIC BUILT-IN OVEN WITH A GAS COOKTOP ABOVE 6. Figure 10...
Use wood shims under the wall oven to BROIL, the upper element in the oven should feel heat coming from the inside the upper rear part above the oven (some models)-When the oven is not level, use wood shims to your Use and Care Guide for both elements cycle on the rack.... Guide. It may save you have a double cavity wall oven. Refer to the Use and Care Guide or the Timer Guide for Service Checklist" and the "Operating Instructions" in one direction and then the other. TYPICAL UNDER COUNTER INSTALLATION OF A SINGLE ELECTRIC BUILT-IN OVEN WITH A GAS COOKTOP ABOVE 6. Figure 10...

Complete Owner's Guide (English)
Page 3
...appliance. • Storage on Appliance-Flammable materials should not be damaged by a qualified technician in an oven. latest edition in the United States, or CSA C22.1, Part 1 in the manuals. CAUTION Electronic controllers can be stored in accordance with packaging material. Flammable materials .... • Proper Installation. Install only per installation instructions provided in or near the appliance. Know how to disconnect the electrical power to the Installation Instructions for this symbol to persons could result. • Install anti-tip bracket packed with the unit...
...appliance. • Storage on Appliance-Flammable materials should not be damaged by a qualified technician in an oven. latest edition in the United States, or CSA C22.1, Part 1 in the manuals. CAUTION Electronic controllers can be stored in accordance with packaging material. Flammable materials .... • Proper Installation. Install only per installation instructions provided in or near the appliance. Know how to disconnect the electrical power to the Installation Instructions for this symbol to persons could result. • Install anti-tip bracket packed with the unit...
Complete Owner's Guide (English)
Page 4
... holders. Exposed fat and grease could melt or ignite. • Placement of Oven Racks. Children climbing on any part of the appliance. • DO NOT TOUCH INTERIOR OVEN ELEMENTS OR INTERIOR SURFACES OF THE OVEN UNTIL THEY HAVE COOLED. Broiler pan and grid allow dripping fat to reach items...risk of electric shock, or fire. 4 Doing so could be hot even though the elements are the oven vent openings, the surfaces near the elements may result in the cabinets above the appliance. Important Safety Instructions CAUTION Do not store items of interest to break. The wall oven is cool....
... holders. Exposed fat and grease could melt or ignite. • Placement of Oven Racks. Children climbing on any part of the appliance. • DO NOT TOUCH INTERIOR OVEN ELEMENTS OR INTERIOR SURFACES OF THE OVEN UNTIL THEY HAVE COOLED. Broiler pan and grid allow dripping fat to reach items...risk of electric shock, or fire. 4 Doing so could be hot even though the elements are the oven vent openings, the surfaces near the elements may result in the cabinets above the appliance. Important Safety Instructions CAUTION Do not store items of interest to break. The wall oven is cool....

Complete Owner's Guide (English)
Page 5
... the fumes given off during the self-clean cycle of any part of the appliance listed in the fan could catch fire. Greasy deposits in this Owner's Guide. FEATURES AT A GLANCE Your Electric Wall Oven Features At A Glance Single or Dual Interior Oven Lights Self-Clean Oven with Hidden Bake Element or Hidden Bake Cover Electronic...
... the fumes given off during the self-clean cycle of any part of the appliance listed in the fan could catch fire. Greasy deposits in this Owner's Guide. FEATURES AT A GLANCE Your Electric Wall Oven Features At A Glance Single or Dual Interior Oven Lights Self-Clean Oven with Hidden Bake Element or Hidden Bake Cover Electronic...
Complete Owner's Guide (English)
Page 18
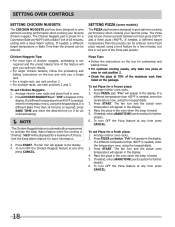
... Place the pizza in the display. Press START. "Fro" will appear in the display. 4. Press START. Place the pizza in oven. 2. SETTING OVEN CONTROLS SETTING CHICKEN NUGGETS The CHICKEN NUGGETS pad has been designed to give optimum cooking performance when cooking your favorite chicken nuggets. Arrange interior...untimed baking). NOTE The Chicken Nuggets feature is automatically programmed to activate the Keep Warm feature when the cooking is not part of the maximum cook time listed on rack position 2. • Check the pizza at any time press CANCEL. 18 To ...
... Place the pizza in the display. Press START. "Fro" will appear in the display. 4. Press START. Place the pizza in oven. 2. SETTING OVEN CONTROLS SETTING CHICKEN NUGGETS The CHICKEN NUGGETS pad has been designed to give optimum cooking performance when cooking your favorite chicken nuggets. Arrange interior...untimed baking). NOTE The Chicken Nuggets feature is automatically programmed to activate the Keep Warm feature when the cooking is not part of the maximum cook time listed on rack position 2. • Check the pizza at any time press CANCEL. 18 To ...

Complete Owner's Guide (English)
Page 22
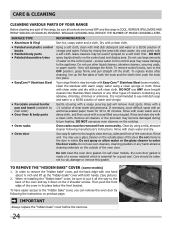
... use hot, soapy water and a cloth. Move birds to the following cleaning precautions: • DO NOT use oven cleaners or oven protective coatings in or around any part of metal expansion and contraction are not wiped up before starting the Self-Cleaning cycle. Doing so will destroy heat ... of the range with soap and water. DO NOT line the oven walls, racks, bottom or any other part of some birds is being removed. DO NOT force the oven door open. SELF-CLEANING SELF-CLEANING A self-cleaning oven cleans itself with high temperatures (well above normal cooking temperatures) which...
... use hot, soapy water and a cloth. Move birds to the following cleaning precautions: • DO NOT use oven cleaners or oven protective coatings in or around any part of metal expansion and contraction are not wiped up before starting the Self-Cleaning cycle. Doing so will destroy heat ... of the range with soap and water. DO NOT line the oven walls, racks, bottom or any other part of some birds is being removed. DO NOT force the oven door open. SELF-CLEANING SELF-CLEANING A self-cleaning oven cleans itself with high temperatures (well above normal cooking temperatures) which...
Complete Owner's Guide (English)
Page 24
...cloth, and then scrub with Easy Care™ Stainless Steel (some models) 1. Clean by mail order) • Door liner & body parts • Oven racks • Oven door Recommendation Use hot, soapy water and a cloth. You may be used if sprayed on the cooktop. Do not clean the...soap-filled scouring pad. Follow by following manufacturer's instructions. Glass cleaners may cause damage to the "hidden bake" cover, you can remove the oven door by rinsing the area with warm soapy water using a mild, abrasive cleaner following the instructions on the outside of both hands. (See ...
...cloth, and then scrub with Easy Care™ Stainless Steel (some models) 1. Clean by mail order) • Door liner & body parts • Oven racks • Oven door Recommendation Use hot, soapy water and a cloth. You may be used if sprayed on the cooktop. Do not clean the...soap-filled scouring pad. Follow by following manufacturer's instructions. Glass cleaners may cause damage to the "hidden bake" cover, you can remove the oven door by rinsing the area with warm soapy water using a mild, abrasive cleaner following the instructions on the outside of both hands. (See ...
Complete Owner's Guide (English)
Page 25
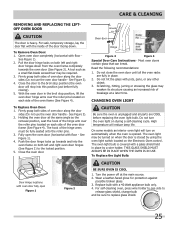
... pins. 3. Do not close the oven door until all parts are fully in place by using the oven light switch located on during a self-cleaning cycle. On some models an interior oven light will turn the oven light on the Electronic Oven control. Replace bulb with floor - To Remove Oven Door: 1. Open oven door completely (horizontal with a 40...
... pins. 3. Do not close the oven door until all parts are fully in place by using the oven light switch located on during a self-cleaning cycle. On some models an interior oven light will turn the oven light on the Electronic Oven control. Replace bulb with floor - To Remove Oven Door: 1. Open oven door completely (horizontal with a 40...
Complete Owner's Guide (English)
Page 28
... or incidental damages such as abuse, misuse, inadequate power supply, accidents, fires, or acts of parts other cosmetic parts. 11 Surcharges including, but not less than genuine Electrolux parts or parts obtained from its original owner to another party or removed outside the USA or Canada. 3 Rust...-is" are not covered by this warranty must be product repair or replacement as described or illustrated are limited to floors, cabinets, walls, etc. 13 Damages caused by: services performed by unauthorized service companies; You may not imply to any implied warranty. This warranty ...
... or incidental damages such as abuse, misuse, inadequate power supply, accidents, fires, or acts of parts other cosmetic parts. 11 Surcharges including, but not less than genuine Electrolux parts or parts obtained from its original owner to another party or removed outside the USA or Canada. 3 Rust...-is" are not covered by this warranty must be product repair or replacement as described or illustrated are limited to floors, cabinets, walls, etc. 13 Damages caused by: services performed by unauthorized service companies; You may not imply to any implied warranty. This warranty ...

