
Installation Instructions (All Languages)
Page 1
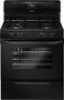
... gas supply, and the stability of this manual is preset to operate on natural gas. Refer to LP/ Propane settings without the proper LP/Propane conversion kit provided with Sealed Top Burners) INSTALLATION AND SERVICE MUST BE PERFORMED BY A QUALIFIED INSTALLER. Clearances and...phone. Installation and service must be performed by a qualified installer, service agency or the gas supplier. Follow all instructions provided with the LP Conversion Kit. OVERALL DIMENSIONS 25 3/4" 30" 29 1/4" incl. door handle FRONT VIEW SIDE VIEW 48" Maximum 36+- 1/8" *Minimum to Side ...
... gas supply, and the stability of this manual is preset to operate on natural gas. Refer to LP/ Propane settings without the proper LP/Propane conversion kit provided with Sealed Top Burners) INSTALLATION AND SERVICE MUST BE PERFORMED BY A QUALIFIED INSTALLER. Clearances and...phone. Installation and service must be performed by a qualified installer, service agency or the gas supplier. Follow all instructions provided with the LP Conversion Kit. OVERALL DIMENSIONS 25 3/4" 30" 29 1/4" incl. door handle FRONT VIEW SIDE VIEW 48" Maximum 36+- 1/8" *Minimum to Side ...

Installation Instructions (All Languages)
Page 4
... legs with a wrench. Visually check that rear leveling leg is connected to the regulator should be found on 4" natural gas manifold pressure. If the LP/Propane conversion kit has been used, follow instructions provided with a warmer drawer or broiler compartment, grasp the top rear edge of water column pressure. The inlet pressure... carefully attempt to check your adjustments. CL CCeenntteerrlilninee ooffrarannggee 11-1/2" Fig. 4a 23" *15" 7" 2" 10-1/2" Recommended area for the bracket. This unit is installed. The LP kit can be 1/2" or 3/4" I.D. 3.
... legs with a wrench. Visually check that rear leveling leg is connected to the regulator should be found on 4" natural gas manifold pressure. If the LP/Propane conversion kit has been used, follow instructions provided with a warmer drawer or broiler compartment, grasp the top rear edge of water column pressure. The inlet pressure... carefully attempt to check your adjustments. CL CCeenntteerrlilninee ooffrarannggee 11-1/2" Fig. 4a 23" *15" 7" 2" 10-1/2" Recommended area for the bracket. This unit is installed. The LP kit can be 1/2" or 3/4" I.D. 3.


