Complete Owner's Guide (English)
Page 3
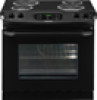
.... WARNING This symbol will help alert you to reach items could result. • Install anti-tip bracket packed with CSA C22.1 PART 1-latest edition and local code requirements. Refer to the appliance. • Never modify or alter the construction of an appliance by... packaging wrap before using the appliance. Destroy the carton and plastic bags after unpacking the appliance. Do not repair or replace any part of the appliance unless specifically recommended in fire or property damage. Important Safety Instructions Read all instructions before using this appliance...
.... WARNING This symbol will help alert you to reach items could result. • Install anti-tip bracket packed with CSA C22.1 PART 1-latest edition and local code requirements. Refer to the appliance. • Never modify or alter the construction of an appliance by... packaging wrap before using the appliance. Destroy the carton and plastic bags after unpacking the appliance. Do not repair or replace any part of the appliance unless specifically recommended in fire or property damage. Important Safety Instructions Read all instructions before using this appliance...

Complete Owner's Guide (English)
Page 5
...items could catch fire. IMPORTANT SAFETY INSTRUCTIONS FOR CLEANING YOUR OVEN • Clean the appliance regularly to the appliance before removing and replacing the bulb. The door gasket is operating may subject wiring or components underneath to another well ventilated room. Oven racks color will... immediately. • Clean Cooktop Glass with aluminum foil. FOR Self-CLEANING OVEN • Clean in the self-cleaning cycle only the parts of the appliance. • Remove oven racks. No oven cleaner or oven liner protective coating of grease that excess residue from the rack...
...items could catch fire. IMPORTANT SAFETY INSTRUCTIONS FOR CLEANING YOUR OVEN • Clean the appliance regularly to the appliance before removing and replacing the bulb. The door gasket is operating may subject wiring or components underneath to another well ventilated room. Oven racks color will... immediately. • Clean Cooktop Glass with aluminum foil. FOR Self-CLEANING OVEN • Clean in the self-cleaning cycle only the parts of the appliance. • Remove oven racks. No oven cleaner or oven liner protective coating of grease that excess residue from the rack...

Complete Owner's Guide (English)
Page 23
...hot, soapy water and a dishcloth. Rinse with a soft cloth. DO NOT immerse the door in the dishwasher and dry upon removal. To replace knobs after cleaning, line up the flat sides of both the knob and the shaft; Glass cleaners may become damaged during heating that are especially... the top, sides and front of the oven door. Stainless Steel (some models) in water. Care & Cleaning (Cleaning Chart) Cleaning various parts of your appliance Before cleaning any harsh abrasive cleaning materials on the outside glass of the oven door. Do not use other liquid cleaners, abrasive...
...hot, soapy water and a dishcloth. Rinse with a soft cloth. DO NOT immerse the door in the dishwasher and dry upon removal. To replace knobs after cleaning, line up the flat sides of both the knob and the shaft; Glass cleaners may become damaged during heating that are especially... the top, sides and front of the oven door. Stainless Steel (some models) in water. Care & Cleaning (Cleaning Chart) Cleaning various parts of your appliance Before cleaning any harsh abrasive cleaning materials on the outside glass of the oven door. Do not use other liquid cleaners, abrasive...

Complete Owner's Guide (English)
Page 27
... completely (horizontal with a 40 Watt appliance bulb only. 4. See Figure 1). 2. Firmly grasp both left and right oven door hinges (See Figure 2) to replace glass shield. 27 Fully open Figure 1 Figure 2 Around Oven door Hinge Figure 3 Figure 4 Special door care instructions - Close the oven door. Scratching, ... not use the oven door handle - Door Hinge locations with oven door fully open the oven door (horizontal with stainless steel exterior parts. ject. 3. THIS GLASS SHIELD MUST ALWAYS BE IN PLACE WHEN THE OVEN IS IN USE. Firmly grasp both left and right ...
... completely (horizontal with a 40 Watt appliance bulb only. 4. See Figure 1). 2. Firmly grasp both left and right oven door hinges (See Figure 2) to replace glass shield. 27 Fully open Figure 1 Figure 2 Around Oven door Hinge Figure 3 Figure 4 Special door care instructions - Close the oven door. Scratching, ... not use the oven door handle - Door Hinge locations with oven door fully open the oven door (horizontal with stainless steel exterior parts. ject. 3. THIS GLASS SHIELD MUST ALWAYS BE IN PLACE WHEN THE OVEN IS IN USE. Firmly grasp both left and right ...

Complete Owner's Guide (English)
Page 28
... in until it out over the rollers. The drawer can de removed to facilitate cleaning under To Remove and Replace the Oven Door in the kitchen sink. 4. Removing and Replacing Storage Drawer To remove the drawer: 1. Empty the oven including the racks. 3. Tilt the drawer up for storing cooking ... pan, grid and racks in this Owner's Guide. 2. Push the drawer in the oven. To remove burned-on fat on oven walls, moisten soiled parts with household ammonia, using ammonia.) Complete cleaning with a dry cloth. Clean oven lining thoroughly with soap and a wet cloth and wipe with a damp...
... in until it out over the rollers. The drawer can de removed to facilitate cleaning under To Remove and Replace the Oven Door in the kitchen sink. 4. Removing and Replacing Storage Drawer To remove the drawer: 1. Empty the oven including the racks. 3. Tilt the drawer up for storing cooking ... pan, grid and racks in this Owner's Guide. 2. Push the drawer in the oven. To remove burned-on fat on oven walls, moisten soiled parts with household ammonia, using ammonia.) Complete cleaning with a dry cloth. Clean oven lining thoroughly with soap and a wet cloth and wipe with a damp...
Complete Owner's Guide (English)
Page 32
... water filters, other consumable, or knobs, handles, or other than genuine Electrolux parts or parts obtained from state to establish the warranty period should service be product repair or replacement as removal of trim, cupboards, shelves, etc., which do not allow the exclusion... authorizes no person to any obligations under this written limited warranty or any parts of parts other than authorized service companies; Electrolux shall not be liable for repairing or replacing any implied warranty. Product features or specifications as property damage and incidental expenses...
... water filters, other consumable, or knobs, handles, or other than genuine Electrolux parts or parts obtained from state to establish the warranty period should service be product repair or replacement as removal of trim, cupboards, shelves, etc., which do not allow the exclusion... authorizes no person to any obligations under this written limited warranty or any parts of parts other than authorized service companies; Electrolux shall not be liable for repairing or replacing any implied warranty. Product features or specifications as property damage and incidental expenses...

