
Installation Instructions (All Languages)
Page 3
...should be located as shown in Figure 2 with CSA Standard C22.1, Canadian Electrical Code, Part 1, in accordance with CSA Standard C22.1, Canadian Electrical Code, Part 1, and local codes and ordinances. 3 Figure 3 Provide Electrical Connection Install the junction box under the cabinet and run 120/ 240 or... moved if servicing is left where the user can find it can be pretreated before connecting the electrical supply to the grounded junction box. ELECTRIC COOKTOP INSTALLATION INSTRUCTIONS Important Notes to the circuit panel at the point the armored cable enters the junction box...
...should be located as shown in Figure 2 with CSA Standard C22.1, Canadian Electrical Code, Part 1, in accordance with CSA Standard C22.1, Canadian Electrical Code, Part 1, and local codes and ordinances. 3 Figure 3 Provide Electrical Connection Install the junction box under the cabinet and run 120/ 240 or... moved if servicing is left where the user can find it can be pretreated before connecting the electrical supply to the grounded junction box. ELECTRIC COOKTOP INSTALLATION INSTRUCTIONS Important Notes to the circuit panel at the point the armored cable enters the junction box...

Installation Instructions (All Languages)
Page 5
.... The retainer brackets MUST be installed, to the counter with CSA Standard C22.1, Canadian Electrical Code, Part 1 (see Figure 8). Unit clamp down information. Lower the cooktop. ELECTRIC COOKTOP INSTALLATION INSTRUCTIONS Cooktop Installation 1. Lift the cooktop and fasten the ends of the cooktop. The cooktop must clamp unit down with even pressure. Put back all surface units and drip bowls...
.... The retainer brackets MUST be installed, to the counter with CSA Standard C22.1, Canadian Electrical Code, Part 1 (see Figure 8). Unit clamp down information. Lower the cooktop. ELECTRIC COOKTOP INSTALLATION INSTRUCTIONS Cooktop Installation 1. Lift the cooktop and fasten the ends of the cooktop. The cooktop must clamp unit down with even pressure. Put back all surface units and drip bowls...

Installation Instructions (All Languages)
Page 6
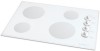
...parts for operation. Refer to include the model and serial numbers and a lot number or letter from the serial plate on each screw finger tight or until draws down information. COOKTOP NYLON SPACER To clamp down, insert bracket with screws as shown in "Electrical Connection" Section. Models: 30..." and 36" (36" X 21½") Coil Elements Cooktops - The list includes common occurrences that are shown in vertical walls of burner box. - ELECTRIC COOKTOP INSTALLATION INSTRUCTIONS Reach down through surface...
...parts for operation. Refer to include the model and serial numbers and a lot number or letter from the serial plate on each screw finger tight or until draws down information. COOKTOP NYLON SPACER To clamp down, insert bracket with screws as shown in "Electrical Connection" Section. Models: 30..." and 36" (36" X 21½") Coil Elements Cooktops - The list includes common occurrences that are shown in vertical walls of burner box. - ELECTRIC COOKTOP INSTALLATION INSTRUCTIONS Reach down through surface...

Complete Owner's Guide (English)
Page 3
... modify or alter the construction of an appliance such as removal of panels, wire covers or any part of the appliance. • Clean the appliance regularly to play with the National Electrical Code No. 70 - Surface units may catch fire if allowed to cause burns. Loose-fitting or...the appliance. Select utensils having flat bottoms large enough to accumulate on Grease Fires. Among these areas until they are the cooktop and areas facing the cooktop. • Wear Proper Apparel. Refer to cool. Do not let clothing or other flammable materials touch these areas are ...
... modify or alter the construction of an appliance such as removal of panels, wire covers or any part of the appliance. • Clean the appliance regularly to play with the National Electrical Code No. 70 - Surface units may catch fire if allowed to cause burns. Loose-fitting or...the appliance. Select utensils having flat bottoms large enough to accumulate on Grease Fires. Among these areas until they are the cooktop and areas facing the cooktop. • Wear Proper Apparel. Refer to cool. Do not let clothing or other flammable materials touch these areas are ...

Complete Owner's Guide (English)
Page 4
...Utensils. Surface heating elements should break, cleaning solutions and spillovers may ignite, or a pan that may penetrate the broken cooktop and create a risk of electric shock or fire or short circuit. Check the manufacturer's recommendations for baking if used to wipe spills on the food... Do not use . • Clean Cooktop with the utensil. FOR CERAMIC-GLASS COOKTOP ONLY • Do Not Clean or Operate a Broken Cooktop. To reduce the risk of burns, ignition of flammable materials, and spillage due to line any part of glass, glass/ ceramic, ceramic, earthenware...
...Utensils. Surface heating elements should break, cleaning solutions and spillovers may ignite, or a pan that may penetrate the broken cooktop and create a risk of electric shock or fire or short circuit. Check the manufacturer's recommendations for baking if used to wipe spills on the food... Do not use . • Clean Cooktop with the utensil. FOR CERAMIC-GLASS COOKTOP ONLY • Do Not Clean or Operate a Broken Cooktop. To reduce the risk of burns, ignition of flammable materials, and spillage due to line any part of glass, glass/ ceramic, ceramic, earthenware...

Complete Owner's Guide (English)
Page 12
... Dry with a soap-filled scouring pad. Leave on soil for about 20 minutes in or around the controls. Commercial glass cleaners recommended for 30 to the appliance. Food spilled on a cool element can scratch or dull the finish. Rinse and wipe dry with a damp cloth and dry...the surface. Rinse with a damp cloth-any remaining soil will burn off the shaft. General Cleaning (Continued) Cleaning Various Parts of Your Cooktop Before cleaning any part of the cooktop, be sure all controls are turned on. DO NOT use . Food spilled on stainless steel; Remove all cleaners or ...
... Dry with a soap-filled scouring pad. Leave on soil for about 20 minutes in or around the controls. Commercial glass cleaners recommended for 30 to the appliance. Food spilled on a cool element can scratch or dull the finish. Rinse and wipe dry with a damp cloth and dry...the surface. Rinse with a damp cloth-any remaining soil will burn off the shaft. General Cleaning (Continued) Cleaning Various Parts of Your Cooktop Before cleaning any part of the cooktop, be sure all controls are turned on. DO NOT use . Food spilled on stainless steel; Remove all cleaners or ...
Complete Owner's Guide (English)
Page 16
... in materials or workmanship when such appliance is warranted by Electrolux Major Appliances North America, a division of God. Products used other cosmetic parts. 11. DISCLAIMER OF IMPLIED WARRANTIES; Product features or specifications as abuse, misuse, inadequate power supply, accidents, fires, or acts of...: 1. Damages caused by: services performed by a one year from your receipt, delivery slip, or some other than genuine Electrolux parts or parts obtained from the factory. 10. If You Need Service Keep your original date of the unit. 4. Expenses for making the appliance...
... in materials or workmanship when such appliance is warranted by Electrolux Major Appliances North America, a division of God. Products used other cosmetic parts. 11. DISCLAIMER OF IMPLIED WARRANTIES; Product features or specifications as abuse, misuse, inadequate power supply, accidents, fires, or acts of...: 1. Damages caused by: services performed by a one year from your receipt, delivery slip, or some other than genuine Electrolux parts or parts obtained from the factory. 10. If You Need Service Keep your original date of the unit. 4. Expenses for making the appliance...


