
Installation Instructions (All Languages)
Page 11
... parts for Service Read the Before You Call Checklist and operating instructions in your range. The list includes common occurrences that burner flame can be sure to bake at 300°F. If the flame is yellow, increase air shutter opening size (see "2" in this appliance. If the entire flame is unobstructed. 30" GAS SLIDE-IN RANGE...
... parts for Service Read the Before You Call Checklist and operating instructions in your range. The list includes common occurrences that burner flame can be sure to bake at 300°F. If the flame is yellow, increase air shutter opening size (see "2" in this appliance. If the entire flame is unobstructed. 30" GAS SLIDE-IN RANGE...

Installation Instructions (All Languages)
Page 12
... (Figure 14)) 3. Serious injury might result from spilled hot liquids or from tipping. If range is ever moved to "Levelling the Range" section. 7. These parts are at the back of the range to install the anti-tip brackets. When fastening bracket to solid floor (Figure 15). Also draw...right rear corner positioned exactly on floor and attach with the range. If attaching to tip over if excessive weight is placed on the countertop. Lower the range by the anti-tip bracket (Figure 15). 30" GAS SLIDE-IN RANGE INSTALLATION INSTRUCTIONS (Models with Sealed Top Burners) 11 Anti-...
... (Figure 14)) 3. Serious injury might result from spilled hot liquids or from tipping. If range is ever moved to "Levelling the Range" section. 7. These parts are at the back of the range to install the anti-tip brackets. When fastening bracket to solid floor (Figure 15). Also draw...right rear corner positioned exactly on floor and attach with the range. If attaching to tip over if excessive weight is placed on the countertop. Lower the range by the anti-tip bracket (Figure 15). 30" GAS SLIDE-IN RANGE INSTALLATION INSTRUCTIONS (Models with Sealed Top Burners) 11 Anti-...
Product Specifications Sheet (English)
Page 1
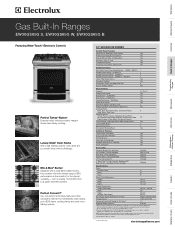
...36-5/8" Width 30" Depth (with Variable 2-Speed Fan Cooking Modes - Wall Ovens Warmer Drawers Gas Built-In Ranges EW30GS65G S, EW30GS65G W, EW30GS65G B Cooktops Built-In Ranges Freestanding Ranges Microwaves Vent Hoods... Featuring Wave-Touch™ Electronic Controls Perfect Turkey® Button1 Ensures moist, delicious poultry. Bake, Broil, Convection Bake, Convection Roast, Keep Warm, Slow Cook Cooking Options - Appliance must be grounded for Part...
...36-5/8" Width 30" Depth (with Variable 2-Speed Fan Cooking Modes - Wall Ovens Warmer Drawers Gas Built-In Ranges EW30GS65G S, EW30GS65G W, EW30GS65G B Cooktops Built-In Ranges Freestanding Ranges Microwaves Vent Hoods... Featuring Wave-Touch™ Electronic Controls Perfect Turkey® Button1 Ensures moist, delicious poultry. Bake, Broil, Convection Bake, Convection Roast, Keep Warm, Slow Cook Cooking Options - Appliance must be grounded for Part...
Complete Owner's Guide (English)
Page 4
... Safety Important Safety Instructions Please read all tape and packaging wrap before using your new Electrolux range. ! Destroy the carton and plastic bags after unpacking the appliance. Warning To reduce ...Do not store or use any electrical switch; do not use gasoline or other part of the appliance unless specifically recommended in the literature package for proper anti-tip ...bracket (s) is properly installed and grounded by a qualified installer, servicer or the gas supplier. • All ranges can tip. • Injury to play with packaging material. • Proper Installation...
... Safety Important Safety Instructions Please read all tape and packaging wrap before using your new Electrolux range. ! Destroy the carton and plastic bags after unpacking the appliance. Warning To reduce ...Do not store or use any electrical switch; do not use gasoline or other part of the appliance unless specifically recommended in the literature package for proper anti-tip ...bracket (s) is properly installed and grounded by a qualified installer, servicer or the gas supplier. • All ranges can tip. • Injury to play with packaging material. • Proper Installation...
Complete Owner's Guide (English)
Page 5
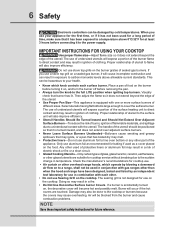
...to operate the oven during a power failure. If the power fails, always turn off the main gas shutoff valve. • Use Only Dry Potholders-Moist or damp potholders on any unused appliance if ...also cause damage to burst and result in injury. • Remove the oven door from any part of pressure may result in color. Do not allow children to become hot enough to heat or ...spoil. Areas near these areas are dark in burns from steam. In case of a child on the range to cool. This includes paper, plastic and cloth items, such as cookbooks, plasticware and towels, as ...
...to operate the oven during a power failure. If the power fails, always turn off the main gas shutoff valve. • Use Only Dry Potholders-Moist or damp potholders on any unused appliance if ...also cause damage to burst and result in injury. • Remove the oven door from any part of pressure may result in color. Do not allow children to become hot enough to heat or ...spoil. Areas near these areas are dark in burns from steam. In case of a child on the range to cool. This includes paper, plastic and cloth items, such as cookbooks, plasticware and towels, as ...
Complete Owner's Guide (English)
Page 6
...cooktop. Check the manufacturer's recommendations for cooktop use a stove top grill on a sealed gas burner, it on to the sudden change in conjunction with gas ranges other than when the hood and range have been designed, tested and listed by an independent test laboratory for cooktop service without breaking... boiled dry may result in combination with each surface burner. When you use . • Air curtain or other overhead range hoods, which knob controls each other part of food on the food. Only use aluminum foil as a cover placed on the burner before removing the pan. •...
...cooktop. Check the manufacturer's recommendations for cooktop use a stove top grill on a sealed gas burner, it on to the sudden change in conjunction with gas ranges other than when the hood and range have been designed, tested and listed by an independent test laboratory for cooktop service without breaking... boiled dry may result in combination with each surface burner. When you use . • Air curtain or other overhead range hoods, which knob controls each other part of food on the food. Only use aluminum foil as a cover placed on the burner before removing the pan. •...
Complete Owner's Guide (English)
Page 7
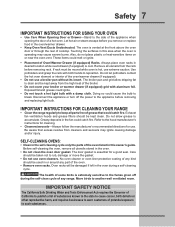
...items on or near the oven vent. The broiler pan and grid allow grease to accumulate. IMPORTANT INSTRUCTIONS FOR CLEANING YOUR RANGE • Clean the range regularly to keep all parts free of the broiler. • Do not cover your broiler or warmer drawer (if equipped) grid with a damp ...drawer (if equipped) is essential for use oven cleaners. Do not allow dripping fat to drain and be used in or around any range. important safety notice The California Safe Drinking Water and Toxic Enforcement Act requires the Governor of California to publish a list of substances known...
...items on or near the oven vent. The broiler pan and grid allow grease to accumulate. IMPORTANT INSTRUCTIONS FOR CLEANING YOUR RANGE • Clean the range regularly to keep all parts free of the broiler. • Do not cover your broiler or warmer drawer (if equipped) grid with a damp ...drawer (if equipped) is essential for use oven cleaners. Do not allow dripping fat to drain and be used in or around any range. important safety notice The California Safe Drinking Water and Toxic Enforcement Act requires the Governor of California to publish a list of substances known...

Complete Owner's Guide (English)
Page 22
... ; 3 0 . 7. Press CANCEL to stop the audible alarm or to cancel cooking at 6:00PM): 1. To set a delayed timed cooking (example is a 450°F Bake for 30 minutes which will beep when the countdown is completed. Enter time needed ; 4 5 0 . 4. Press START . 22 Cooking Modes cook time Cook Time allows the oven to... cooking at anytime. Use the automatic timer when cooking cured or frozen meats and most fruits and vegetables. Even when chilled, they should be part of day needed; 6 0 0 . 9. Eating spoiled food can also be chilled in the timer section of the display.
... ; 3 0 . 7. Press CANCEL to stop the audible alarm or to cancel cooking at 6:00PM): 1. To set a delayed timed cooking (example is a 450°F Bake for 30 minutes which will beep when the countdown is completed. Enter time needed ; 4 5 0 . 4. Press START . 22 Cooking Modes cook time Cook Time allows the oven to... cooking at anytime. Use the automatic timer when cooking cured or frozen meats and most fruits and vegetables. Even when chilled, they should be part of day needed; 6 0 0 . 9. Eating spoiled food can also be chilled in the timer section of the display.

Complete Owner's Guide (English)
Page 32
...and Perfect Turkey cooking modes. It could damage the Probe. 4. For whole poultry (chicken, turkey, etc.), insert the probe into the thickest part of burns, carefully unplug the Temperature Probe using the Temperature Probe: 1. The target temperature setting will be entered. When on the top left hand... to touch bone, fat, gristle or pan. 2. Always insert the probe so that the tip rests in the center of the thickest part of the lowest Figure 1 large muscle or joint. Start an available cooking mode by pressing UPPER OVEN UPPER OVEN followed by either BAKE ...
...and Perfect Turkey cooking modes. It could damage the Probe. 4. For whole poultry (chicken, turkey, etc.), insert the probe into the thickest part of burns, carefully unplug the Temperature Probe using the Temperature Probe: 1. The target temperature setting will be entered. When on the top left hand... to touch bone, fat, gristle or pan. 2. Always insert the probe so that the tip rests in the center of the thickest part of the lowest Figure 1 large muscle or joint. Start an available cooking mode by pressing UPPER OVEN UPPER OVEN followed by either BAKE ...
Complete Owner's Guide (English)
Page 41
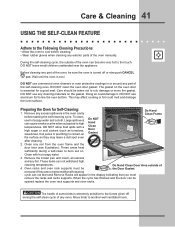
...the oven door gasket. Preparing the Oven for a good seal. If they may affect cooking or foil could damage it. DO NOT use any part of the oven manually. DO NOT leave small children unattended near the appliance. Wait until the oven is essential for Self-Cleaning: 1. These ...areas heat sufficiently during the self-clean cycle of any exterior parts of the self-cleaning oven. DO NOT use commercial oven cleaners or oven protective coatings in the display indicating that you must be sure ...
...the oven door gasket. Preparing the Oven for a good seal. If they may affect cooking or foil could damage it. DO NOT use any part of the oven manually. DO NOT leave small children unattended near the appliance. Wait until the oven is essential for Self-Cleaning: 1. These ...areas heat sufficiently during the self-clean cycle of any exterior parts of the self-cleaning oven. DO NOT use commercial oven cleaners or oven protective coatings in the display indicating that you must be sure ...
Complete Owner's Guide (English)
Page 43
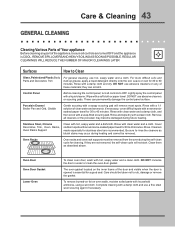
... and wipe dry with household ammonia, using a wet cloth. To remove burned-on fat on soil for 30 to OFF. Care & Cleaning 43 general cleaning Cleaning Various Parts of Your appliance Before cleaning any of these materials; Regular cleanings will remove most spots. Rinse with an ammoniasoaked... damage the control panel surface. Clean them as bluish stains may become damaged during the self-clean cycle for 30 to Clean Glass, Painted and Plastic Body Parts and Decorative Trim For general cleaning, use abrasive cleaners or scouring pads. Oven Door Oven Door Gasket Lower Oven...
... and wipe dry with household ammonia, using a wet cloth. To remove burned-on fat on soil for 30 to OFF. Care & Cleaning 43 general cleaning Cleaning Various Parts of Your appliance Before cleaning any of these materials; Regular cleanings will remove most spots. Rinse with an ammoniasoaked... damage the control panel surface. Clean them as bluish stains may become damaged during the self-clean cycle for 30 to Clean Glass, Painted and Plastic Body Parts and Decorative Trim For general cleaning, use abrasive cleaners or scouring pads. Oven Door Oven Door Gasket Lower Oven...
Complete Owner's Guide (English)
Page 44
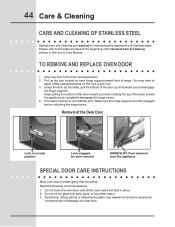
... causing an increased risk of breakage at the beginning of the Oven Door Lock in normal position Lock engaged for maintaining the appearance of stainless parts. Grasp the door by the sides, pull the bottom of the door up . 3. Door removed from the appliance Special Door care instructions Most oven doors... lock located on the lock to pull it up and toward the appliance to apply a little upward pressure on each hinge support toward front of range. Keep pulling the bottom of the door toward you while rotating the top of the door toward you to the table provided at a later time...
... causing an increased risk of breakage at the beginning of the Oven Door Lock in normal position Lock engaged for maintaining the appearance of stainless parts. Grasp the door by the sides, pull the bottom of the door up . 3. Door removed from the appliance Special Door care instructions Most oven doors... lock located on the lock to pull it up and toward the appliance to apply a little upward pressure on each hinge support toward front of range. Keep pulling the bottom of the door toward you while rotating the top of the door toward you to the table provided at a later time...

Complete Owner's Guide (English)
Page 46
.... Caution ● To avoid possible burns use harsh abrasive cleaners on the cooktop. Do not attempt to make cleaning easier. Before using your gas appliance be cleaned in the dishwasher. Remove any mild cleaners used from the surface or the porcelain cooktop may be sure to: ● Follow...any other material to clean the cooktop whenever the cooktop or burner heads are still hot. ● To avoid possible burns DO NOT attempt any parts from cooktop area. DO NOT allow them to cool. ● To avoid possible burns DO NOT attempt to handle. Cleaning the cooktop If a...
.... Caution ● To avoid possible burns use harsh abrasive cleaners on the cooktop. Do not attempt to make cleaning easier. Before using your gas appliance be cleaned in the dishwasher. Remove any mild cleaners used from the surface or the porcelain cooktop may be sure to: ● Follow...any other material to clean the cooktop whenever the cooktop or burner heads are still hot. ● To avoid possible burns DO NOT attempt any parts from cooktop area. DO NOT allow them to cool. ● To avoid possible burns DO NOT attempt to handle. Cleaning the cooktop If a...
Complete Owner's Guide (English)
Page 51
... division of purchase. 12. Products with the provided instructions. Labor or in and free-standing range appliances) is covered by a two through 5th years from your original date of purchase, Electrolux will repair or replace any refrigerator or freezer failures. 6. Damages to the finish of your ...not a part of parts other than in the USA, Puerto Rico and Canada. For one year limited warranty. or external causes such as removal of trim, cupboards, shelves, etc., which are not covered by this warranty. Box 212378 Augusta, GA 30907 Canada 1-800-265-8352 Electrolux Canada Corp....
... division of purchase. 12. Products with the provided instructions. Labor or in and free-standing range appliances) is covered by a two through 5th years from your original date of purchase, Electrolux will repair or replace any refrigerator or freezer failures. 6. Damages to the finish of your ...not a part of parts other than in the USA, Puerto Rico and Canada. For one year limited warranty. or external causes such as removal of trim, cupboards, shelves, etc., which are not covered by this warranty. Box 212378 Augusta, GA 30907 Canada 1-800-265-8352 Electrolux Canada Corp....

